
With the Google Sheets add-on, you can now send your contact form data directly to Google Sheets. You can quickly set it up by following the steps portrayed in the images below and get going instantly.
Installation #
- Firstly, you need to purchase the Everest Forms Pro plugin.
- After the successful purchase, you will get the plugin zip file under your WPEverest account page.
- Now, you can download the Everest Forms Pro plugin and Everest Forms Google Sheets addon from there.
- Through your WordPress Dashboard, visit Plugins -> Add New -> Upload and then choose the downloaded zip file and then install and activate it.
- Now you are ready to use this add-on for your site.
To connect Google Sheets with the Everest Forms, we need to follow these steps.
1. Authenticating Google Sheets
3. Connecting Form with the Spreadsheet.
Authenticating Google Sheets #
The first part is to authenticate Google Sheets with your site. Browse to the Integration part of Everest Forms and click on Google Sheets. Everest Forms > Settings > Integration > Google Sheets
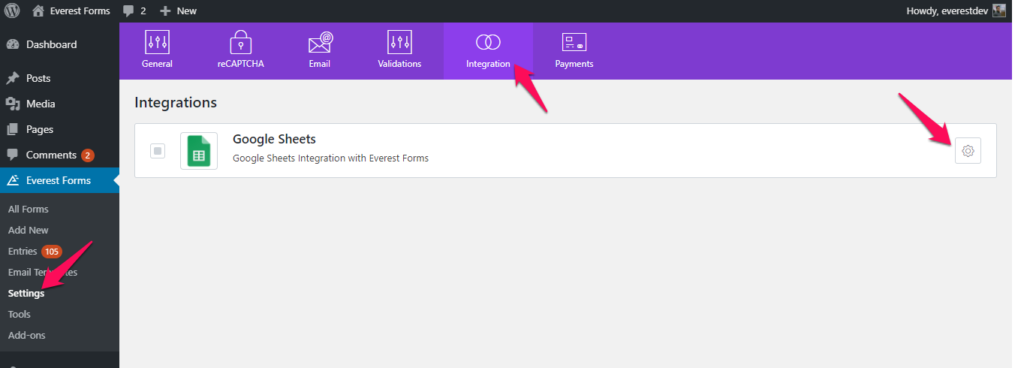
After you click on the settings icon, you will see the options as shown in the screenshot below.
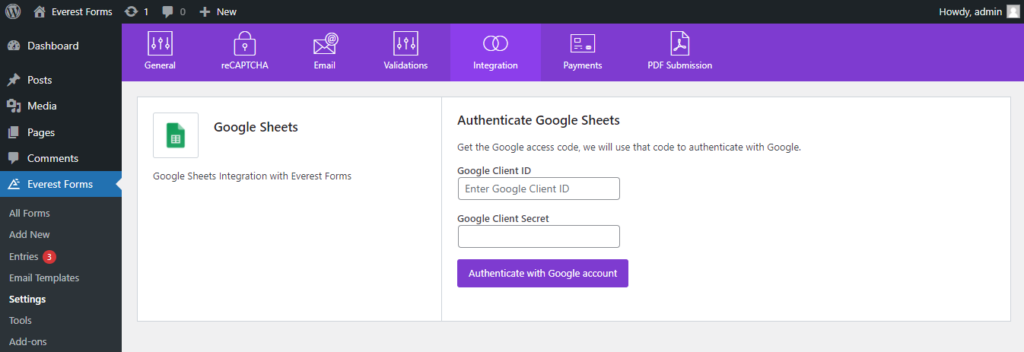
How to get the Google Client ID and Secret key? #
Now, you will need the Google Client ID and Secret key to authenticate with your Google Account. Please follow the steps below to get these keys.
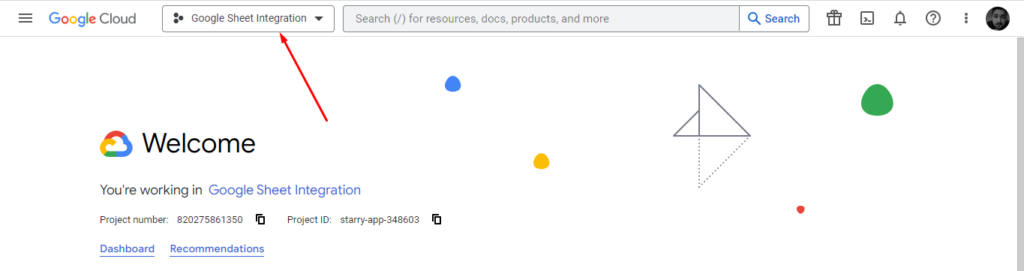
- Go to: https://console.cloud.google.com/
- Click on the option “Select a project”, after which a window will pop up. Then, click on the “New Project” option.
Please note that if you already have a project, the project’s name will appear in the place of ‘Select a Project‘. For example, in the image below, ‘WPEverest‘ should be clicked.

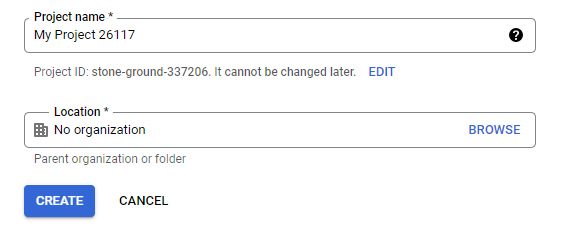
- Add your project name.
- Browse your location OR choose the option, “No Organization”.
- Click on the “Create” button.
- Navigate to the left and go to: API & Services > Library
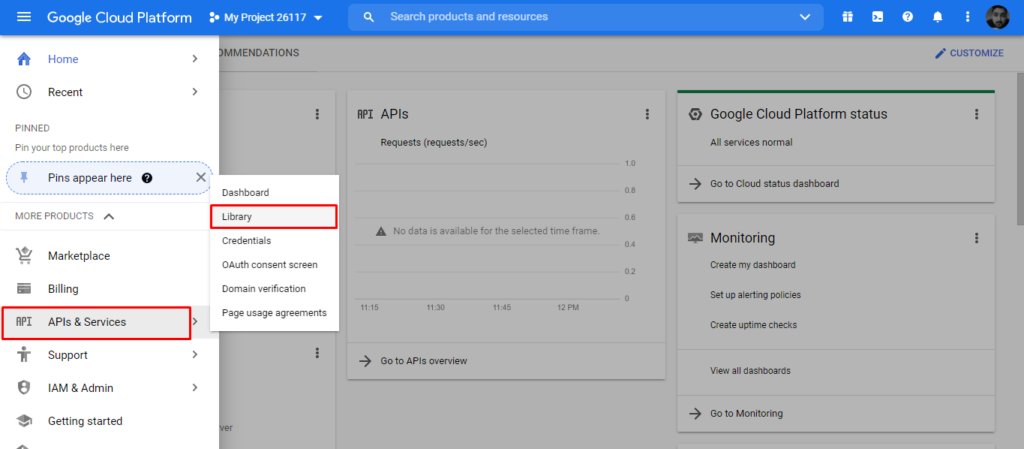
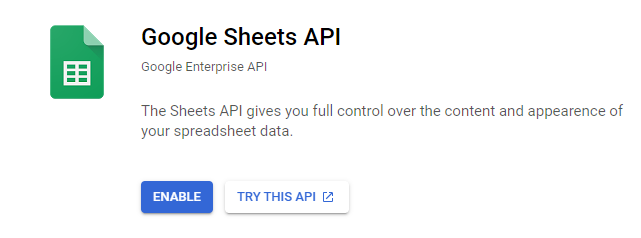
- Search ‘Google Spreadsheet’.
- Click on ‘Enable‘.
- Navigate to the left and click on “Oauth Consent Screen.”
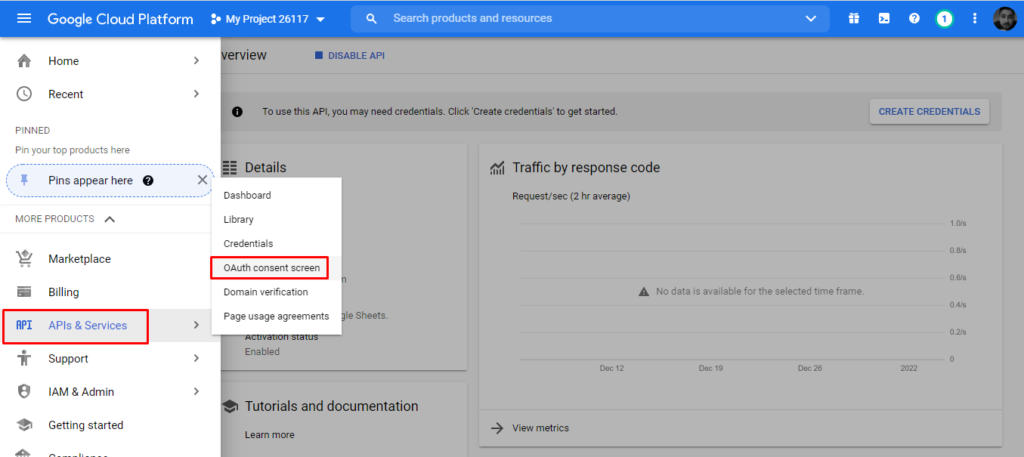
- Select the “External” radio button.
- Click on the “Create” button.
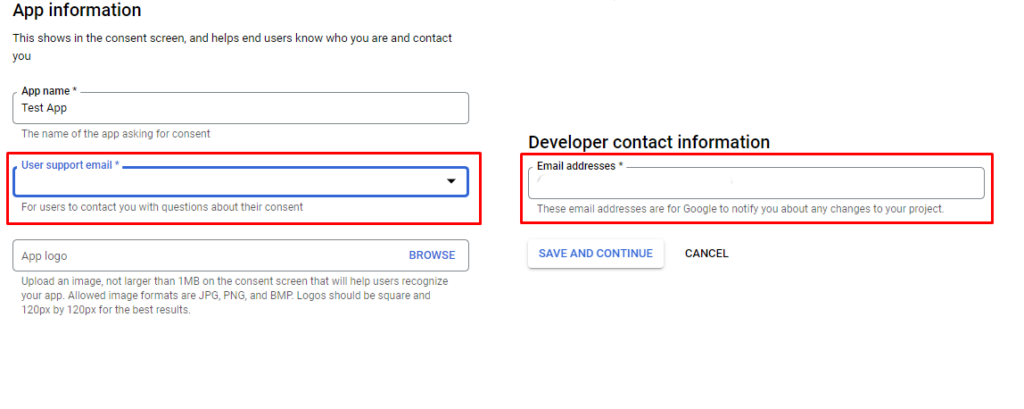
- Add an “Application Name” in the field.
- Add User Support Email.
- Add email address in the Developer contact information option.
Please note, the User Support Email and Developer contact information can be same email address. - Click on the “Save” button.
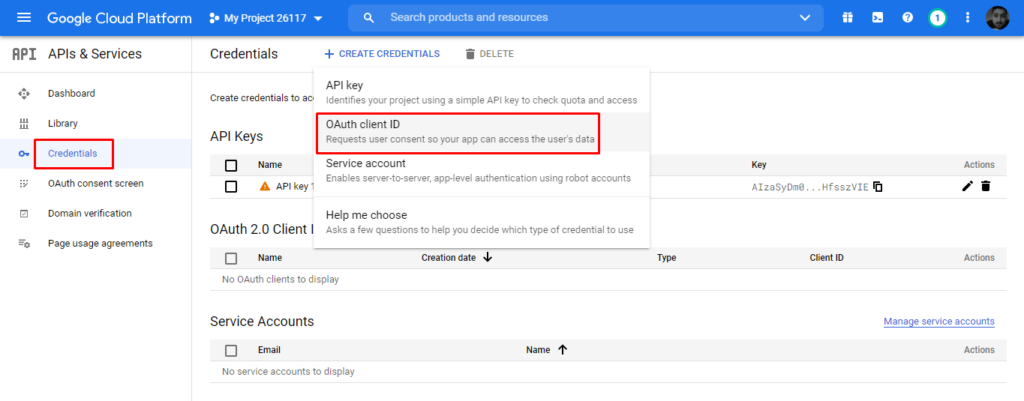
Once you have created the app, you will have to publish it. For this, go to: OAuth Consent Screen and click on ‘Publish App’. - Navigate through the menu on the left and click on “Credentials”.
- Click on the “Create Credentials” button.
- Select “Oauth Client ID” from the dropdown menu.
- Select Application type to “Web Application“.
- Add the text you desire in the field under “Name”.
- Add your site’s URL under “Authorized redirect URIs”.
Note: If you site’s URI is https://example.com, then the redirect URIs should be https://example.com/ where the trailing ‘/’ is a must. - Click on the “Save” button and you will see a popup window with the Client ID and Client Secret.
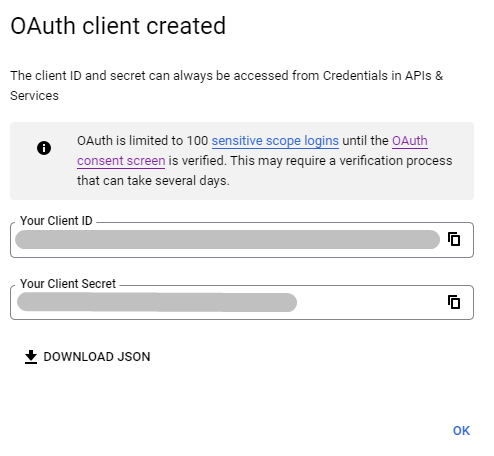
Now, copy and add the above keys in the Everest Forms > Settings > Integration > Google Sheet and click on ‘Authenticate with Google Account’.
After you click on it, a different window will open where you will be asked to choose your Google Account. Select the account and allow the permissions to integrate with Google Sheets.
Note: You can ignore the security message from Google that pops up after this process. The app is not verified but you can trust it because it was created by you. To proceed click on ‘Advanced‘ and ‘Go to <your site> ‘.

Once you have selected the account and allowed the permissions, the access code will be generated. You need to copy and paste it into the settings as shown in the screenshot below. After pasting it, click on the “Verify Access Code” button.
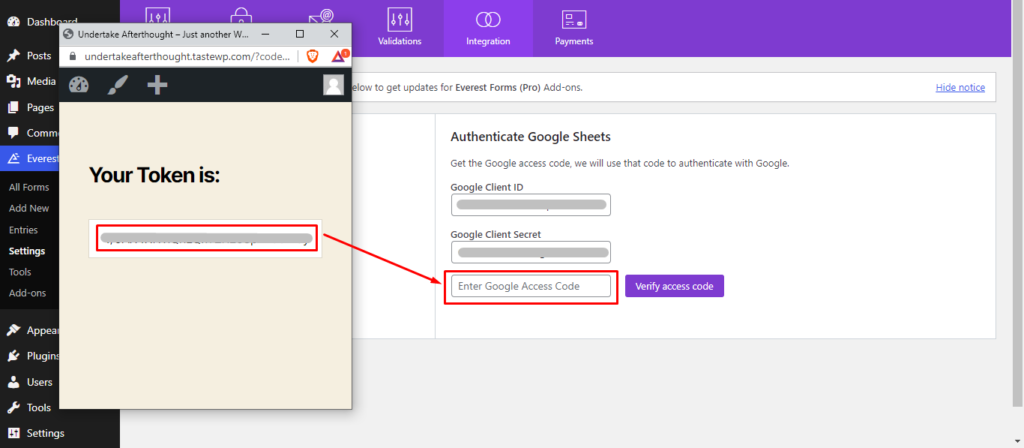
The authentication should be completed successfully and now you can move to the second part of the tutorial.
Connecting Form with Spreadsheet #
The second part is to set up which form needs to send data to the spreadsheet. For that, you must go to the Integration Part of your form.
Go to Everest Forms > All Forms > (click on the form you want to embed sheets) > Integration > Google Sheets > Connect New Spreadsheet
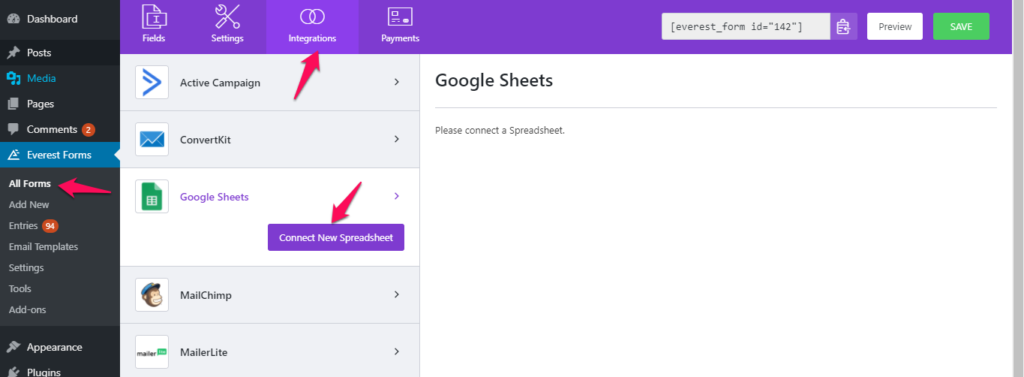
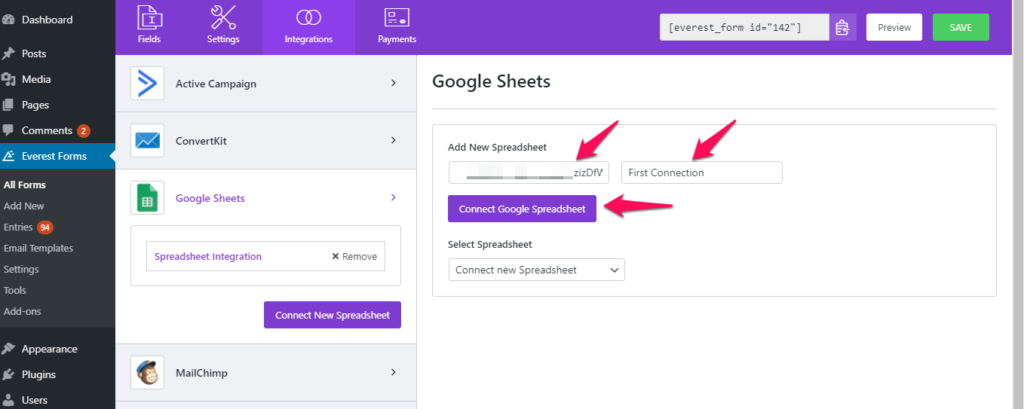
After you click on it, you will be asked to enter a nickname for the connection. You can enter anything that you want. In my case, I have named it “Spreadsheet Integration“. After that you will see on the right, you will be asked to enter the “Google Spreadsheet ID” and “Google Spreadsheet Nickname“.
You can get your Google Spreadsheet ID from the URL of the spreadsheet in which you want to send the form data.
1. Visit docs.google.com/sheets and create a sheet.
2. Copy the spreadsheet ID from the URL. You only have to copy the highlighted part of the URL as shown in the screenshot below.

Now, after entering the ID and giving a name, click on “Connect Google Spreadsheet” and connection should establish fine showing you the field names if available.
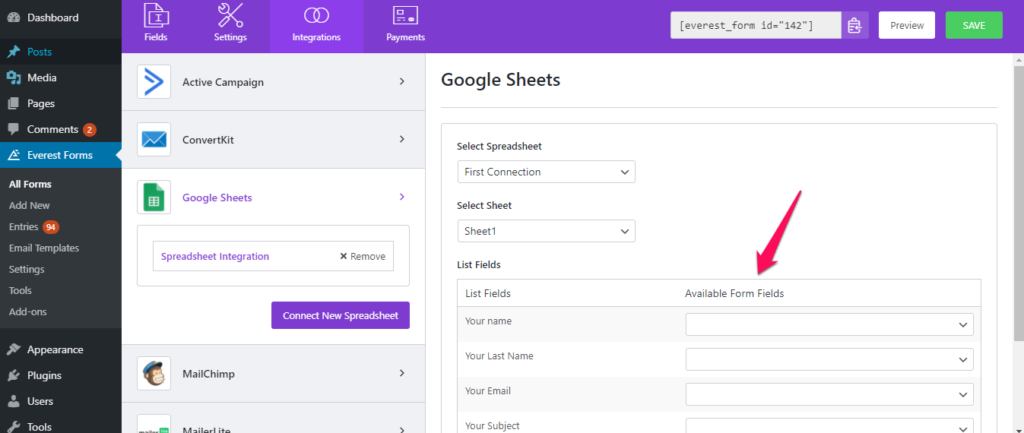
You need to map your contact form fields with the spreadsheet fields, save the changes, and that’s all. The form data will be sent to Google Sheets whenever the form is submitted.


