Everest form’s Stripe addon provides you with the option of enabling Stripe as a payment gateway on your forms as well. Use this simple addon to provide the option for your customers to pay directly without any hassle and with complete security and assurance.
What’s New? #
Now, You have the option to set-up a one time charge or a recurring charge with this add-on. Also, the latest version of Stripe is more secure since it is SCA(Strong Customer Authentication) compatible now.
Next, you can also use Conditional Logic to allow users to choose between the payment gateways like PayPal and Stripe.
Installation: #
Installation of the Everest form stripe addon requires the following steps:
- First, you will be required to purchase the Everest Forms pro plugin.
- Once your purchase is verified, the plugin zip file will be made available to you on your WPEverest account page.
- Next, download the Everest form pro plugin zip as well as the Stripe addon from your WPEverest account page
- Then, you will be required to Install the Everest pro plugin and the Stripe addon through your WordPress admin dashboard. To do this, visit Plugins → Add new → Upload and then choose the downloaded zip files. Once the plugins have been installed, activate them and your addon should be enabled on your website.
Setup: #
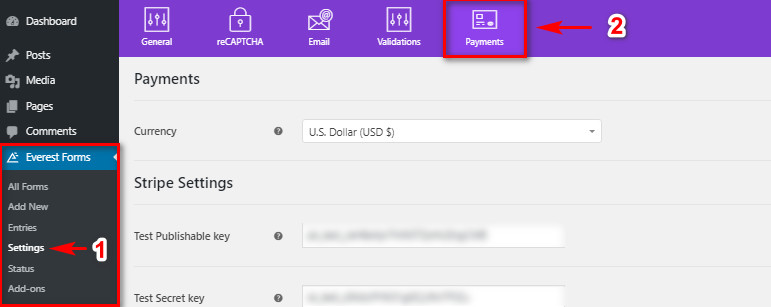
To make sure the Stripe addon and the Payments options work perfectly on your website, we suggest you tune its settings to fit your forms better. To open the Payments settings, visit Everest Forms –> Settings through your admin sidebar. Next, click on the Payments section on the top bar to open the payments settings.
Once you’ve installed the addon and activated it, you will be required to activate Stripe’s features on Everest form. To proceed with the Stripe setup, you will be required to use your Stripe account’s API keys. To retrieve your API keys, follow these simple steps:
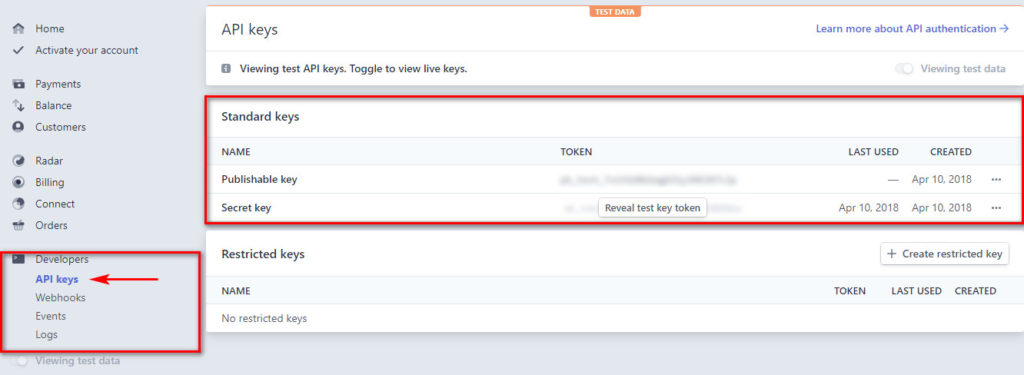
- Open your Stripe Dashboard.
- Visit the API keys page by clicking under API keys under the Developer tab on the dashboard sidebar. (Developer → API keys.)
- Create and copy your API keys through this page. To learn more about the process involved in using API keys, you can refer to this page on the Stripe website.
Next, you can change various settings for Stripe to make it fit better for your website.
Click on the Payments option on the top of the page to manage your Payments settings. Here, you can choose the currency for your payments and manage the settings for both the Paypal and the Stripe addon.
Under Stripe settings, you can insert the Publishable key and the Secret key to the appropriate fields. If you want to test the payment system before going live, use the Test keys that you may have received for the Stripe API.
If you want to test the payment system before going live, click on the Enable Test mode option. For the test mode, you can use the Test keys that you may have received for the Stripe API. You can learn more about the Test keys and

Stripe Form Integration: #
To activate Stripe Add-on on your form, open the corresponding form through Everest forms–>All Forms and click on the Payments on the form builder toolbar. Then, click on Stripe on the left column and simply set a checkmark on the ‘Enable Stripe’ option.
For integrating Stripe payment onto your forms, you will be required to use the Payment fields section of the Everest form builder.
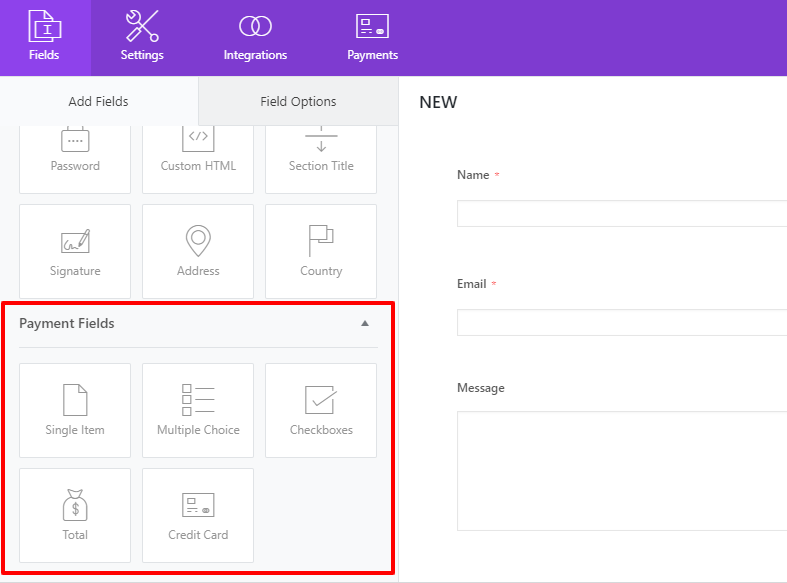
Payment Fields: #
Single item #
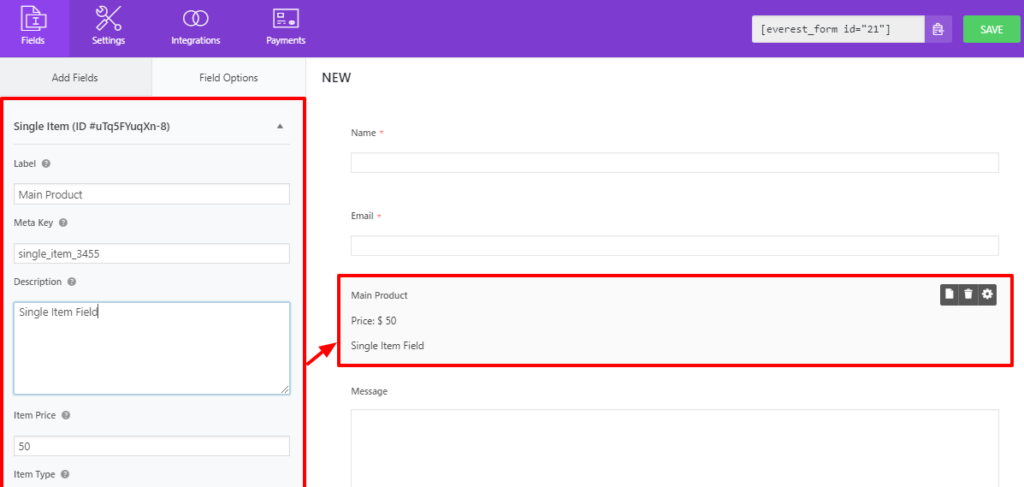
Set the price on a single item. You can customize it even further by changing its features. Choose between 3 different Item types to fit your payment forms better:

Pre defined : If the item type is set to pre-defined, the form users will not be able to change the price of the item on the frontend.User defined : If the item type is set touser defined - Hidden: If the item type is set to be hidden, the price will not be displayed on the frontend and the item’s set price will be used as the product’s price directly. U
Multiple choice #
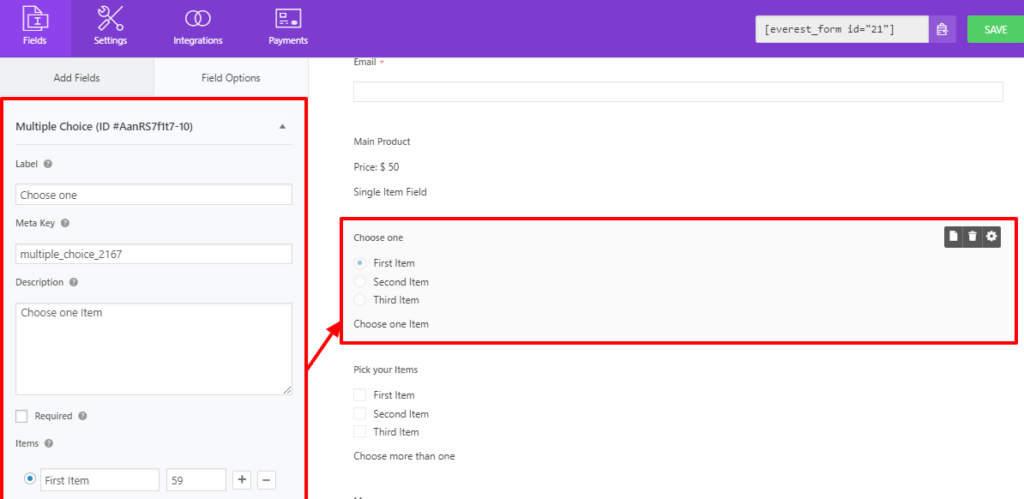
With the Multiple choice field, you can set various options for users to choose from. You can also set the price on each field, change their name and even change the order of the choice options by simply using drag and drop.
Checkbox #
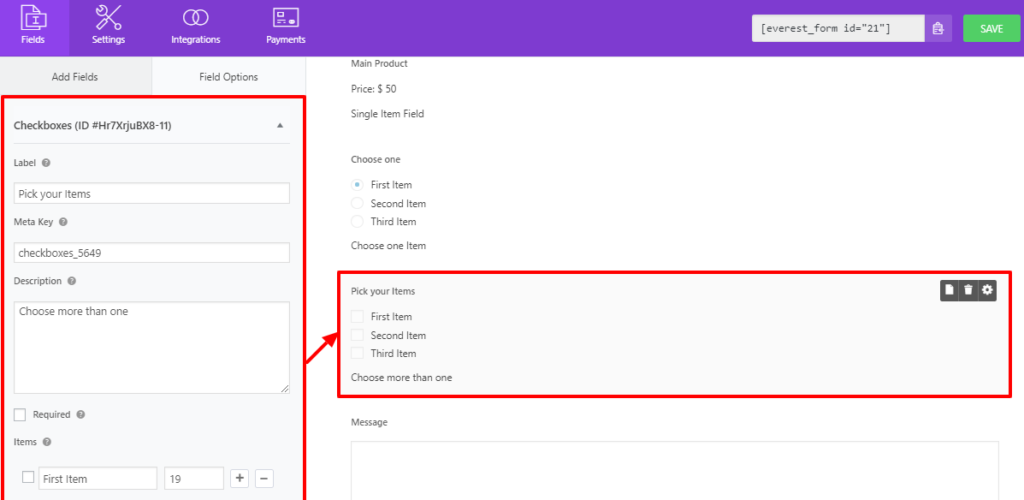
The C
Similar to multiple choices, you can also set the name and order for each of the fields and set a flat price for all of the items available.
Total #

The Total field simply exists to automatically calculate the total price of all the items selected on your form. This way, you can integrate various checkboxes, multiple option fields, and single item fields and ensure that your customer doesn’t lose track of the final expenses.
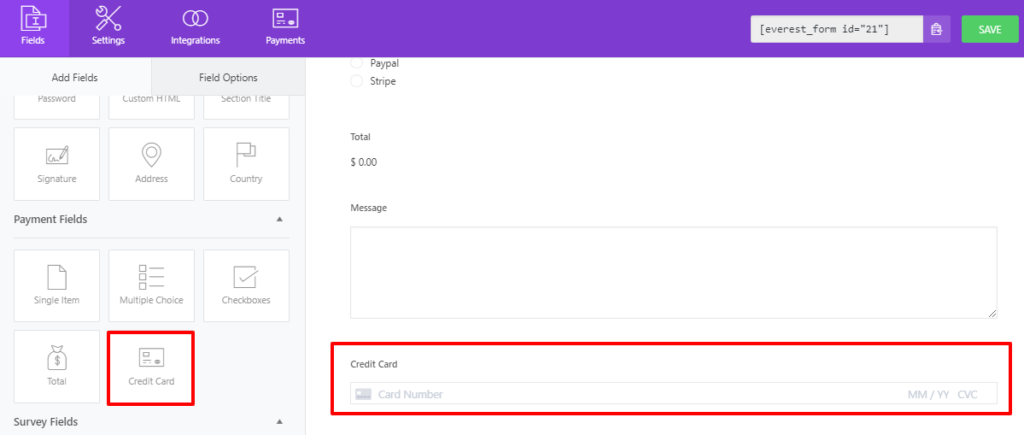
Credit Card #
After you Enable Stripe in the Form Settings, the Payment Fields shows a new field i.e. the Credit Card field for stripe.
To set Stripe as the payment method for your form just drag-and-drop the Credit Card field to your Form. And it is that simple!
What’s new? #
Stripe Subscription for Recurring Payments #
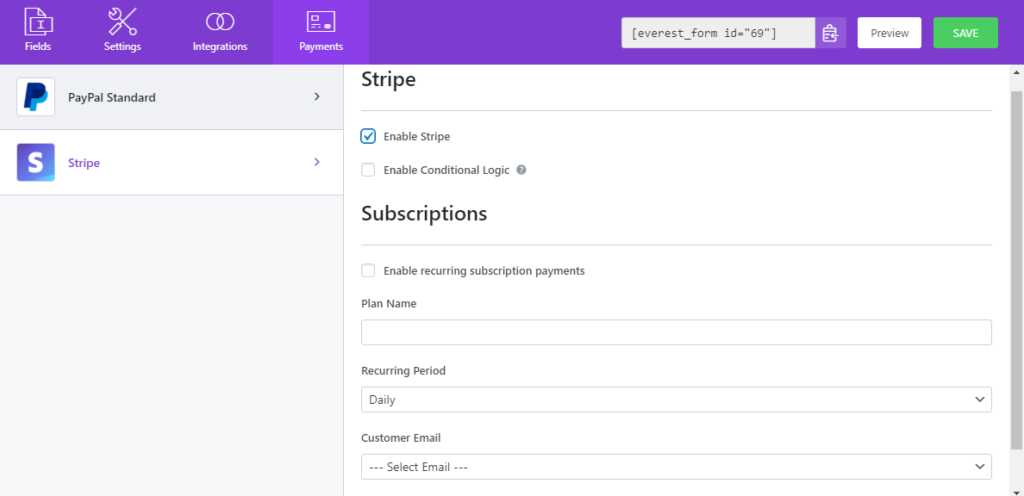
Everest Forms Stripe also supports Recurring Payments. If you want to charge users on a periodic basis, you can enable recurring payment on the form, and then the users will be charged periodically after they submit the form. To do so, in the form builder, click on Payments > Stripe and then tick both options, Enable Stripe, and Enable Recurring Subscription Payments.
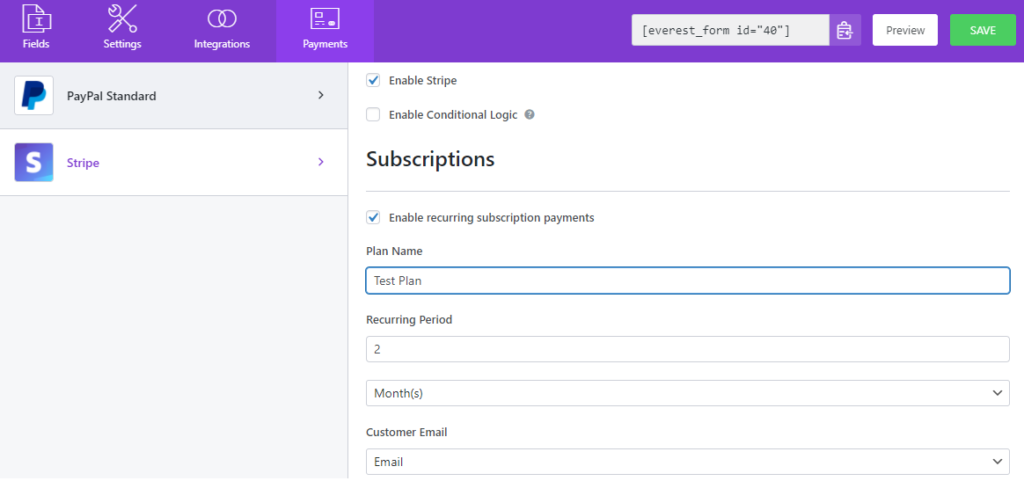
In the Plan Name, you can give a name to your recurring plan.
In the Recurring Period option, you can select the frequency when the next transaction will be done. Also, you can select intervals between the recurring payment i.e 15 days, 5 weeks, 6 months, and so on. But you can’t make the recuring of more than 1 year.
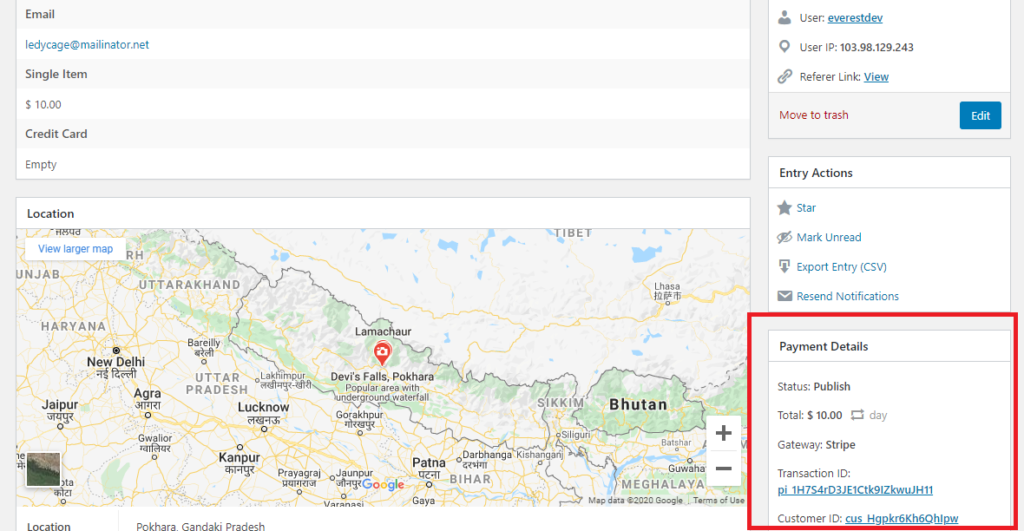
In the Customer Email option, you can select the Email field that your user will fill in during the form submission. Lastly, the Payment Info of any user can be seen by the admin in the Entries Section of Everest Forms by clicking on the particular entry of that user.
User Defined Approach #

User-Defined Approach – You can create a form where you can add multiple-choice or checkbox fields with various plan options to select from. Now, the users can select the desired plan and pay accordingly.
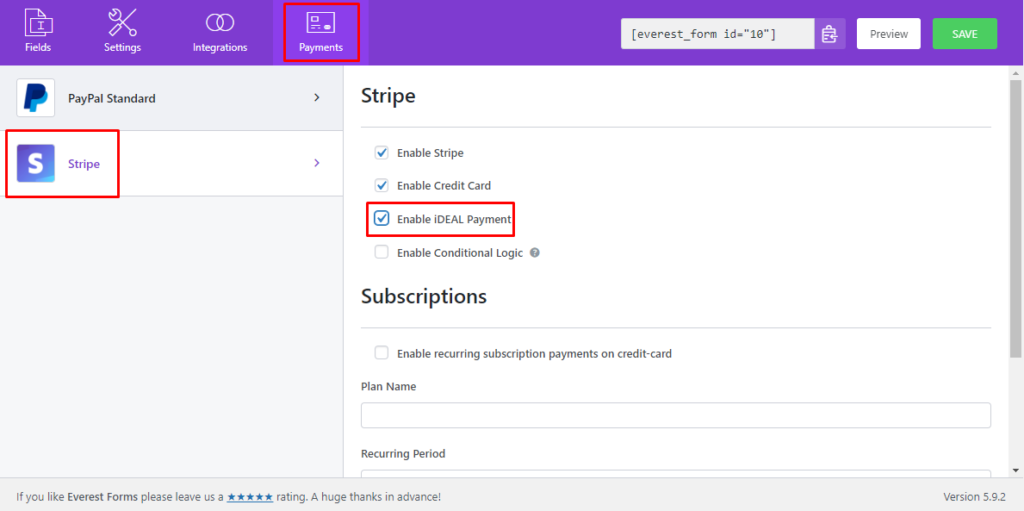
iDeal Payment #
You can integrate the iDeal payment for the Netherlands as the payment option. For this,
- Go to the Form builder.
- Payment > Stripe
- Now, enable the ‘Enable iDeal payment’ option.
Save the form and you will be able to select the banks for the iDeal payment on the form(frontend).
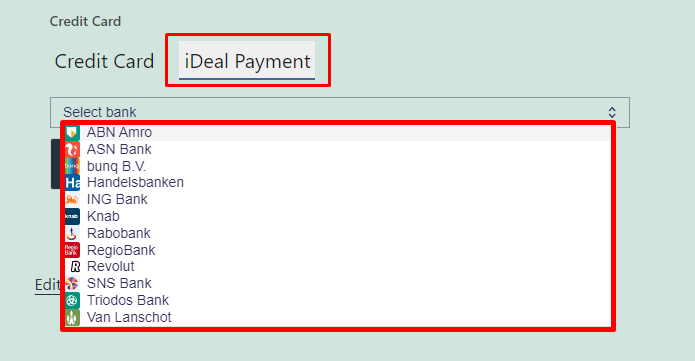
Note: The currency must be selected as the 'Euro' for the iDeal payment to work.
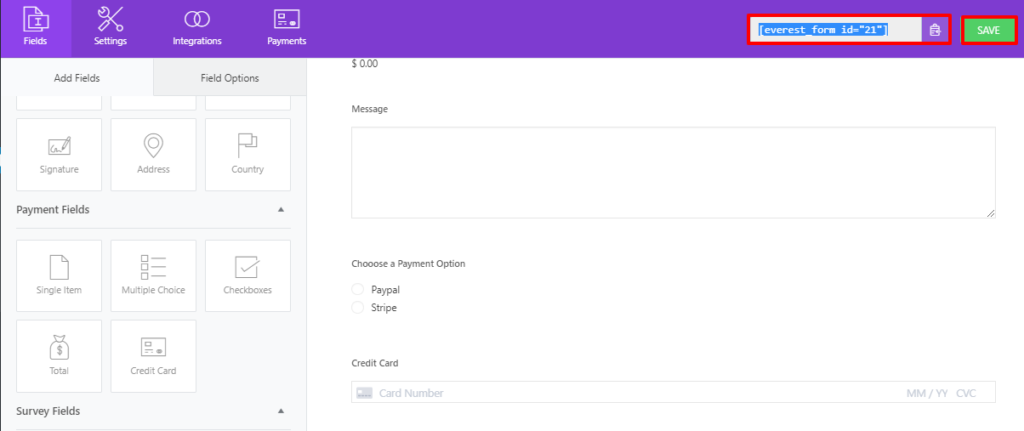
How to add Stripe as a payment option with PayPal? #
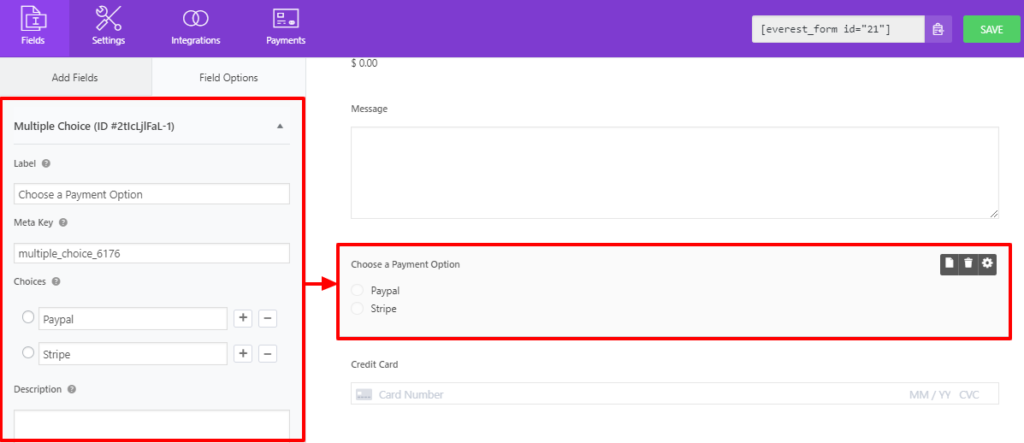
If you have both the Paypal standard and the Stripe addons, you can create options for your customers to choose between the two payment methods.
Firstly, insert a Multiple Choice field and add PayPal and Stripe as payment options.
Compatibility with Conditional Logic #
Everest Forms Pro allows you to enable conditional logic using the Conditional Logic addon on.
Now, you can not only integrate conditional logic on each and every form fields but also, on both the payment options. This lets you set up a more responsive and situationally adaptive payment for your users.
If you are new to Conditional Logic and want to learn what it is in detail Click Here.
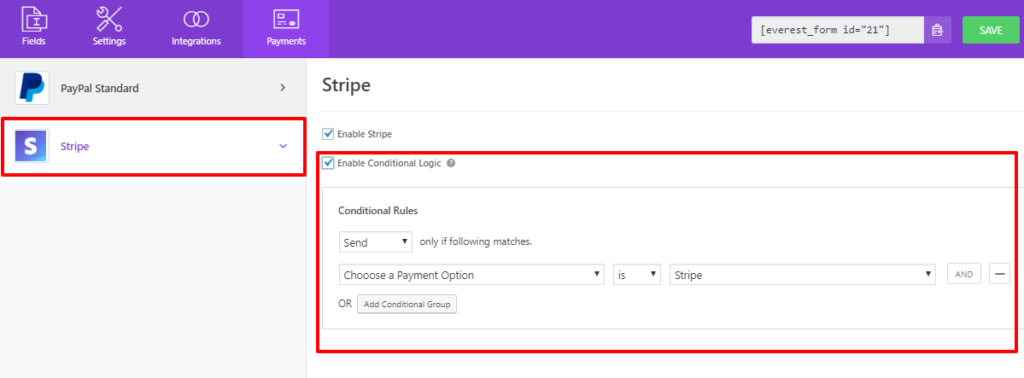
Use Conditional logic for Stripe: #
Go to the Payments tab at the top. And make sure you enable both Paypal and Stripe. Then, Click on Stripe and Enable Conditional Logic. Now, make the settings so that Stripe is implemented only if the user selects the Stripe option in the form.
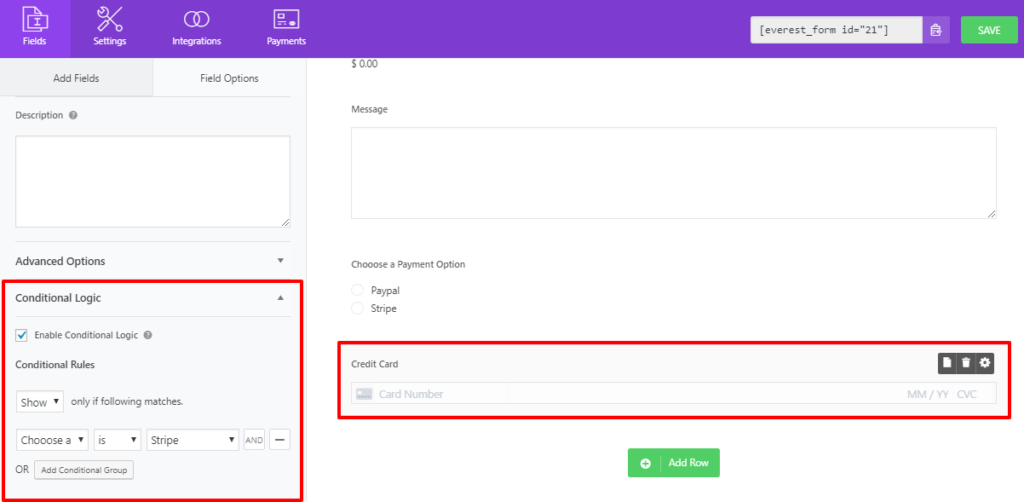
Then, simply click on the Credit Card field and in the Field Options, if you scroll down there is the Conditional Logic setting. And, Enable Conditional Logic there.
Now, set the conditions so that the Credit Card field appears only when users choose Stripe as a payment option.
Map extra fields with Stripe transaction details #
Map Extra fields to sync with the Stripe Payment #
You can map the Stripe-supported fields of the Everest Forms when creating a subscription so that Stripe will get extra information about the users along with their email addresses. For mapping, the fields, go to the Payments > Stripe. Enable the Credit Card option and now you can enable the field mapping under ‘Map fields to sync with Stripe‘.
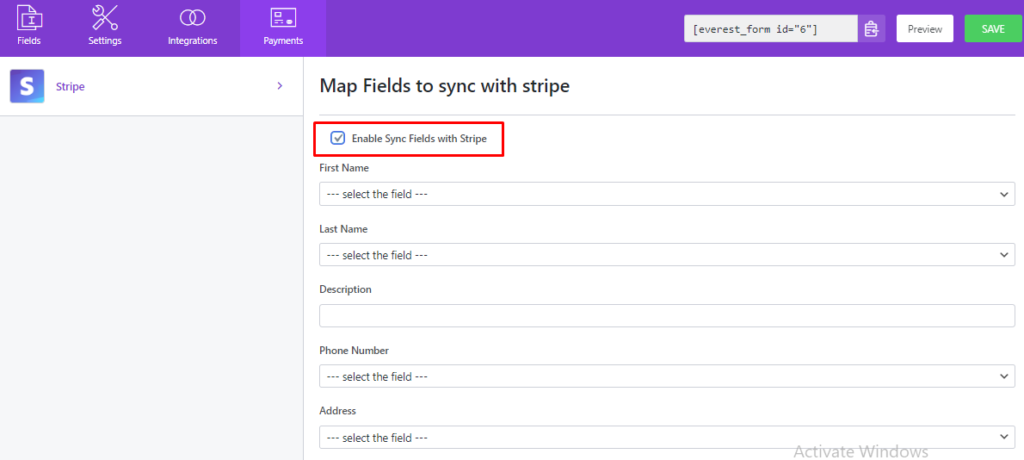
You can map the name field, description field, and phone number field. Along with these fields, you can also map the address of the user by selecting the assigned address field on the form.
Finishing up: #
Once your form has been set up as you want, click on the Save button on the top right toolbar to save your form.
The shortcode provided next to the Save button is the corresponding shortcode for your current form and can be used on any page or post to display your customized payment form.
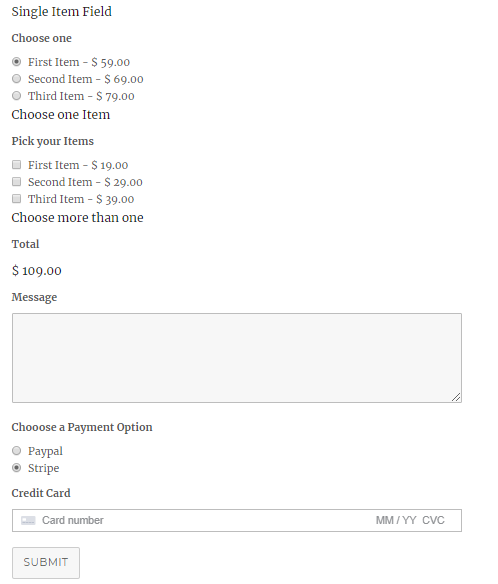
Once you’ve customized your form perfectly and inserted it onto the corresponding pages, it should be displayed on your website in a similar manner to this: