
Zoho CRM is a cloud-based application that includes tools for pipeline management, team collaboration, marketing automation, analytics, artificial intelligence, and more.
Installation #
- Firstly, you need to purchase the Everest Forms Pro plugin.
- After the successful purchase, you will get the plugin zip file under your WPEverest account page.
- Now, you can download the Everest forms pro plugin and Zoho CRM add-on from there.
- Through your WordPress Dashboard, visit Plugins -> Add New -> Upload and then choose the downloaded zip file and then install and activate it.
- Now you are ready to use this add-on for your site.
Alternative Method:
- Once you have entered the Everest Forms Pro license on your site, go to Everest Forms > Add-ons.
- Search for the ‘Zoho CRM‘ add-on.
- Click on ‘Install‘.
- Once the installation is finished, click on ‘Activate‘. The add-on will be activated.
Setup and Configuration #
You will need to have a Zoho Client ID and Client Secret in order to integrate the Everest Forms with the Zoho. Follow the steps below for this.
Getting Client ID and Client Secret #
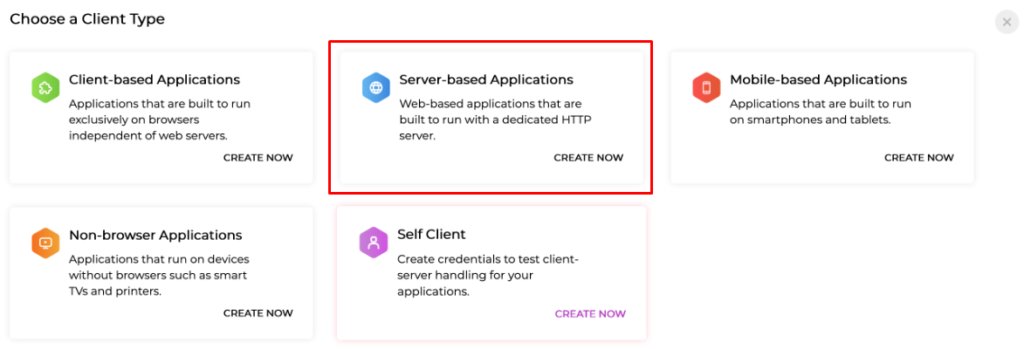
- Go to Zoho API Console and click GET STARTED.
- Hover over your Server-based Application client type and click CREATE NOW.
- Enter the Client Name, Homepage URL, and Authorized redirect URI.
- Click CREATE.
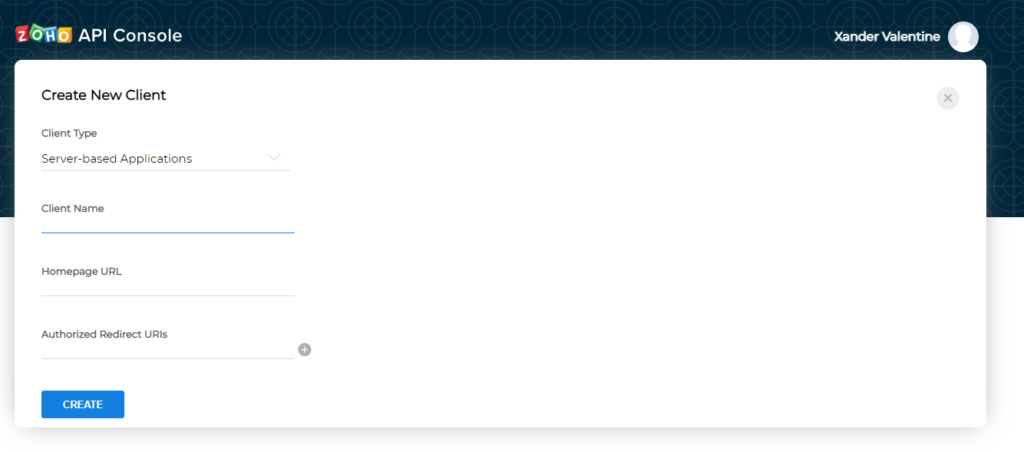
URL Formats:
Homepage: https://yoursite.com/
Redirect URL: https://yoursite.com/wp-admin/?evf_zohocrm_auth=1
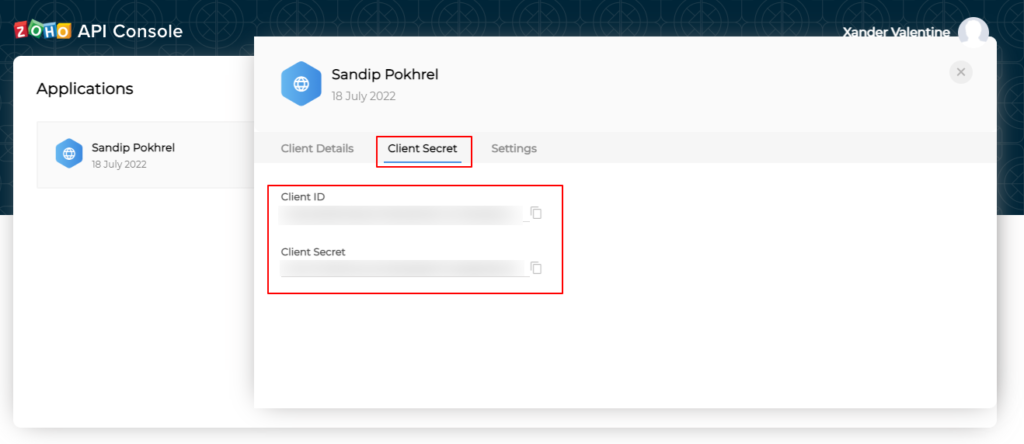
Now, the client ID and Secret are ready to be used.
Note: Please goto zoho.com, sign in and click on CRM to integrate the Zoho CRM with the Everest Forms.
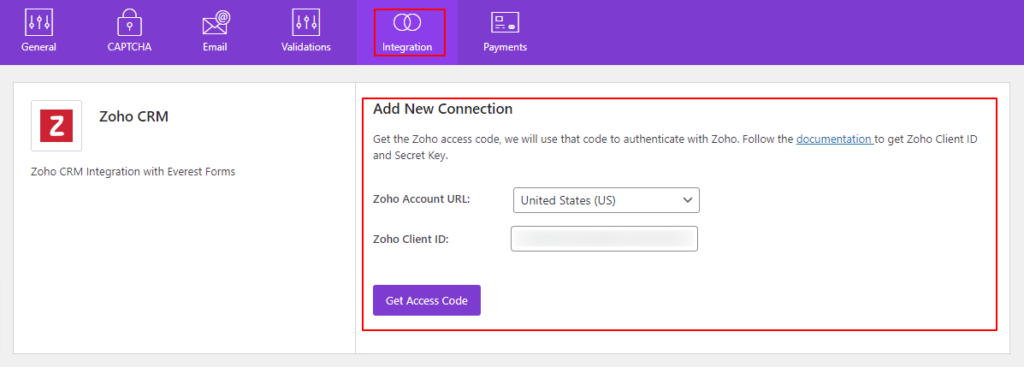
Integrating the Zoho CRM with Everest Forms #
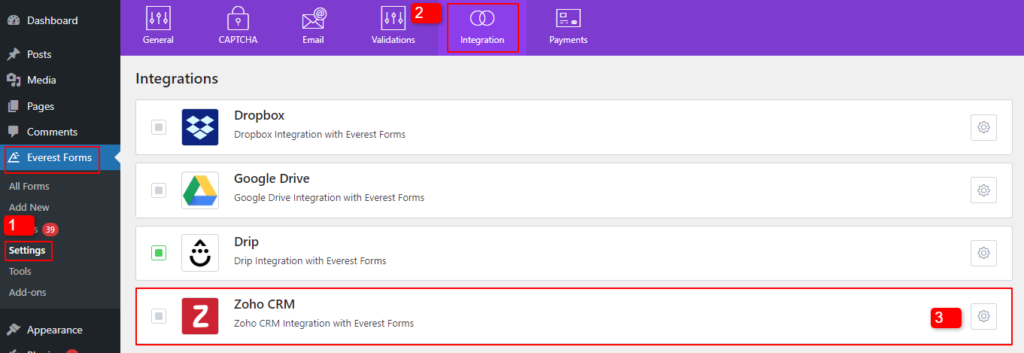
Once you have generated and copied the Client ID from the Zoho account, go to Everest Forms > Settings > Integration > Zoho. Add the Client ID to the ‘Zoho Client ID‘ box. Click on ‘Get Access Code’.
After you click on the Get Access Code, the following dialog box appears.
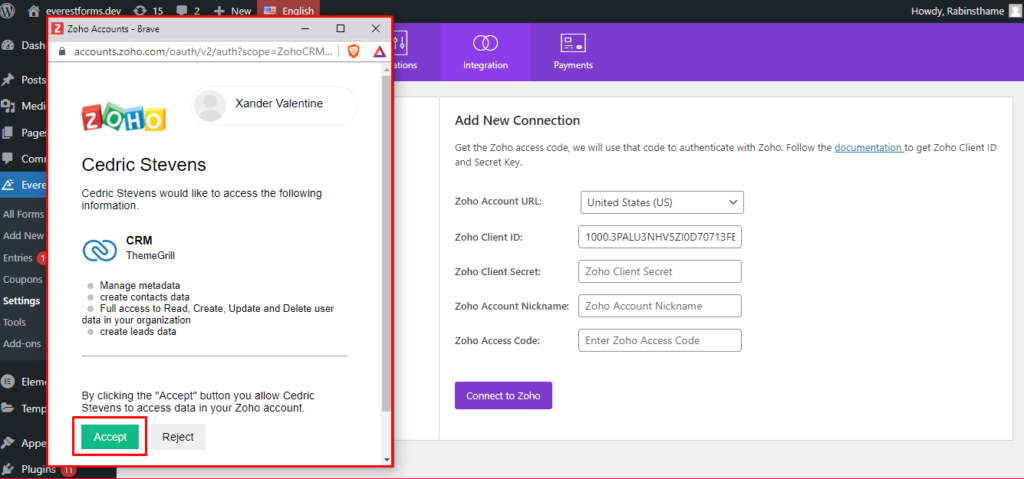
Click on ‘Accept‘. You will get the Access Code. Copy this code and paste it into the Connection Settings. Also, add the Client Secret ID and a nickname and click on ‘Connect to Zoho‘.
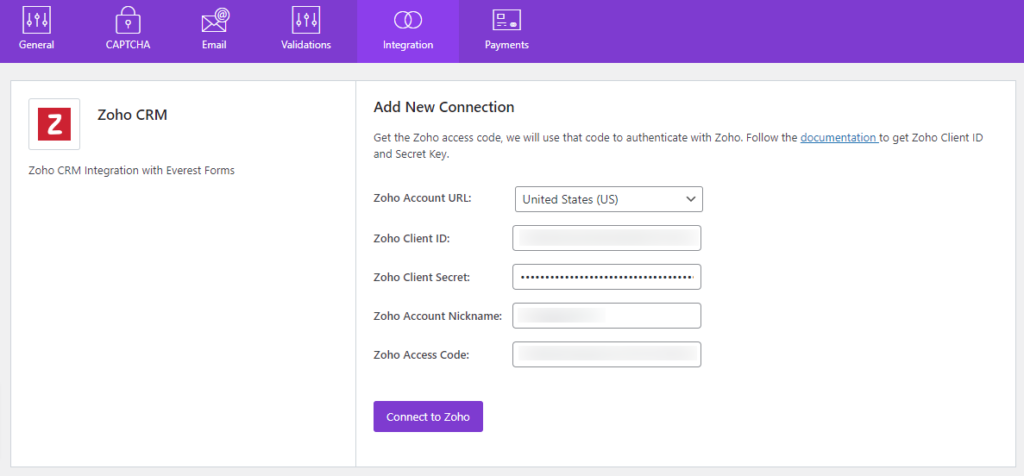
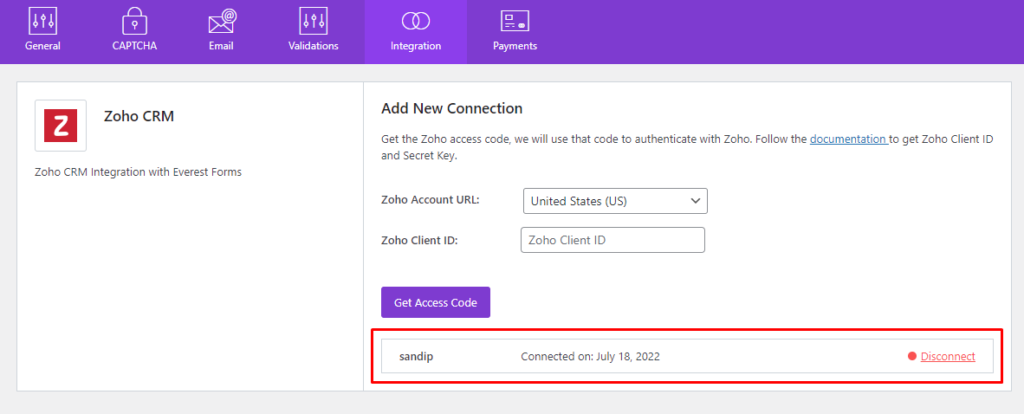
The connection is successfully created now.
Adding Connections for individual forms #
Once you have set up the required credentials on the main settings, it’s time for you to add a new connection for your forms. For this, go to the required form’s editor page. Click on ‘Integration’ from the available tabs. You will find an option called ‘Zoho CRM‘ from which you can add a new connection.
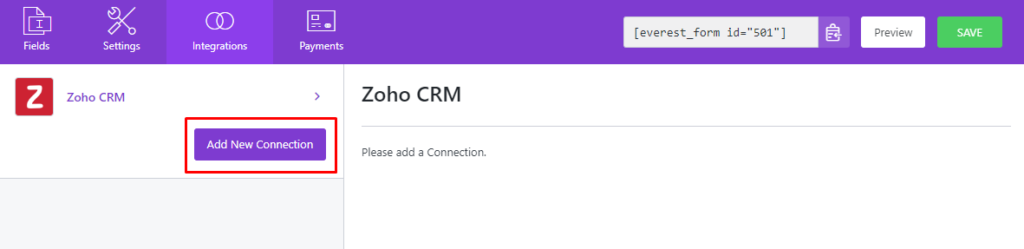
- Click on the ‘Add New Connection‘ button and a pop-up will appear. Add the name of the connection.
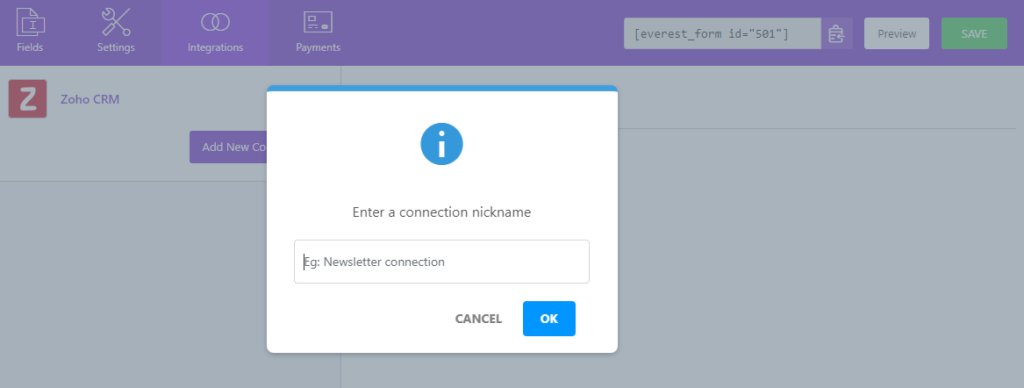
- Click on ‘OK‘ after adding the name and the connection is added.

- Select Account: Select the available Zoho accounts for connecting the form.
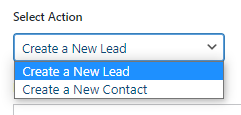
- Select Action: Either create a new lead or create a new contact.
- Select List: Select one of the available lists.
- List Fields: Map the matching fields from the form fields.
- Custom Fields: Match the Everest Forms fields with the Zoho custom fields from the available lists of the custom fields.
- Lead Source: The Lead Source field is a standard in the Lead, Account, Contact, and Deal modules. It is intended to represent your quiver of marketing strategies used to find leads. Select from the available source as per your need.
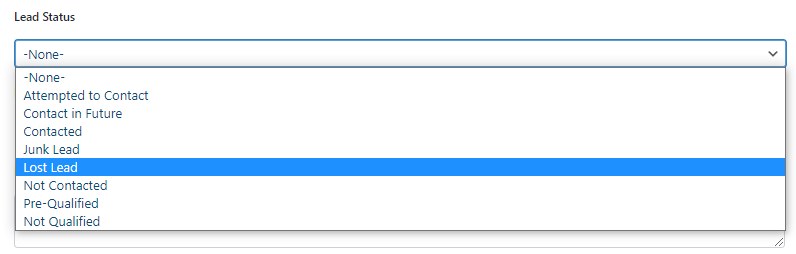
- Lead Status: Select the status of the lead.
- Lead Rating: Select the preferred rating for the lead from the available options.

- Lead Description: Add a custom lead description.
How to use conditional logic for Zoho CRM connections? #
To use conditional logic, enable the option by ticking the ‘Use Conditional Logic’ option at the bottom of every connection you make.
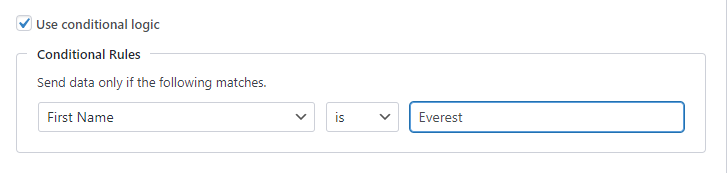
In the above example, the form sends data to the Zoho account only if the First Name is ‘Everest’.
Note: You can add more than one connections.


