
Are you experiencing email delivery issues for your WordPress forms? No need to worry. If you set up SMTP (Simple Mail Transfer Protocol), you can easily solve this problem on your website. With the help of the Easy WP SMTP plugin, you will never have to deal with the “Email Not Delivered” problem on your forms again.
So, we are going to give you easy instructions on how to setup SMTP using the Easy WP SMTP plugin.
Install Easy WP SMTP plugin #

The first step is to install the Easy WP SMTP plugin on your site. So, go to Plugins → Add New and search for Easy WP SMTP. Then, install and activate the plugin to your site.
Go to Easy WP SMTP tab #
After you finish installing and activating the plugin to your site, you can see that the Easy WP SMTP plugin tab is added to the Settings in your WordPress admin dashboard. So, go to the plugin settings and you’ll need to configure the SMTP credentials first.
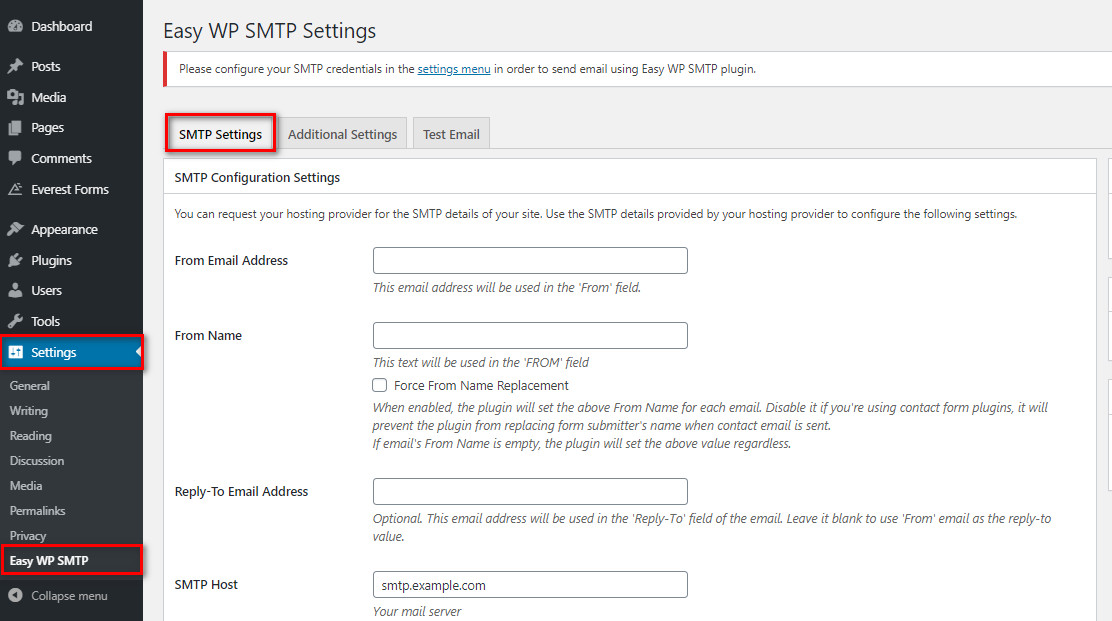
SMTP Configuration Settings #
In the configuration settings, you can see the various SMTP settings. Here, we are going to list out and explain all the settings.
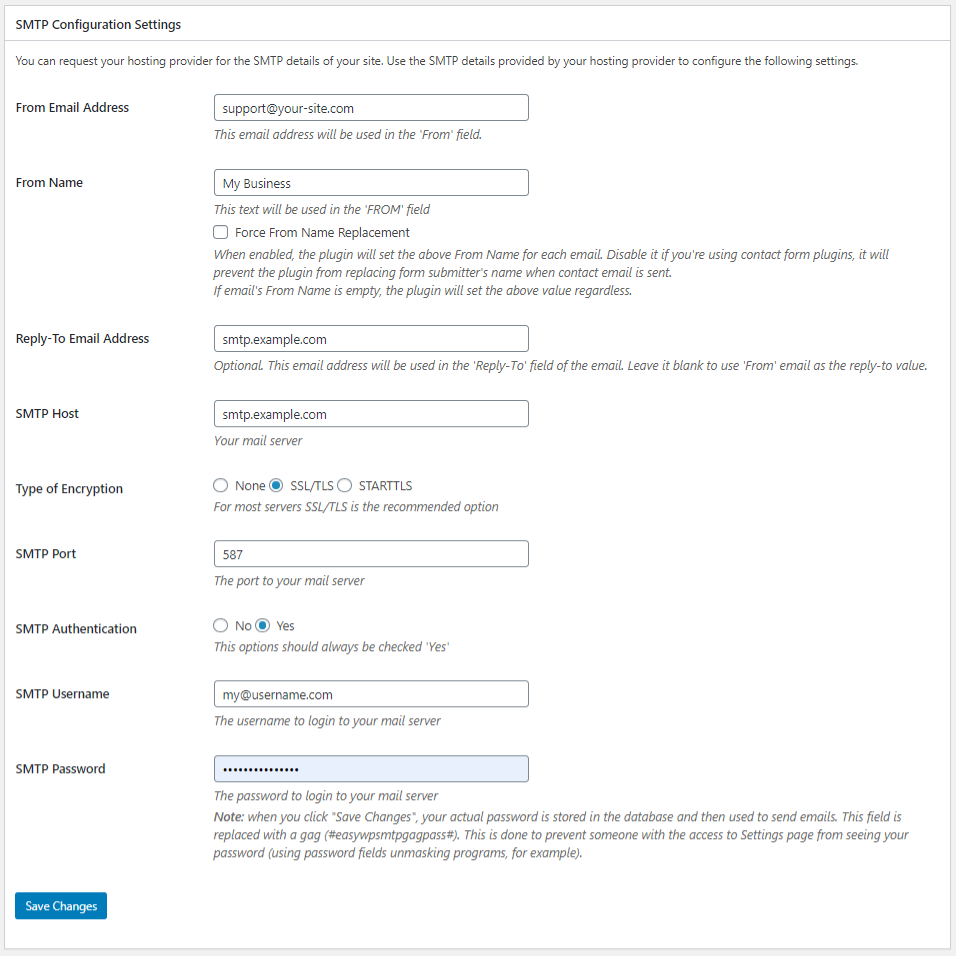
From Email Address:
You need to enter the email address that you use to send the email notifications.
From Name:
You need to enter the Sender name which will be displayed to the recipients with the emails.
SMTP Host:
Here, you need to enter the address of the host’s SMTP server or, the outgoing mail server (example: smtp.your-site.com)
Type of Encryption:
There are three options here for you to choose: none, SSL/TLS and STARTTLS. SSL and TLS are widely used and they are used with different ports: 465 and 587 respectively.
SMTP Port:
Enter the port that will be used to relay outbound mail to your mail server. The most common ports are 587 and 465 but, you need to check with your hosting provider if these ports are open.
SMTP Authentication:
This option should always be checked “Yes” as popular email providers require authentication.
Username:
Enter the username for SMTP mail server (example: [email protected])
Password:
Enter the password for the SMTP mail server
Once you are done with the settings, you can Save Changes.
SMTP Settings for Email Providers #
There are different SMTP settings for different email providers. So, you need to know these settings before you configure SMTP on your site. We are listing the SMTP configuration settings for the popular email service providers so, take a look at them and fill out the fields accordingly.
Gmail
- SMTP Host: smtp.gmail.com
- Type of Encryption: TLS
- SMTP Port: 587
Yahoo
- SMTP Host: smtp.mail.yahoo.com
- Type of Encryption: SSL
- SMTP Port: 465
Hotmail
- SMTP Host: smtp.live.com
- Type of Encryption: TLS
- SMTP Port: 587
Test Email Delivery
#
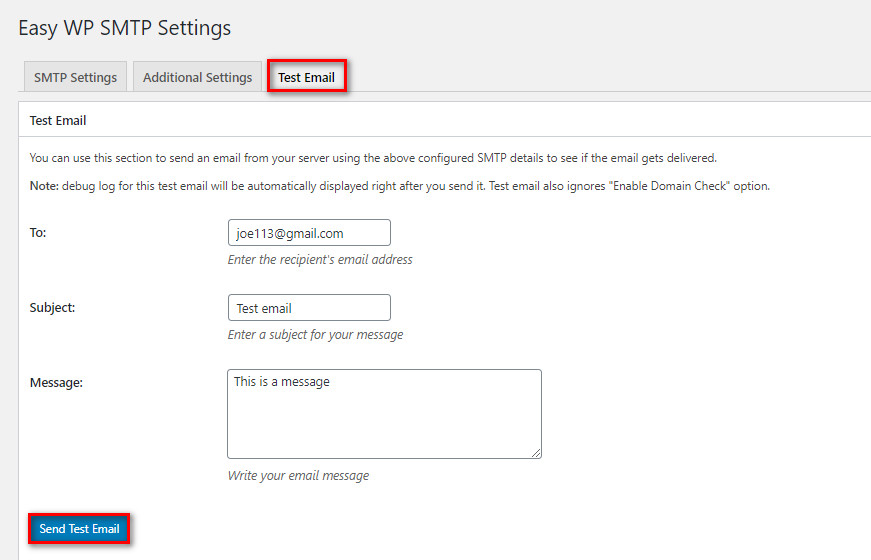
After you are done with the SMTP settings, you can test if your emails are delivered successfully. Go to the Test Email tab and send an email to test your SMTP connection.


