
Installation #
- First, purchase the User Registration – Conditional Logic add-on.
- After the process succeeds, you will get the add-on zip file under your WPEverest account page.
- Now, you can download the add-on zip file from there.
- After you log into your WordPress Dashboard, go to Plugins > Add New and click Upload Plugin button available there and choose the file you’ve downloaded and click Install Now button. Make sure that you have installed the User-Registration Plugin.
- After installing, now, you’ve to activate the addon from the Installed Plugins list.
- Now you are ready to use this add-on for your site.
Notes:
- Conditional Logic applies only to front-end forms. In the back-end, it won’t hide any fields. However, it works in the profile details field.
- If the field is required and is hidden by conditional logic, it will bypass the required.
Now, you can apply conditional logic to fields and conditionally hide or show them in the frontend. Conditional Logic allows you to show or hide certain fields based upon other field’s value. You will get conditional settings on every field excluding user password, user email, and username.
For example, I have set up conditional logic on the Last Name field in the screenshot below.
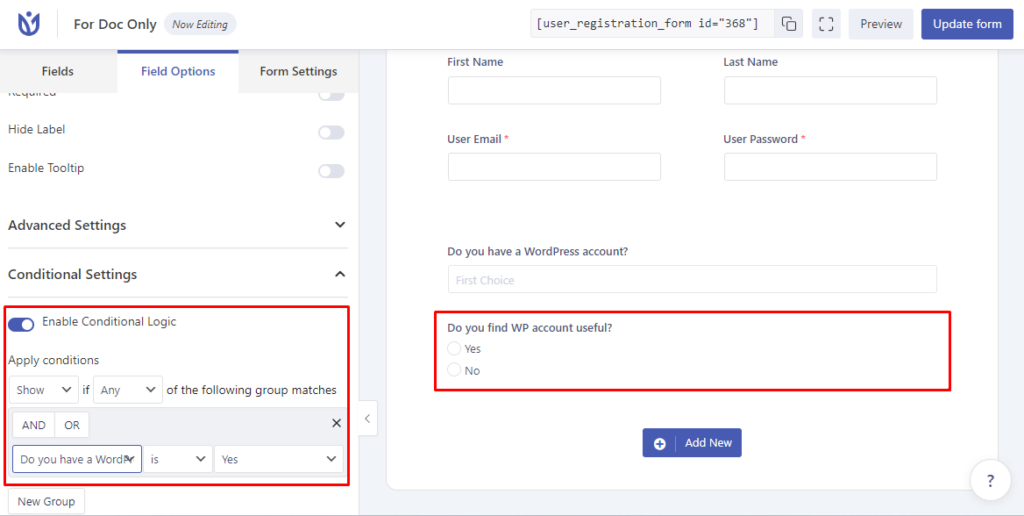
Fig. Condition to Last Name Field. Last Name field will only show to the users if user inserts “ted” in the First Name field.
- Enable Conditional Logic: It remains unchecked by default. Click on the field and then Enable it to apply conditional logic to the selected field.
- Show or Hide if Any or All of the following group matches:
– You can either choose Show or Hide to show or hide a field depending upon the conditions defined below in groups.
– You can either choose Any if you want any of the following groups to be true. You can choose All if you want all of the group to be true.
Conditional Groups: By default there is one group and it is mandatory to be there. You must have at least one group and at least one condition inside a group, same as that you can see in the screenshot shown above.
You can have multiple conditions inside a group and each Group does have its own logical operator i.e AND and OR.
-If you select AND inside a group then it will make sure that all the conditions defined inside the group must be true.
-If you select OR inside a group then it will make sure that any one of the conditions defined inside the group must be true.
You can also add multiple groups and define more conditions inside those groups.
-To add a new group, click on New Group and a group will be added below.
-To add multiple conditions inside a group, click on the “+” sign that appears when you hover upon an existing condition.
-To delete a condition, click on the “x” sign that appears when you hover upon an existing condition.
See an example screenshot below:
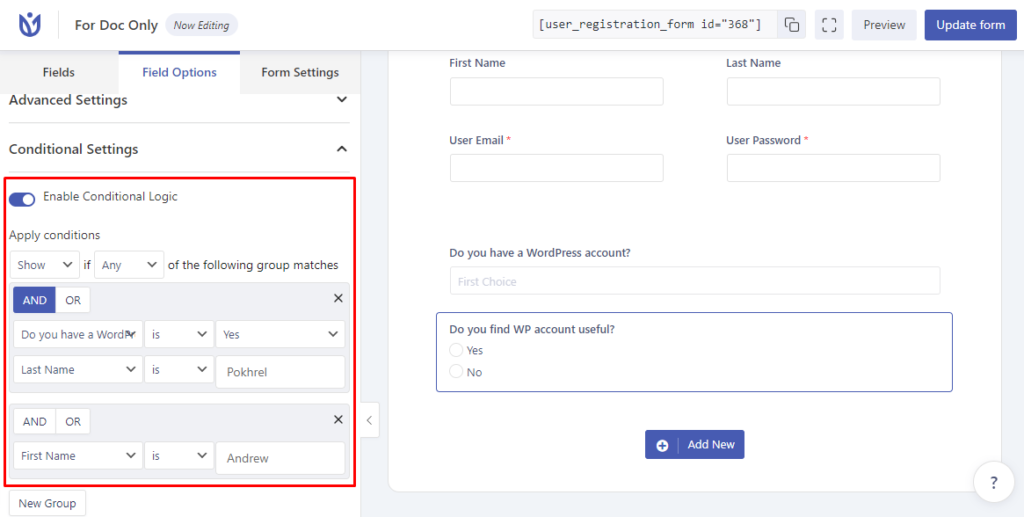
Fig: Last name will only show if either the conditions of the first group are met or the conditions of the second group are met.
Note: You can see that neither AND nor OR is selected in the second group. If you leave it as it is then it will do OR-ing by default
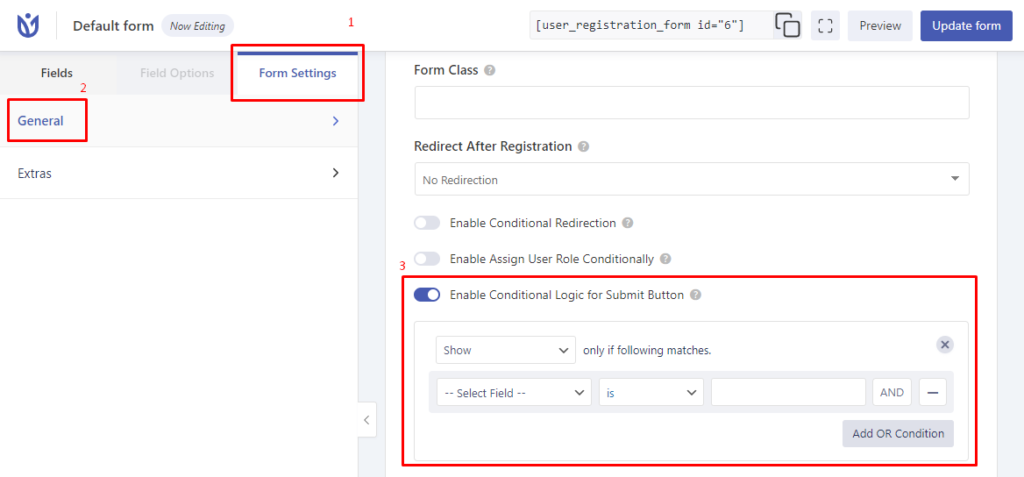
Conditionally Hide/Show Submit button #
If you want to show/hide submit button based on the form field’s input data, navigate to the Form Builder > Form Settings > General. Now, at the bottom of this setting, you will find the option to enable conditional logic for the submit button.
Conditional Redirect after Registration #
You can redirect the users conditionally after they submit the registration form. For this, navigate to Form Settings > General and Enable Conditional Redirection.


