
The User Registration Email Templates Add-on allows you to create different email templates that you can use to send emails to your users. The templates can be created from scratch or you can simply get started with the available templates. You can customize the templates completely as per your requirement.
Installation #
- Firstly, you need to purchase the User Registration plugin.
- After the successful purchase, you will get the plugin zip file under your WPEverest account page.
- Now, you can download the User Registration plugin and Email Templates addon from there.
- Through your WordPress Dashboard, visit Plugins → Add New → Upload and then choose the downloaded zip file and then install and activate it.
- Now you are ready to use this add-on for your site.
Step 1: Creating a New Email Template #
After you are done installing and activating the User Registration plugin and Email Templates add-on, go to your admin dashboard.
Then, click on User Registration → Email Templates and click the Add New button.
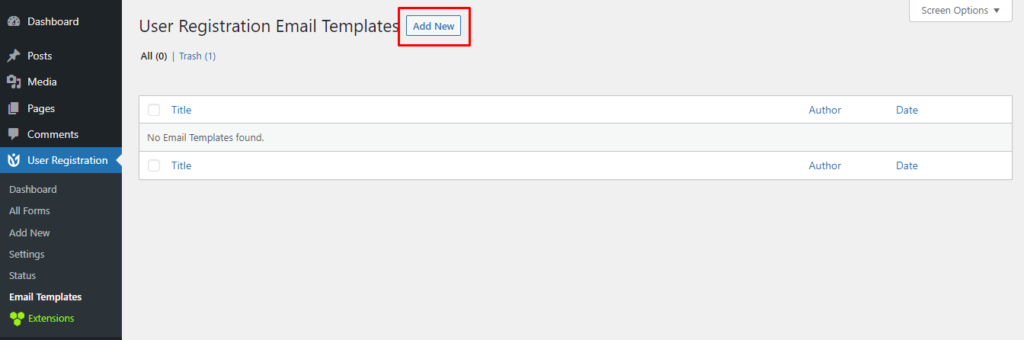
Now, you can see all the Email Templates for User Registration. There are many pre-made email templates that you can choose from.
Or, you can create your email template yourself by selecting the Start from Scratch option.
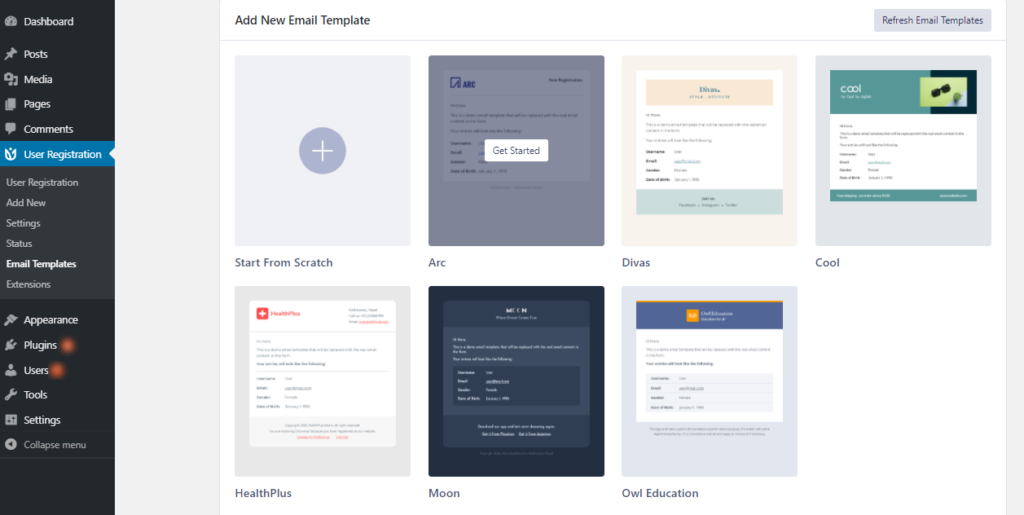
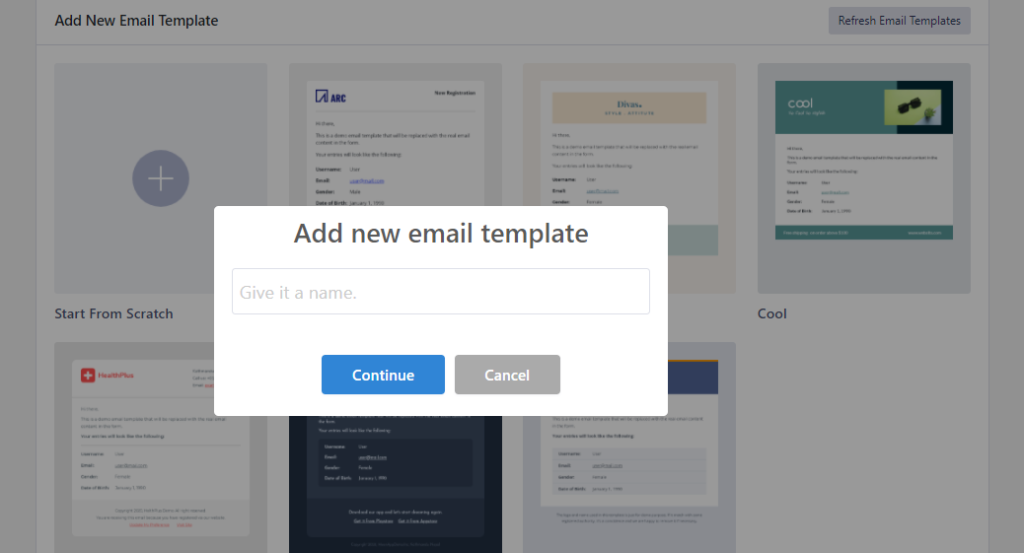
So, you can select a template or create your own and give it a name.
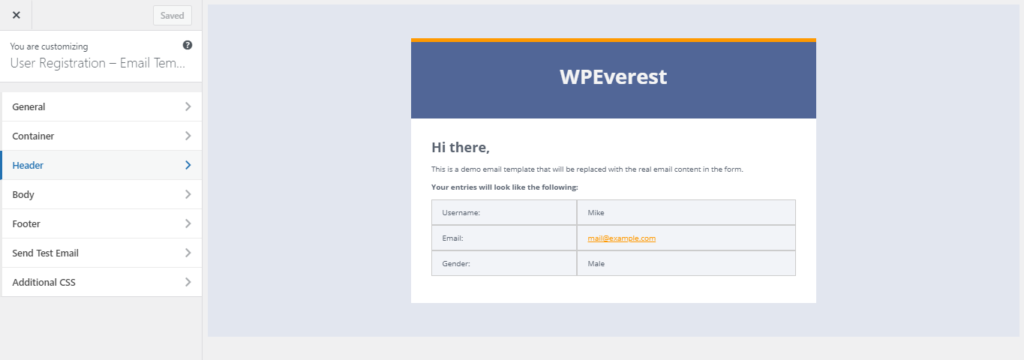
Step 2: Customizing your Email Template #
After you select an Email Template, you can customize the email template as you like. You can change almost all parts of the template according to your requirements.
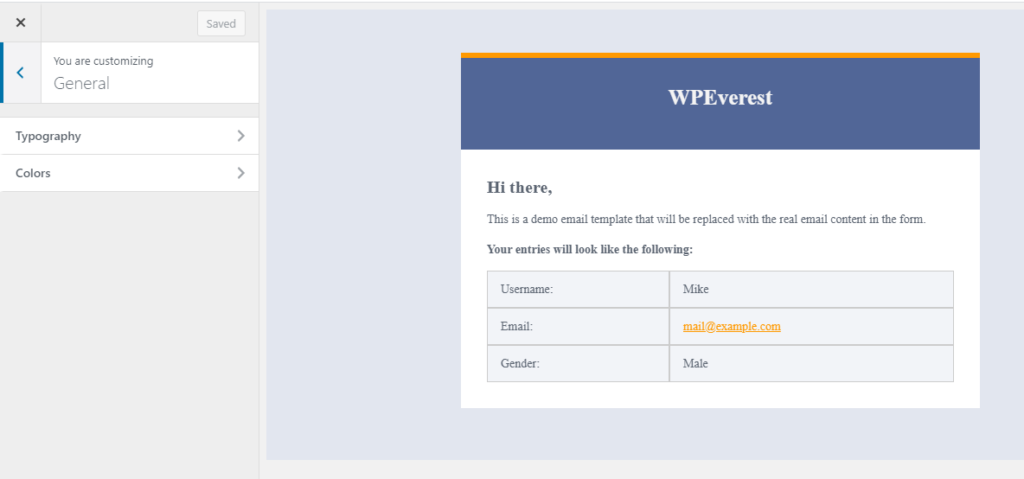
1. General #
The general option lets you customize the typography and color of the selected email template. You can choose between different fonts, adjust the font size and line-height for different headings and the body text. And in the Colors option, you can choose different colors for different headings and body text.
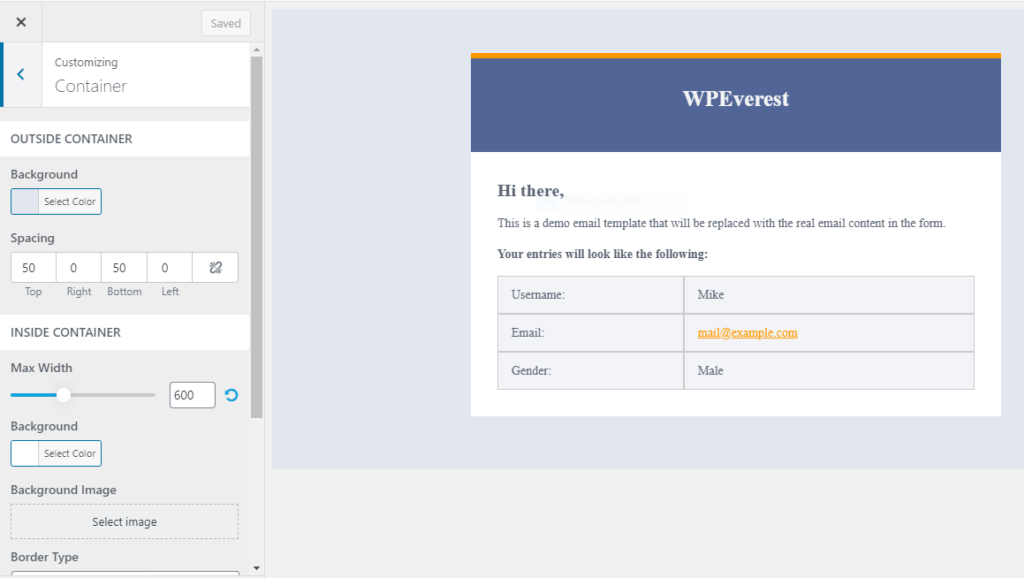
2. Container #
The container option lets you customize both the Inside and Outside area of the email template container. You can add a background color to your email template and adjust the spacing. Also, it lets you add a background image or color to the email template.
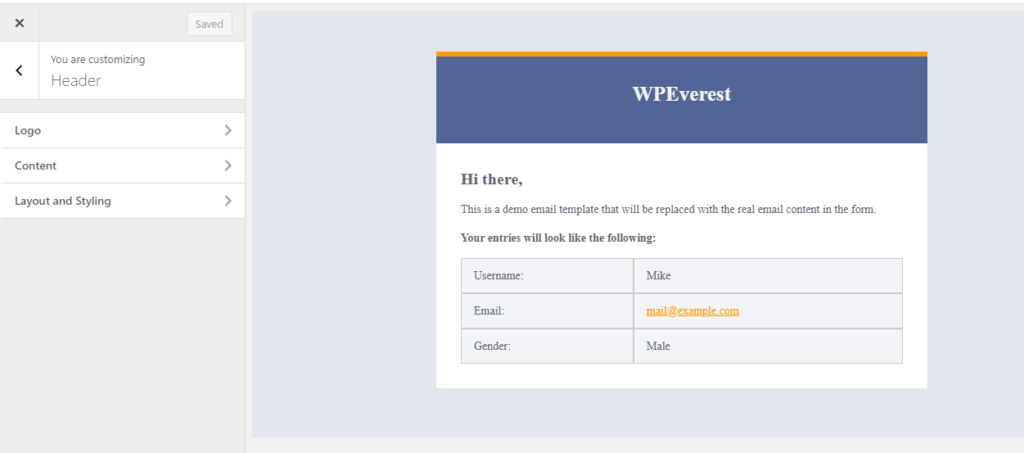
3. Header #
The Header option allows you to play with three things of the header part of the email template. You can customize the logo, the header content, and the Layout/Styling of the logo and content.
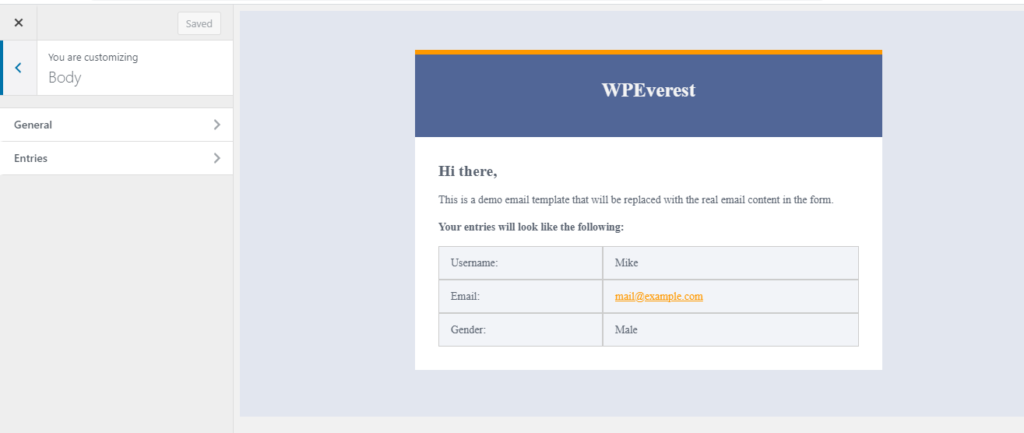
4. Body #
The Body option allows you to customize the body section of the email template. You can customize 3 different aspect of the body section which is, typography, colors, and styles. You can set particular background colors and select a different font size for the body text.
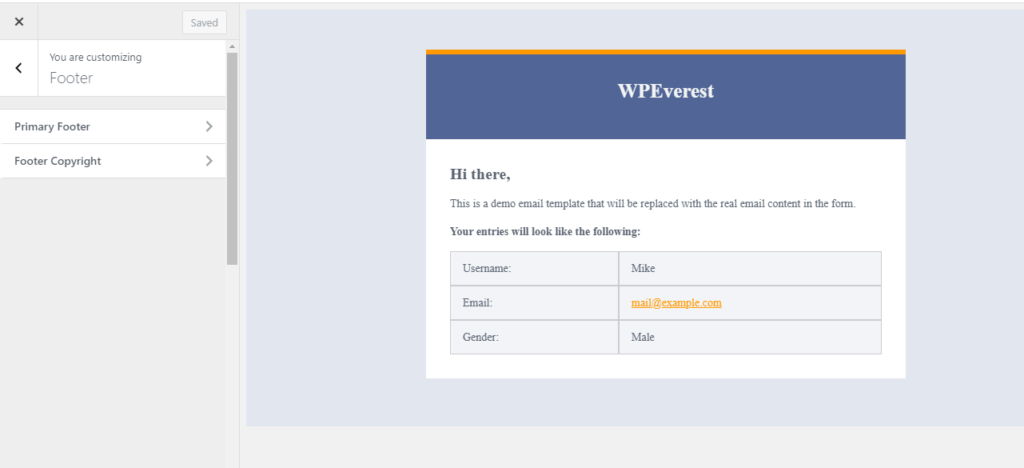
5. Footer #
The footer option lets you customize the footer part of the email template. You can customize the Primary Footer of the template and also add a Footer Copyright text and then customize it.
6. Send Test Email #
This option helps you to send test emails to the desired email address to check the template progress you have made.
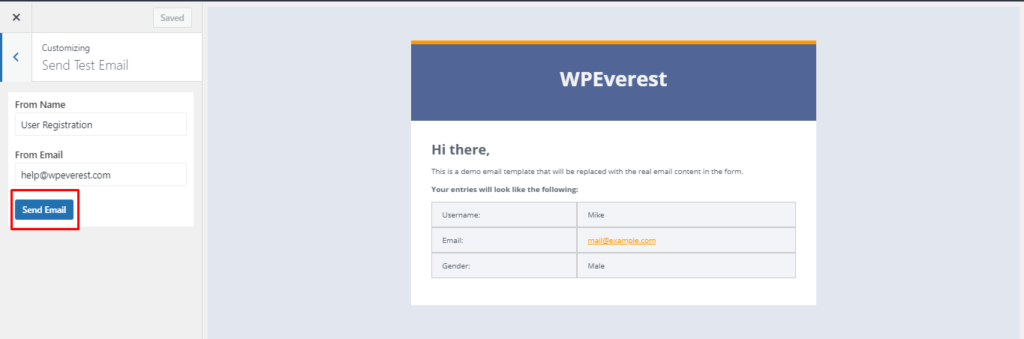
Here, enter the desired email address in the ‘From Email’ field
- From Name: Enter the desired name to be sent in the email.
- From Email: Enter the desired email address to which you would like to send the test email. By default, it is set as the admin email.
7. Additional CSS #
As the name suggests itself, Additional CSS can be used to add your own CSS codes to customize the way you want.
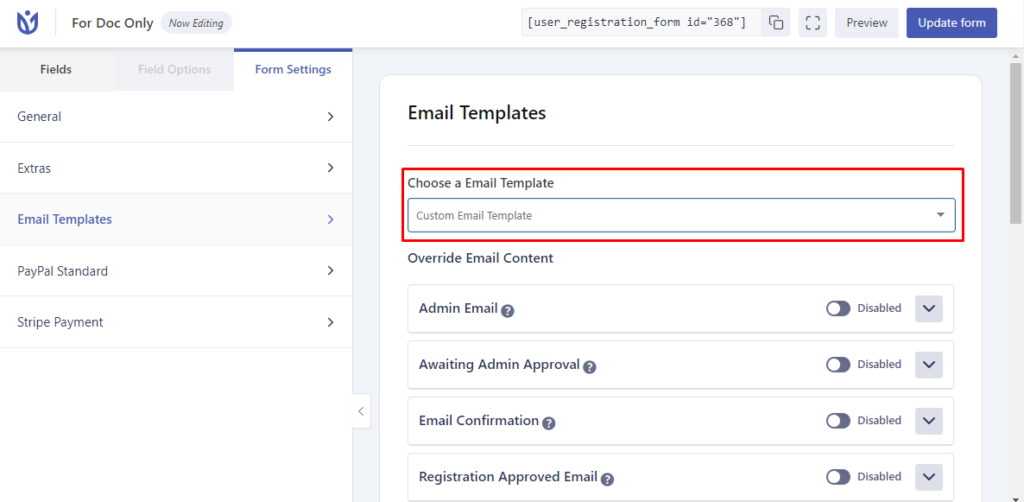
Step 3: Select Email Template for User Registration #
Now, you can easily use the email template that you created or any of the pre-built email templates.
For this, you need to go to User Registration and open the form you want to use the email template. Then, go to the Form Settings → Email Templates tab on the form builder.
Here, you can select your custom email template or the pre-built email templates.
Step 4: Override Email Content #
Then, you can override the Default Email Content set for the User Registration plugin for the individual form. You can override the email content for Admin Email, Awaiting Admin Approval, and more.
And, there is also the option for Successfully Registered Email. Here, you can edit the email content to add your content and website links.

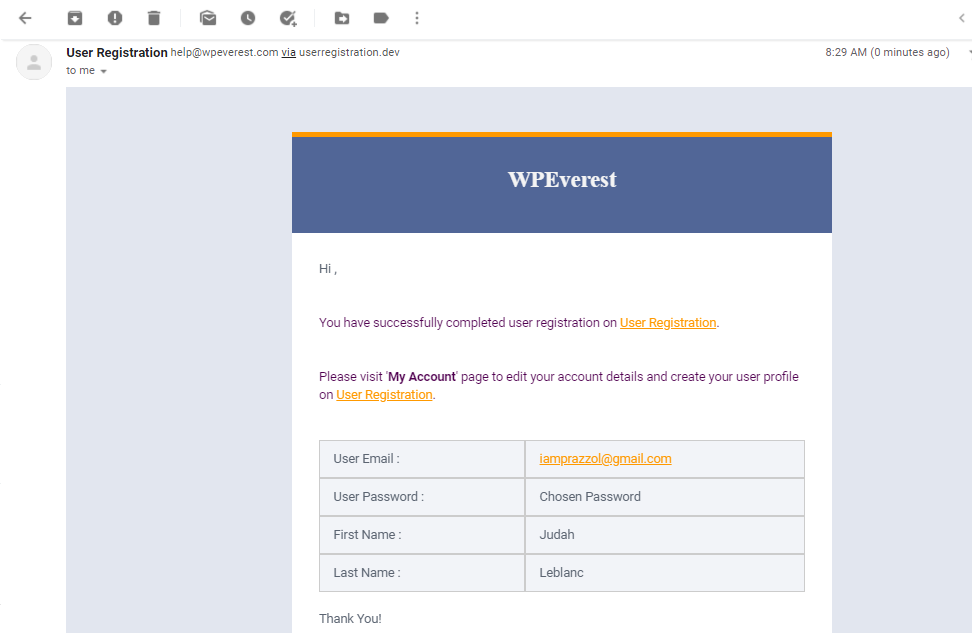
Email Received by the User: #
This is how the email looks with the User Registration Email Template.
Not to forget, the add-on is compatible with every email sent through the User Registration form.
It includes Payment success and failed email from User Registration Payments and Stripe Add-on. And, Auto password generation success email from User Registration Extras Add-on.


