File Upload #
This add-on helps you to upload the files to your site when registering to your site. It is mostly useful when you provide your users to upload some of the documents to your site while registering.
Installation #
- Firstly, you need to purchase the plugin User Registration – File Upload add-on.
- After the successful purchase, you will get the plugin zip file under your WPEverest account page.
- Now, you can download the plugin zip file from there.
- Through your WordPress Dashboard, visit Plugins -> Add New -> Upload and then choose the downloaded zip file and then install and activate it.
- Now you are ready to use this add-on for your site.
Setup and Configuration #
Once, you have completed the above-mentioned task of installing and activating the plugin, now let’s move ahead on setting up this add-on for your site.
First of all, you see an extra tab of File Uploads when you visit the User Registration -> Settings section after you have successfully installed this plugin added to your site. You can see the same as in the image below:
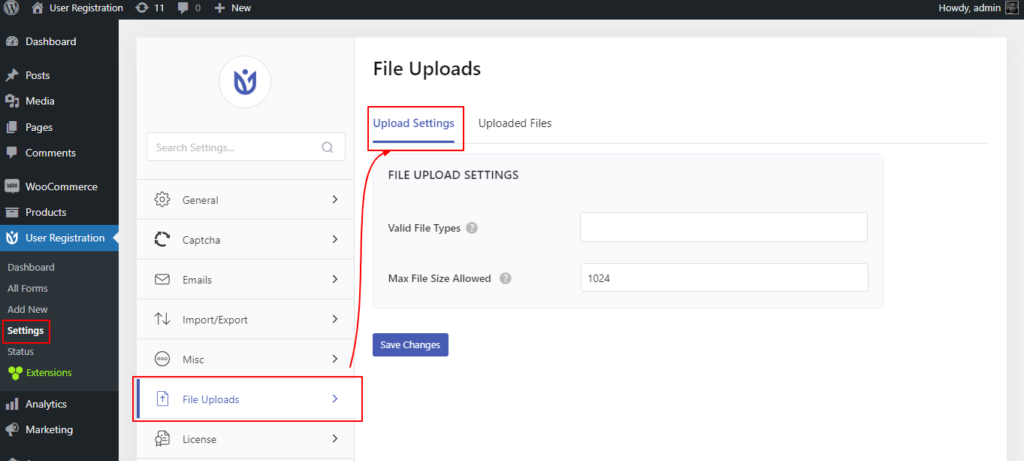
As in the above screenshot, it is the default option of this add-on. Here, you can see that you have two tabs inside this too, namely: Upload Settings and Uploaded Data. First of all, let’s discuss what options inside the Upload Settings reside.
In this Upload Settings option, you have two options which are described below for:
- Valid file type: From this option, you can provide the option to your users to upload the file types for your site. For eg: if you want your user to only upload the pdf files then, you can choose the pdf option from here. But, if you want both pdf and jpeg files too then, you can choose both of them in that option there. The available option types are pdf, doc, Docx, jpg, jpeg, gif, png, and mp3.
- Max file size to upload: From this option, you can restrict your users to upload the file size setup there as Kb, ie, if you add there 1024 then, you are providing the users to upload the file size up to 1Mb and if you add 2048, then, you are providing 2Mb of the file to get uploaded to your site while registering for your site.
Download Uploaded Files #

In the Uploaded Data option, there you can see only the option of Select registration form, which allows you to download the attached files of your users in zip format while they signed up for your site or updated their attached files.
Display the file upload option for your users #
Now, knowing about the options available in this add-on, let’s move ahead and add this add-on to your registration form.
Here, what you have to do is, you need to create a new registration form or edit the required registration form for your site. So, while you are on the registration form creation or editing stage, you will notice that you have got one extra field named File under the Extra Fields section.
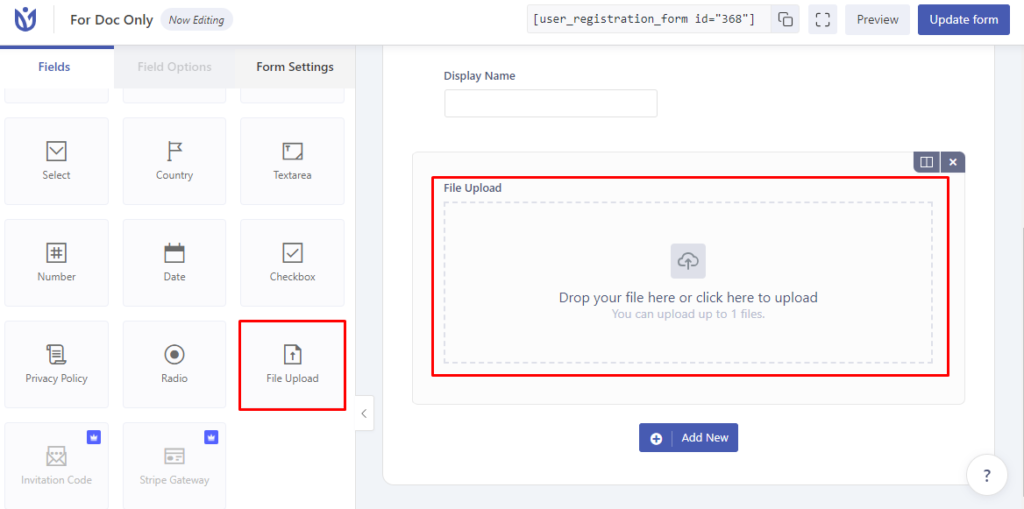
Here, you just need to drag and drop the field provided via this File Upload add-on for your site in the required field for user registration and save the changes to the form.
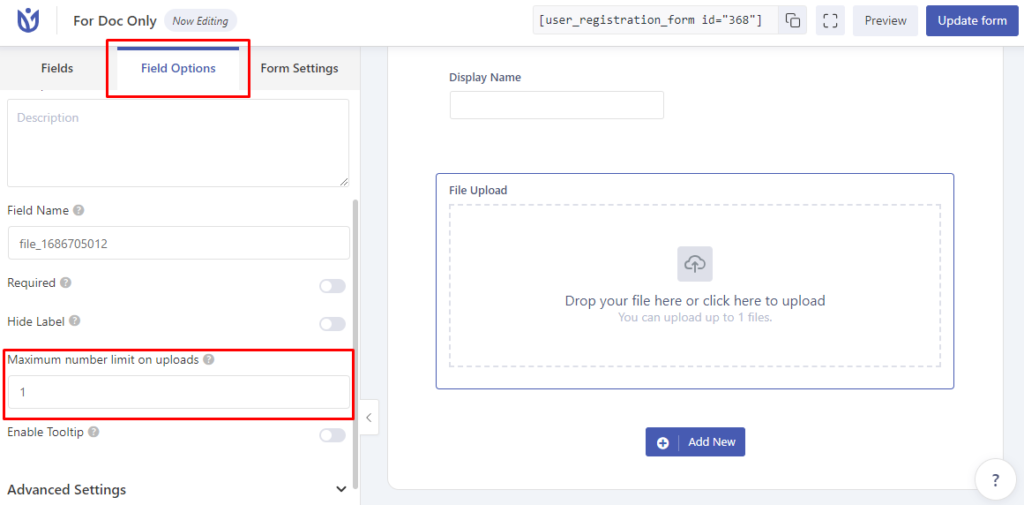
Multiple File Upload Feature: #
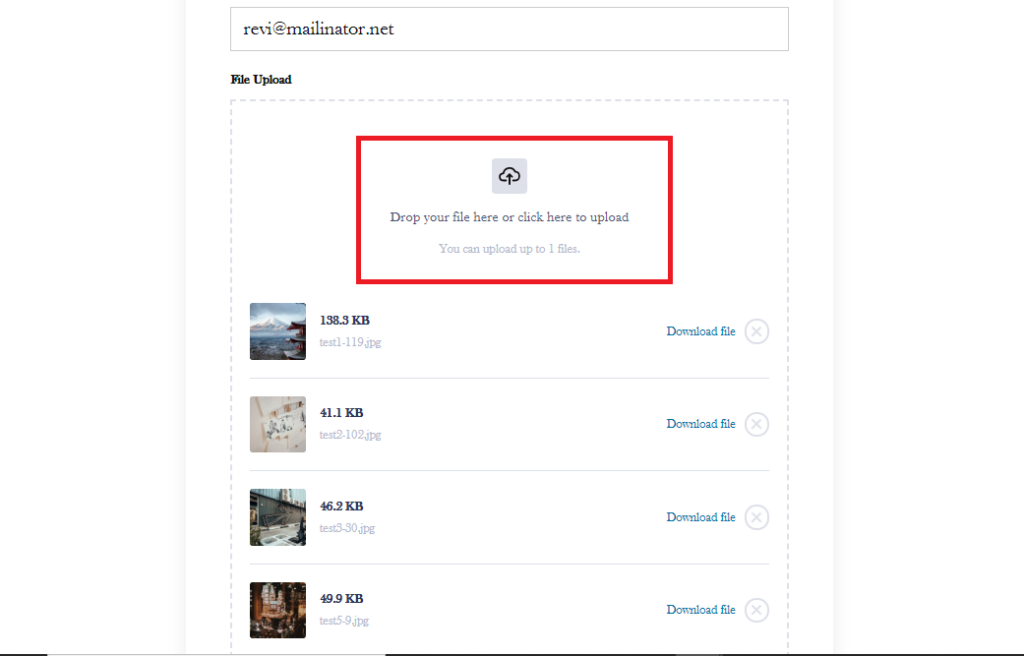
With this File Upload add-on, you can add a multiple file upload options for your user on the registration form. Go to the Field Options of the File Upload field and you can see all the settings available. Here, there is a Maximum number limit on the uploads option. You need to enter the number of file uploads you want to allow on the registration form.
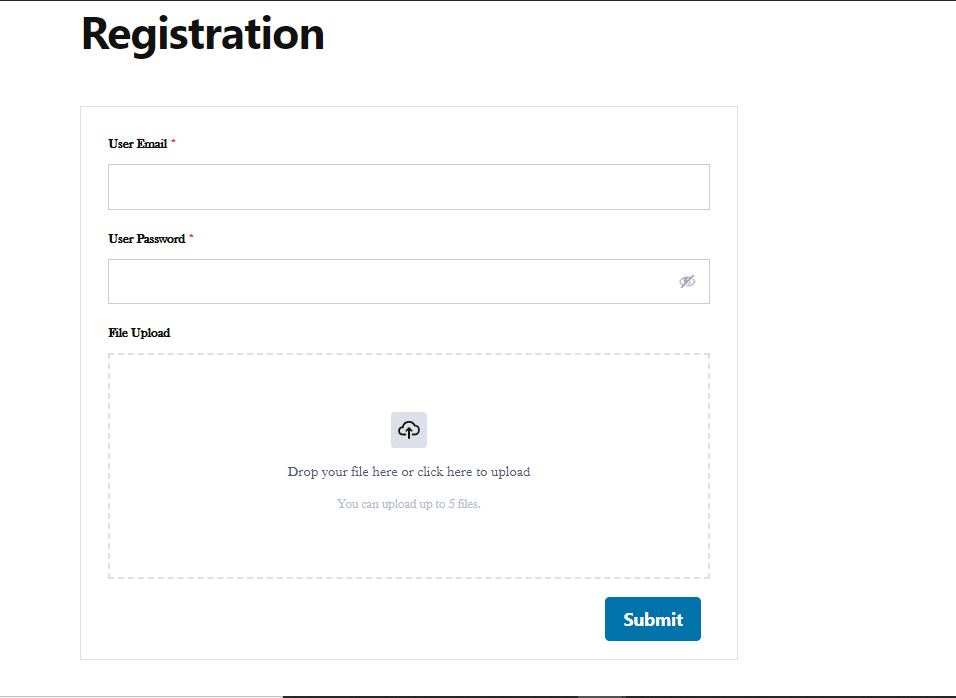
Now, when you visit the registration page, you will get this extra filed added for your site with number of uploads limit. You can see a similar output as below:
When a user selects an invalid file type to upload, this message is displayed in the frontend of the registration form.

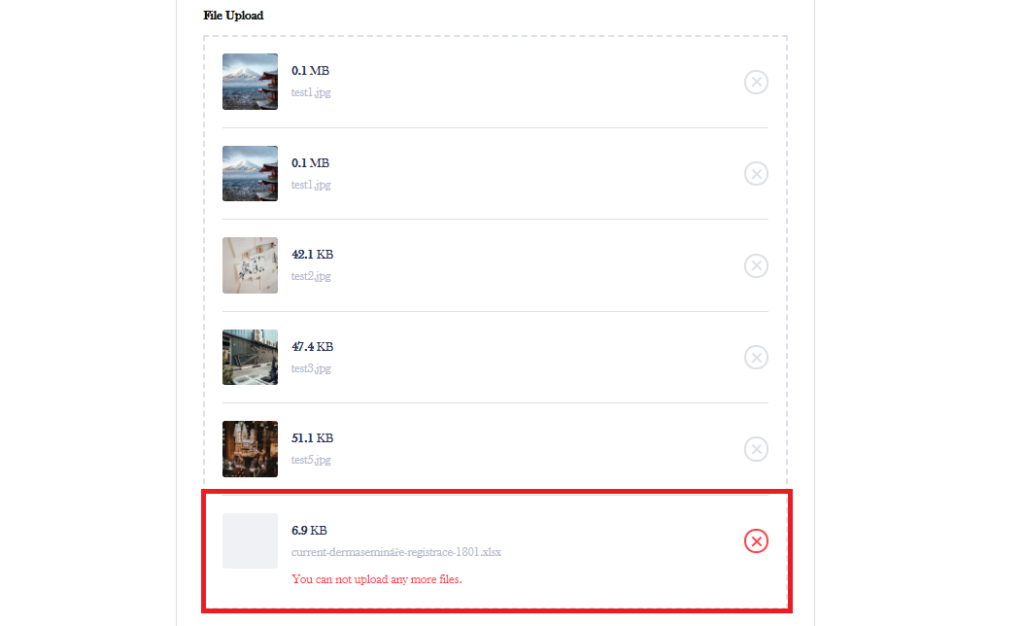
When the user uploads the limited number of files this message is displayed saying that the users cannot upload more.
Deleting and Replacing File Uploads #
The users also have the option to delete the uploaded file from the file upload field and replace the file. There is a cross sign for each of the files uploaded. To delete a file simply click on the cross.
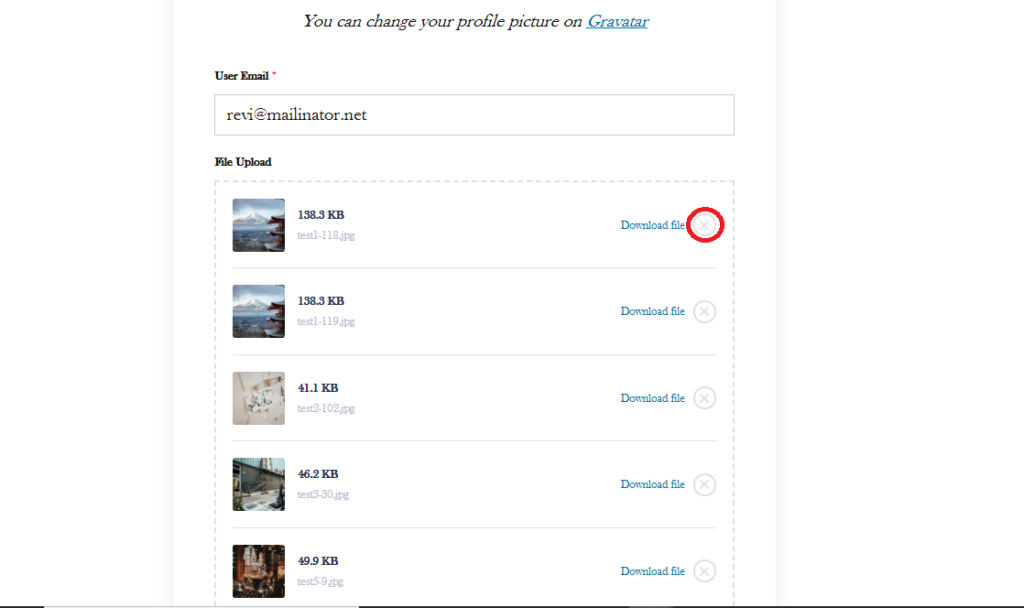
Then, you will be able to replace the file by uploading a new file.
Select Valid File Types: #
If you scroll down to the Advanced Settings in the Field Options, you can see the Valid File Types option.
This option allows you to choose the file type options for the File Upload field. You can allow multiple file types such as pdf, doc, png, gif, and more.
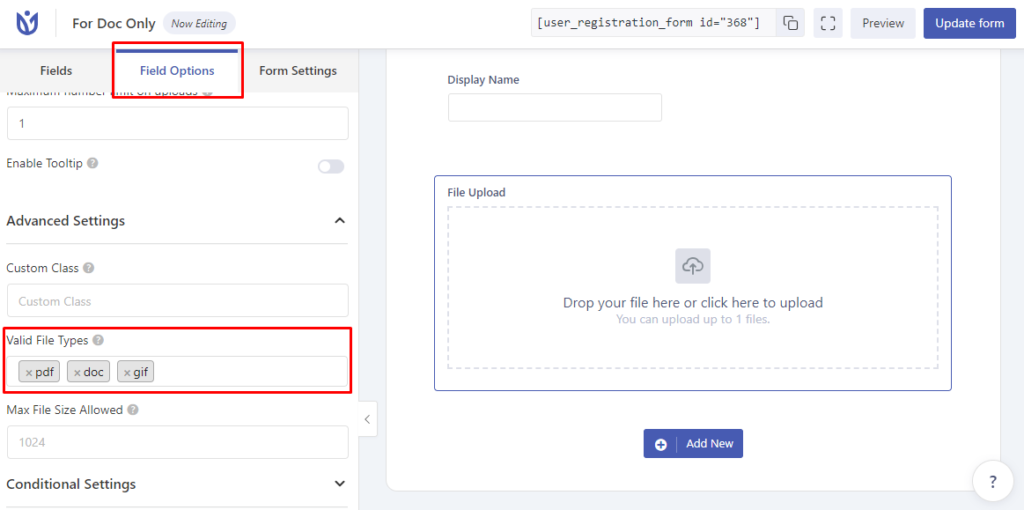
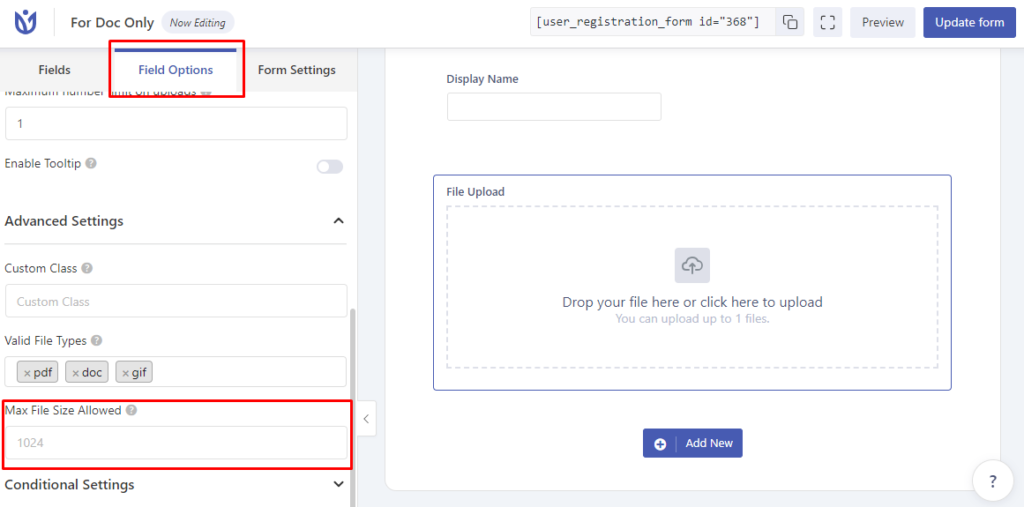
Max File Size Allowed: #
Another option for the File Upload field is the Max File Size Allowed. This option allows you to set the maximum size for the File Upload field.