Geolocation #
User Registration Geolocation addon allows you to collect and store your users’ geolocation data along with their data while registering to your form. Also, you can send geolocation data to the emails as well as view geolocation data from the Users tab page.
Installation #
- Firstly, you need to purchase the plugin User Registration – Geolocation add-on.
- After the successful purchase, you will get the plugin zip file under your WPEverest account page.
- Now, you can download the plugin zip file from there.
- Through your WordPress Dashboard, visit Plugins -> Add New -> Upload and then choose the downloaded zip file and then install and activate it.
- Now you are ready to use this add-on for your site.
After activating the add-on, once a user registers to your site, now you can also see the geolocation data of users from the users tab in the admin dashboard.

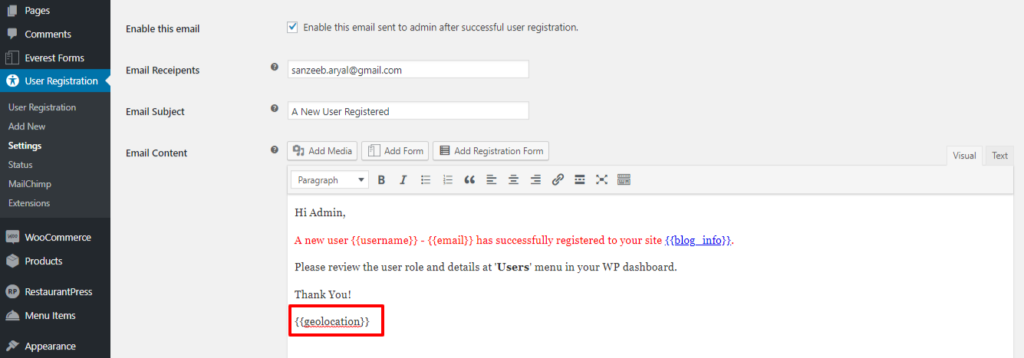
Also, you can use the smart tag {{geolocation}} to the email contents to send geolocation data to admin and user. Navigate to User Registration->Settings->Emails, Select the email to send geolocation data.
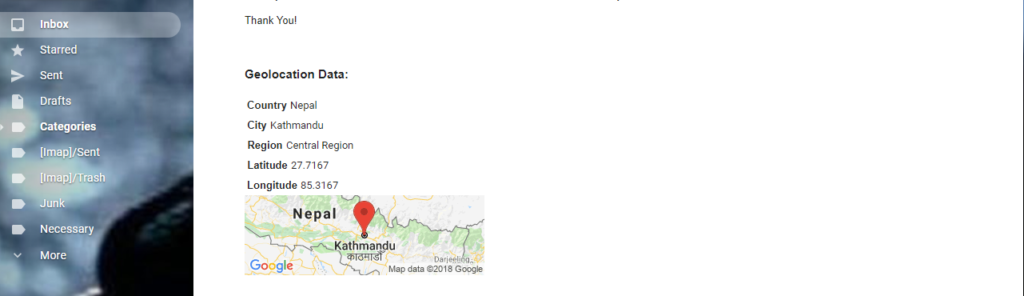
You will receive geolocation data along with the email contents as shown below:
AutoComplete Address: #
The users filling out the form can promptly fill the address field with the User Registration address autocomplete feature. This feature is easy to set up and works with Google.
Setting up Geolocation Add-On for autocomplete address. #
Generating API Key #
Please follow the steps given below to enable the Google Places API and add it to the User Registration’s settings.
- Go to Google Console Dashboard.
- Select a project at the top of your Google Cloud dashboard to enable the API key. (If you don’t have an existing project, you can create a project by clicking on ‘New Project‘)

Note: Google will require you to enable billing on your account in order to use the Places feature.
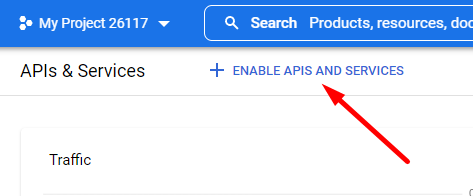
Once you have selected/created a project, you will be redirected to the API & Services dashboard of that project. If not, click on the menu icon on the top left corner of the screen and go to API & Services > Dashboard. Now, click ‘+Enable APIS & Services’.
Once you click on this option, it will open the API Library. From here, search and enable the following APIs:

- Places API
- Maps JavaScript API

Once you’ve enabled the required APIs, navigate to APIs & Services » Credentials in the menu on the left. From here, click +CREATE CREDENTIALS and select the API key option to generate an API key.
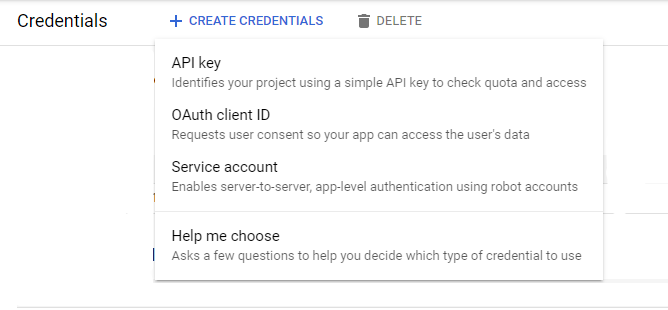
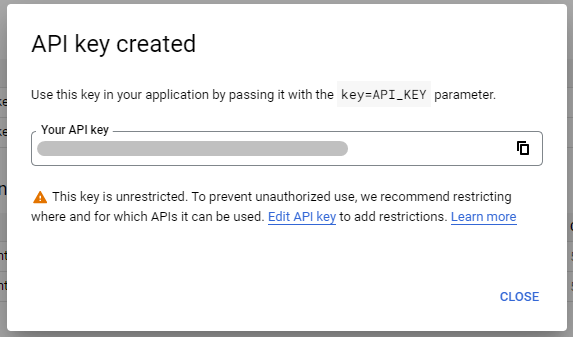
Your API will be presented to you in a pop-up window. Copy to clipboard.
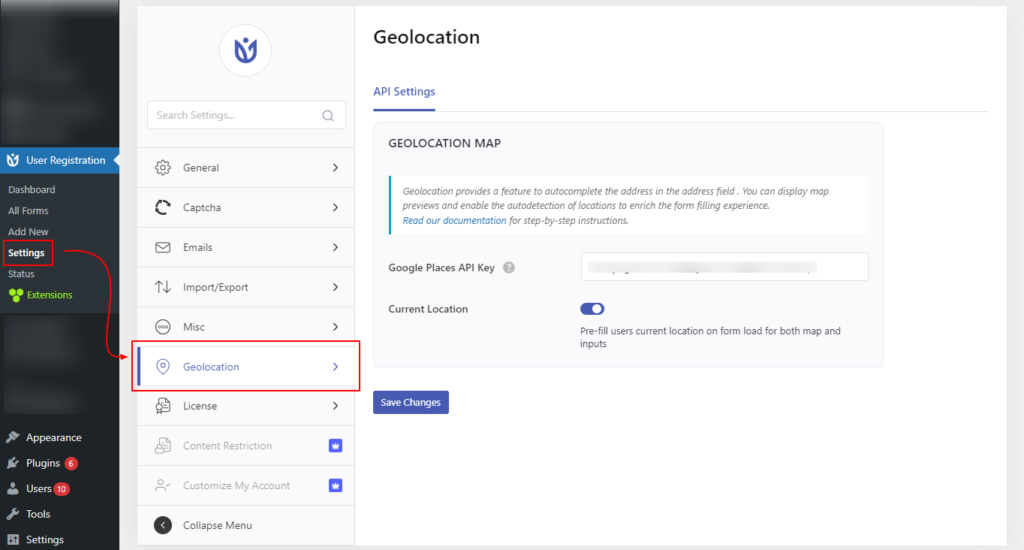
Adding API Key to the User Registration Settings #
Once the API key is generated, follow the steps below to add the key to the settings.
- Go to User Registration > Settings > Geolocation.
- Add the copied API Key in Google Places API Key and click on Save Changes.
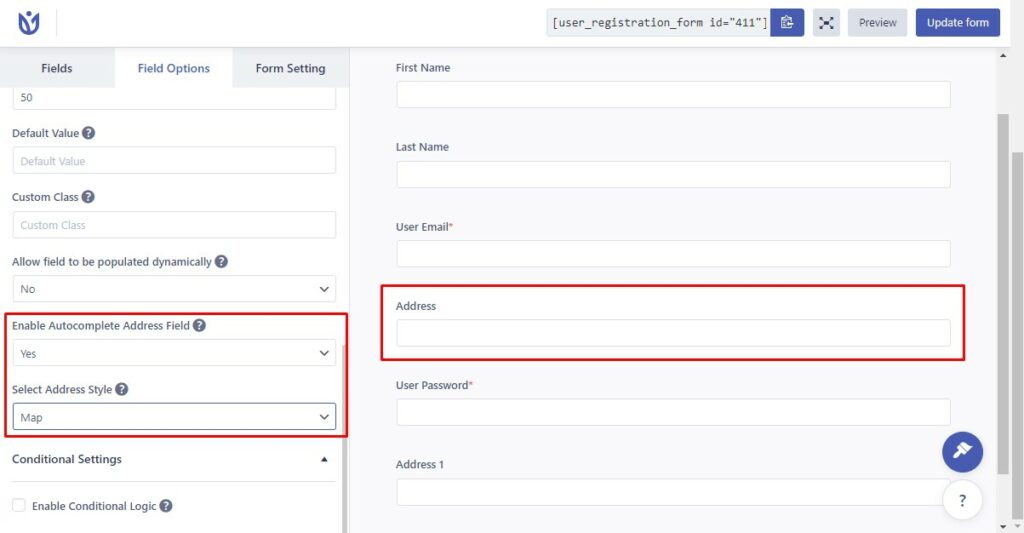
Adding the auto-complete address field on a form: #
Now, go to the form and add an ‘Input Field’. Click on the ‘Input Field’ and you will see the field options on the left-hand side. Scroll the available options to find ‘Enable Autocomplete Address Field’. Select ‘Yes’.
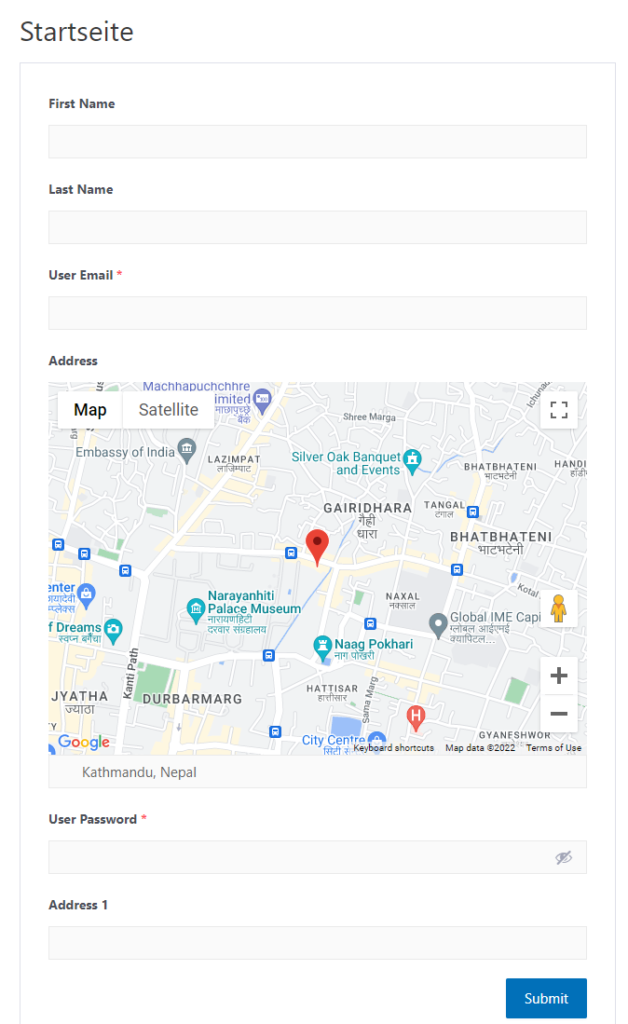
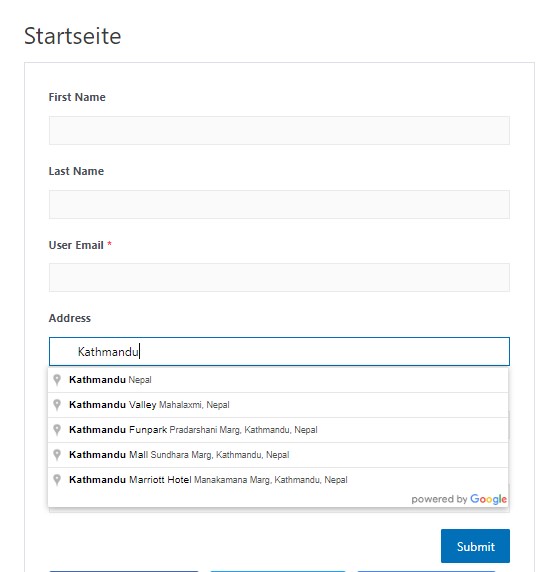
Frontend View #
You can now type in the address and you will be provided with adequate suggestions for the address. For example, we have typed Kathmandu and were able to find a few suggestions. Also, there are two styles available. One is a plain address style and on the other one, you can find a map.
Address Style #
Map Style #