
Invite Codes #
User Registration Invite Codes add-on allows you to restrict the registration on your site to users with invite Codes.
Installation #
- Firstly, you need to purchase the plugin User Registration – Invite Codes add-on.
- After the successful purchase, you will get the plugin zip file under your WPEverest account page.
- Now, you can download the plugin zip file from there.
- Through your WordPress Dashboard, visit Plugins -> Add New -> Upload and then choose the downloaded zip file and then install and activate it.
- Now you are ready to use this add-on for your site.
Setup and Configuration #
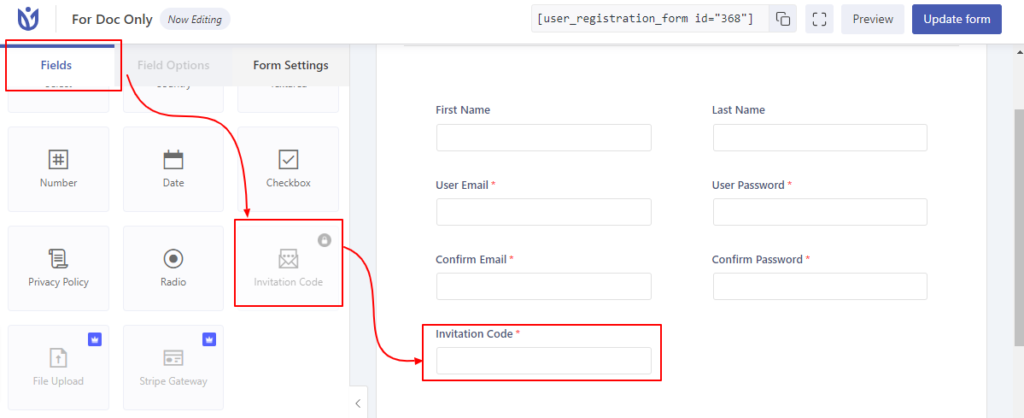
Once, you have completed the above-mentioned task of installing and activating the plugin, now let’s move ahead on setting up this add-on for your site. Navigate to User Registration->Select your form, drag and drop invitation code field.
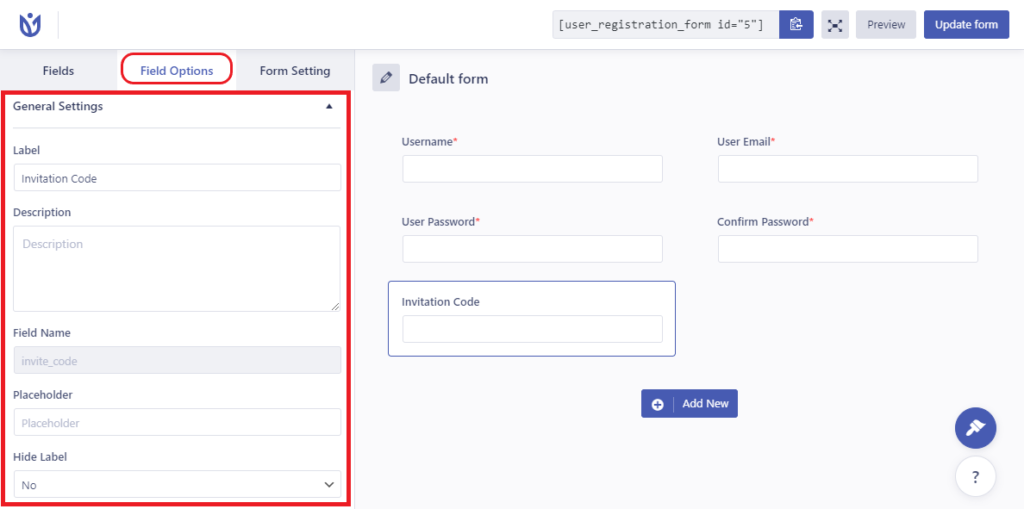
Change the invitation code field options as per your requirements.
Now, let us move ahead on creating invitation codes. Navigate to User Registration->Settings->Invite Codes.
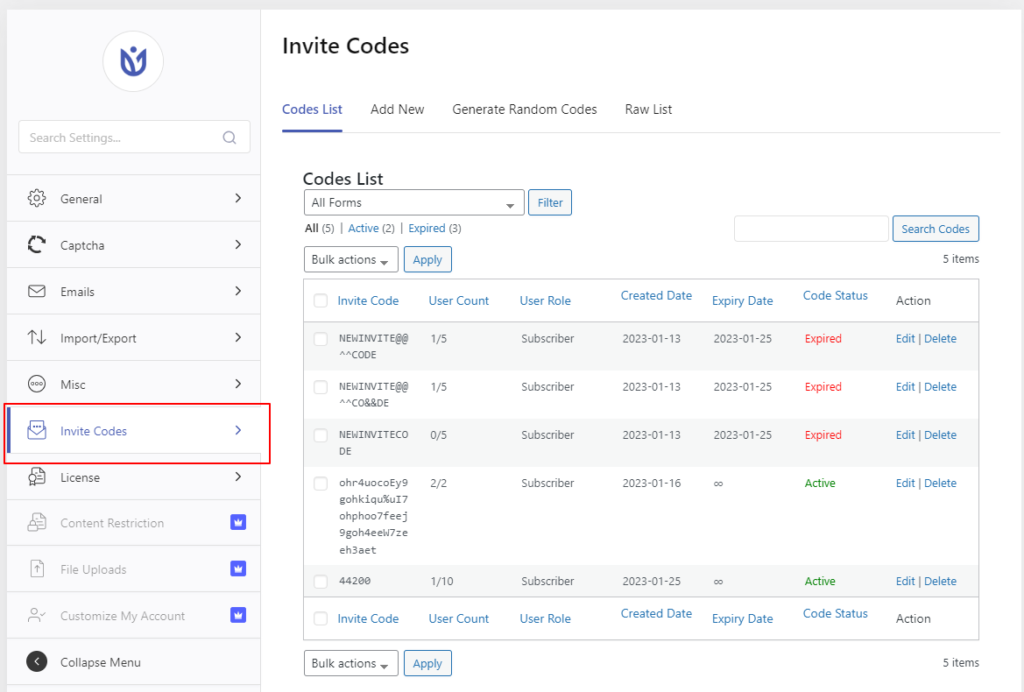
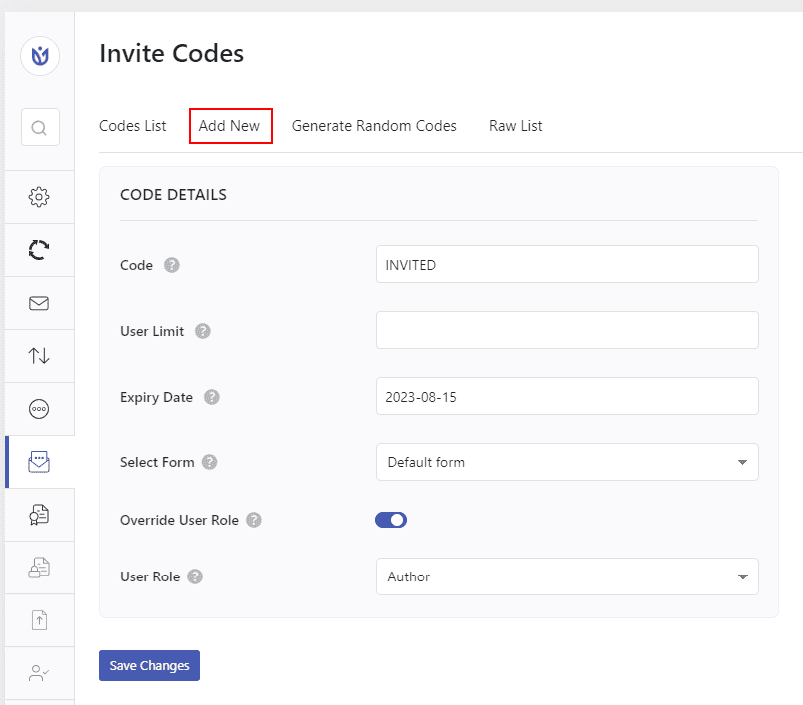
You can create the codes you wish from Add New section there.
Option Description:
- Add New Code: Add new code to enable users register with this code.
- User Limit: Limit the number of users can use this code. Leave empty for unlimited times.
- Expiry Date: Set the date in which the code will be expired. Leave empty for no expiry date.
- Select Form: Select the form to set this invite code to successfully register.
- Override User Role: Enable/Disable the user overriding for the invite code.
- User Role: Override the user role from form settings and assign to the user registered with this invite code.
You can also generate any number of random codes from Generate Random Codes section.

Option Description:
- Code Numbers: Number of random codes to generate.
- Code Prefix: Add prefix to randomly generated codes.
- User Limit: Limit the number of users can use this code. Leave empty for unlimited times.
- Expiry Date: Set the date in which the code will be expired. Leave empty for no expiry date.
- Select Form: Select the form to set this invite code to successfully register.
- User Role: Override the user role from form settings and assign to the user registered with this invite code.
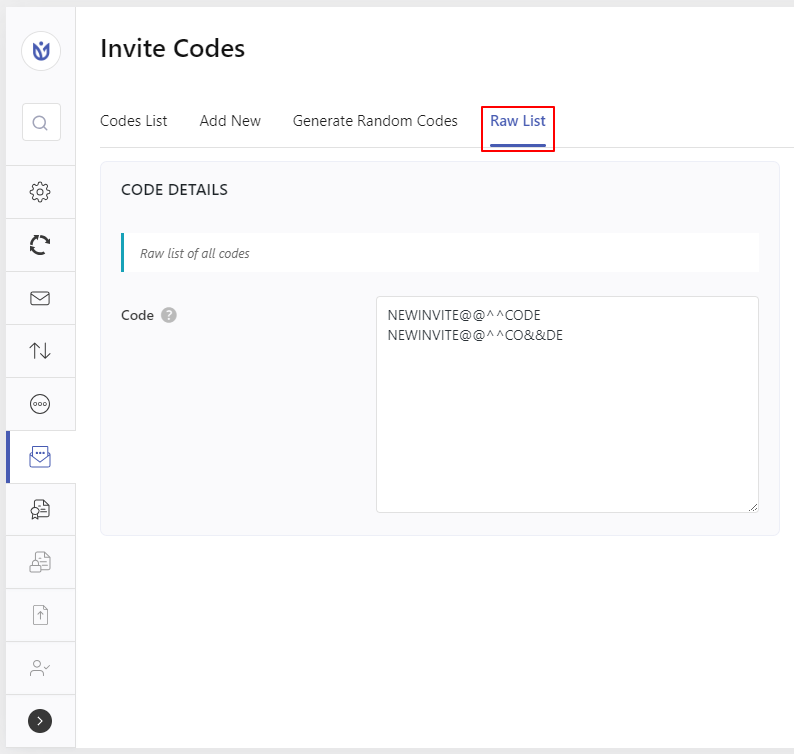
You can view all invite codes raw list from Raw List Section.
That’s all. Now you can distribute these invite codes to the users to register to your site.
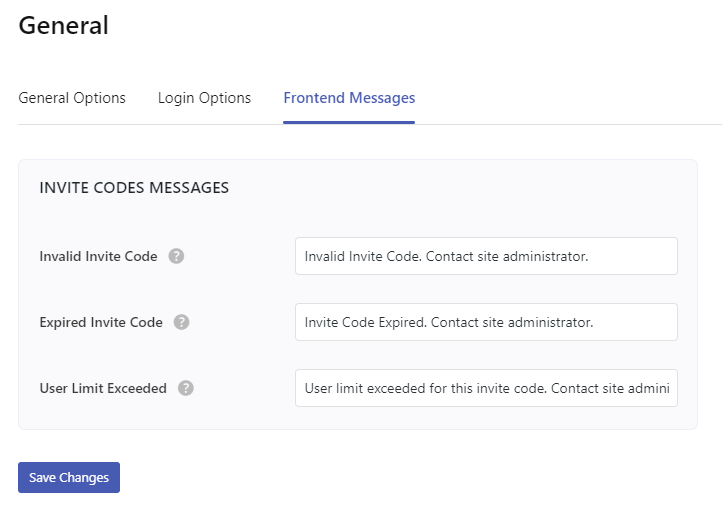
You can customize the messages on invalid, expired, user limit invite codes from User Registration->Settings->General->Frontend Messages->Invite Codes:
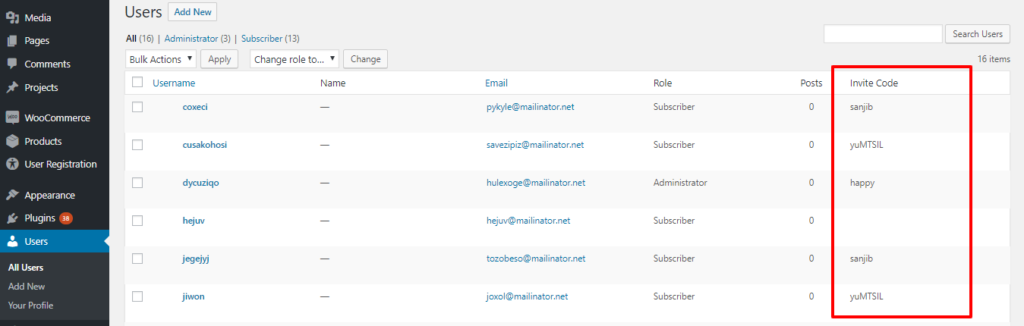
You can view the users with invitation codes from Users tab in admin dashboard.
Import/Export Invite Codes #
1. Go to User Registration > Settings > Import/Export
2. Click on ‘Import/Export Invite Codes’.
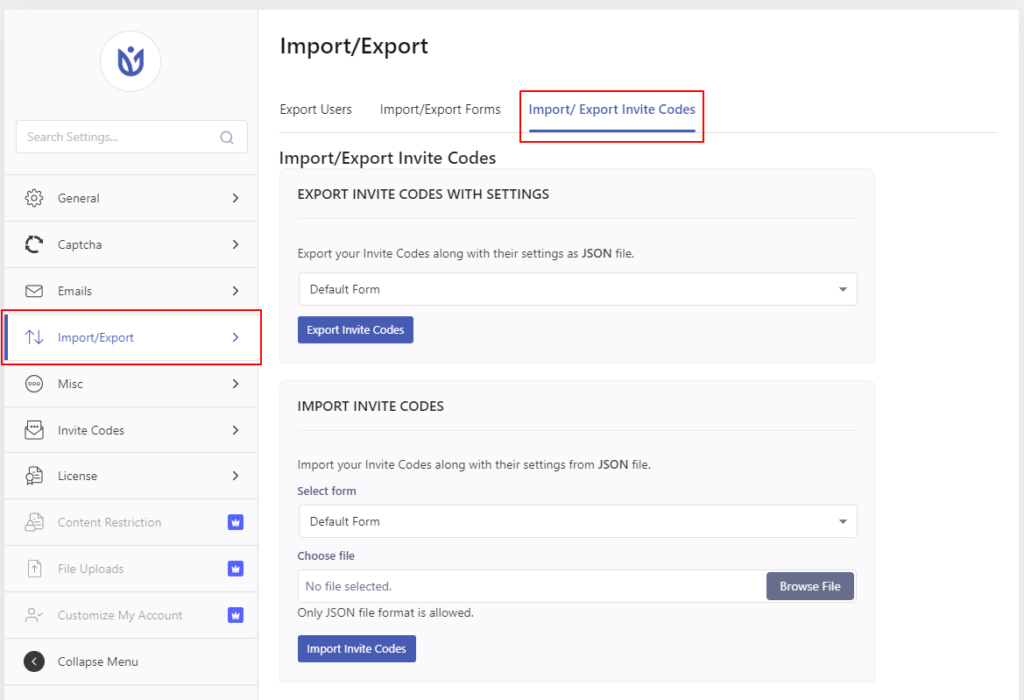
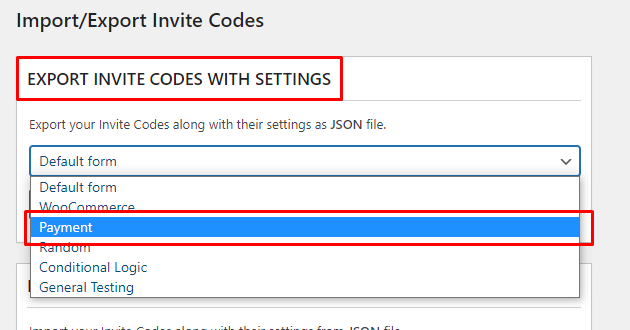
Export Invite Codes: This option allows you to export the invite codes associated with specific forms along with their settings.
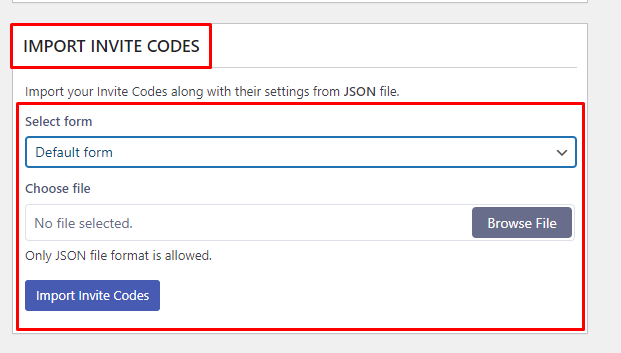
Import Invite Codes: This option allows you to select the available json file with the invite codes and import it to any of the available forms.
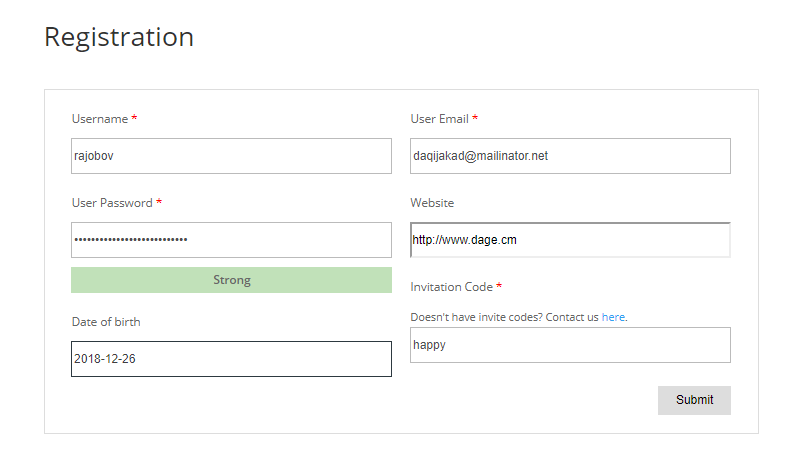
Frontend View:
If you want to step by step invite codes setup guide then please follow our blog post on how to register users with invitation codes


