- Overview
- Installation
- Global Stripe Settings
- Stripe Gateway Integration to Registration Forms
- Where can an admin and a user view the Payment Details after Registration?
- Stripe Subscription for Recurring Payments
- Map Extra fields to sync with the Stripe Payment
- Changing the Payment Details for the Users.
- Compatibility with Conditional Logic:
- Detailed Payment Status
Overview #
User Registration’s Stripe add-on provides you with the option of enabling Stripe as a Payment Gateway on your registration forms. You can use this addon to provide the option for your visitors to pay directly with their Credit Card during the registration process without any hassle and with complete security and assurance.
You also have the option to set up a one-time charge or a recurring charge with this add-on. The process is described below in detail.
Note: You will need to install and activate the User Registration Pro add-on for Stripe add-on to work since it shares some part of functionality with the Pro add-on.
Installation #
- First, you need to purchase the User Registration Premium Plan containing Stripe Add-on.
- After the successful purchase, you will get the plugin zip file under your WPEverest account page.
- Now, you can download the plugin zip file from there.
- Through your WordPress Dashboard, visit Plugins -> Add New -> Upload and then choose the downloaded zip file and then install and activate it.
- Now you are ready to use this add-on for your site.
Global Stripe Settings #
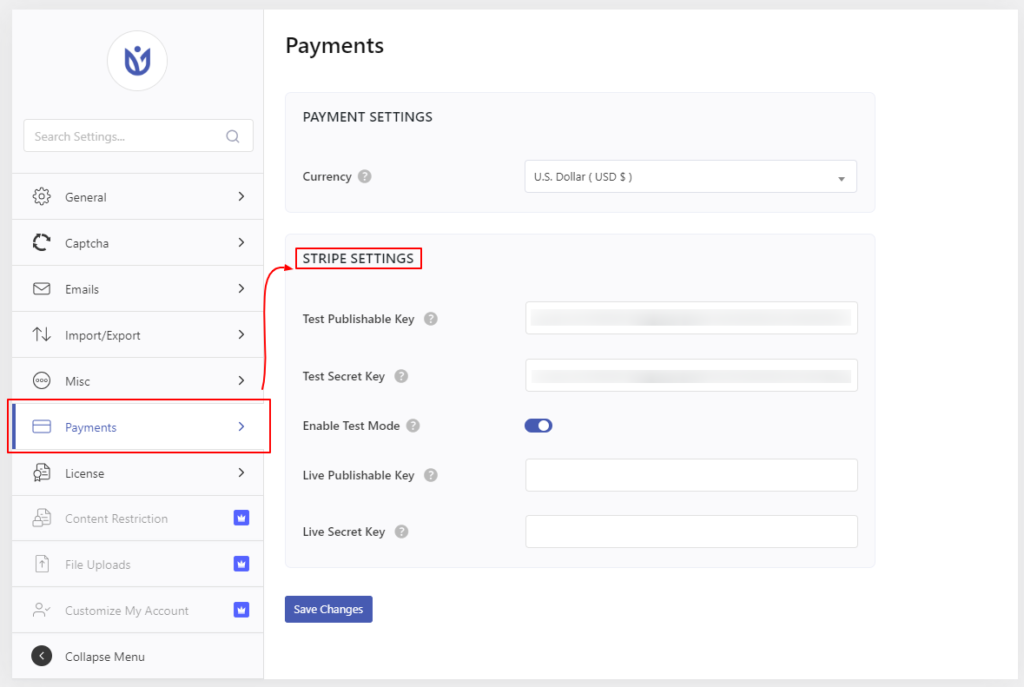
After you have successfully activated the add-on, you will need to configure Stripe on your site. To configure the settings, click on User Registration > Settings > Payments and you will see the following window.
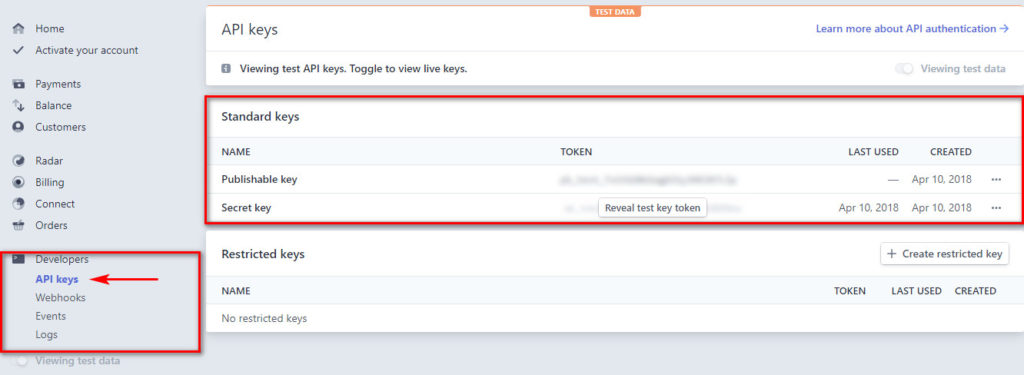
To proceed with the Stripe setup, you will be required to use your Stripe account’s API keys. To retrieve your API keys, follow these simple steps:
- Open your Stripe Dashboard.
- Visit the API keys page by clicking under API keys under the Developer tab on the dashboard sidebar. (Developer → API keys.)
- Create and copy your API keys through this page. To learn more about the process involved in using API keys, you can refer to https://stripe.com/docs/keys link.
Next, you can change various settings for Stripe to make it fit better for your website.
Click on the User Registration > Settings > Payments option on the top of the page to manage your Payment settings. Here, you can choose the currency for your payments and manage the settings for both the PayPal and the Stripe addon.
Under Stripe settings, you can insert the Publishable key and the Secret key to the appropriate fields. If you want to test the payment system before going live, use the Test keys that you may have received from your Stripe Dashboard on Stripe’s website.
If you want to test the payment system before going live, click on the Enable Test mode option. For the test mode, you can use the Test keys that you may have received for the Stripe API. You can learn more about the Test keys and receive Test credit cards by referring to this https://stripe.com/docs/testing link.
Stripe Gateway Integration to Registration Forms #
After you have configured Stripe Globally, you can enable it for your registration forms. To do so, first, you will need to add the payment field and the stripe payment field to your form. Drag the fields to your form to add them.
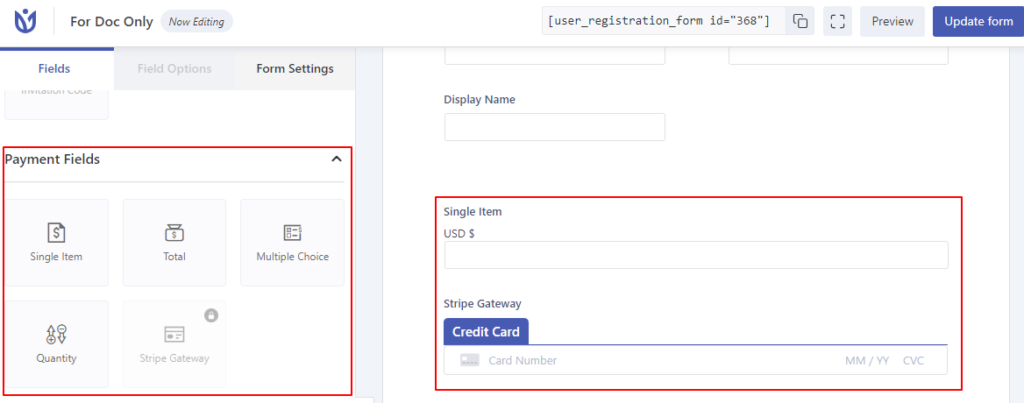
After adding the fields, click on the single item payment field and then set the amount for this field. The set amount will be charged to your users during the registration process.
In addition to the credit card, the iDeal Payment option has also been introduced. The iDEAL is an e-commerce payment system used in the Netherlands, supported by online banking. This payment method allows customers to shop on the web using direct online transfers from their checking accounts.
After this save the changes by clicking on the Update Form button on the top right of the form builder.
How to add an iDeal payment option to your form? #
For this, you will have to insert a field called “Stripe Gateway” from the form builder in your form. You can get this field in the Payment Fields category. After inserting the field, please scroll to the end of the field settings for the Stripe Gateway field, you will find an option under Payment Method to use Credit Card, iDeal Payment, or both.
After you select the iDEAL payment option, then you have an option to choose the bank from which you want to make a payment.

Note: If you use any other currency than Euro, it is not accepted in the iDEAL Payment.
After the fields are added, one last thing that you need to do is enable Stripe for this registration form. To do so, Click on User Registration > Your Registration Form > Form Settings.
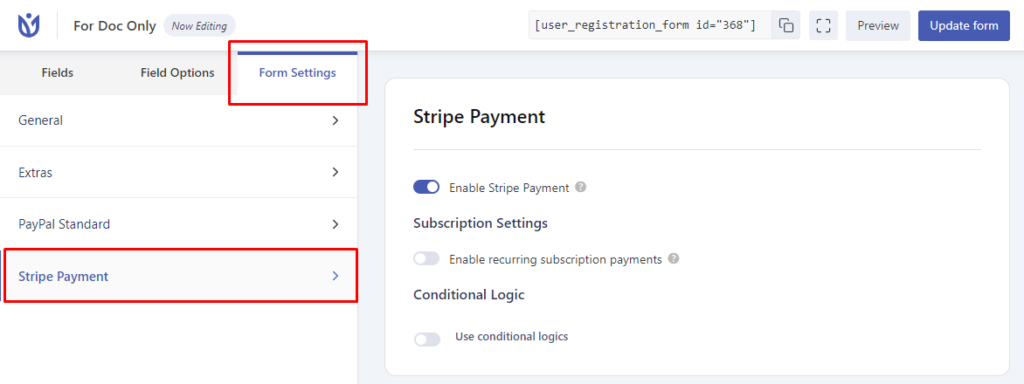
In the form settings, you can see Stripe Payments, click on it, and then click Enable Stripe Payment. Now you have enabled Stripe on your form. Click on update form and the changes will be saved.
That’s all. Now anyone registering through this form will need to pay during registration.
Where can an admin and a user view the Payment Details after Registration? #
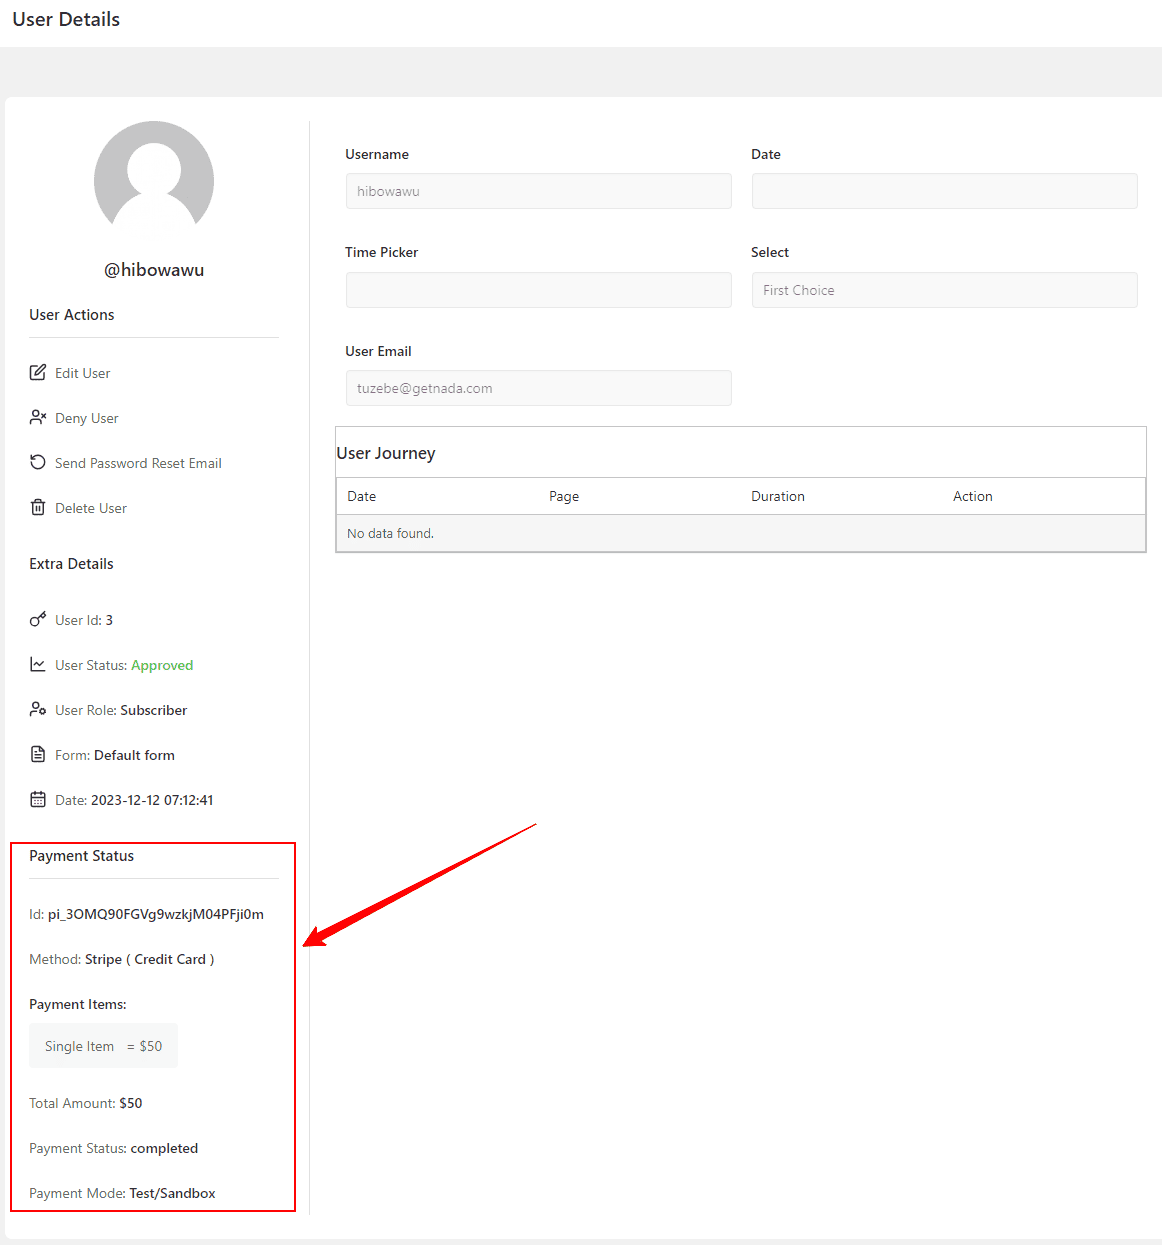
Admin Side: Admin can view the Payment Status of the registered users in the WordPress Users Section. To do so, on the WordPress dashboard, Click on Users > (username). Scroll a bit and the information will be shown there. See the example in the screenshot:
User Side: Users can simply log in to their account on the site and then see their payment information of the Payment Details Tab. See the example in the screenshot below:

Stripe Subscription for Recurring Payments #
User registration Stripe also supports Recurring Payments. To charge users on a periodic basis, you can enable recurring payments on the registration form, and then the users will be charged periodically. For this, follow the steps below.
- Add the Subscription Plan field from the form editor.
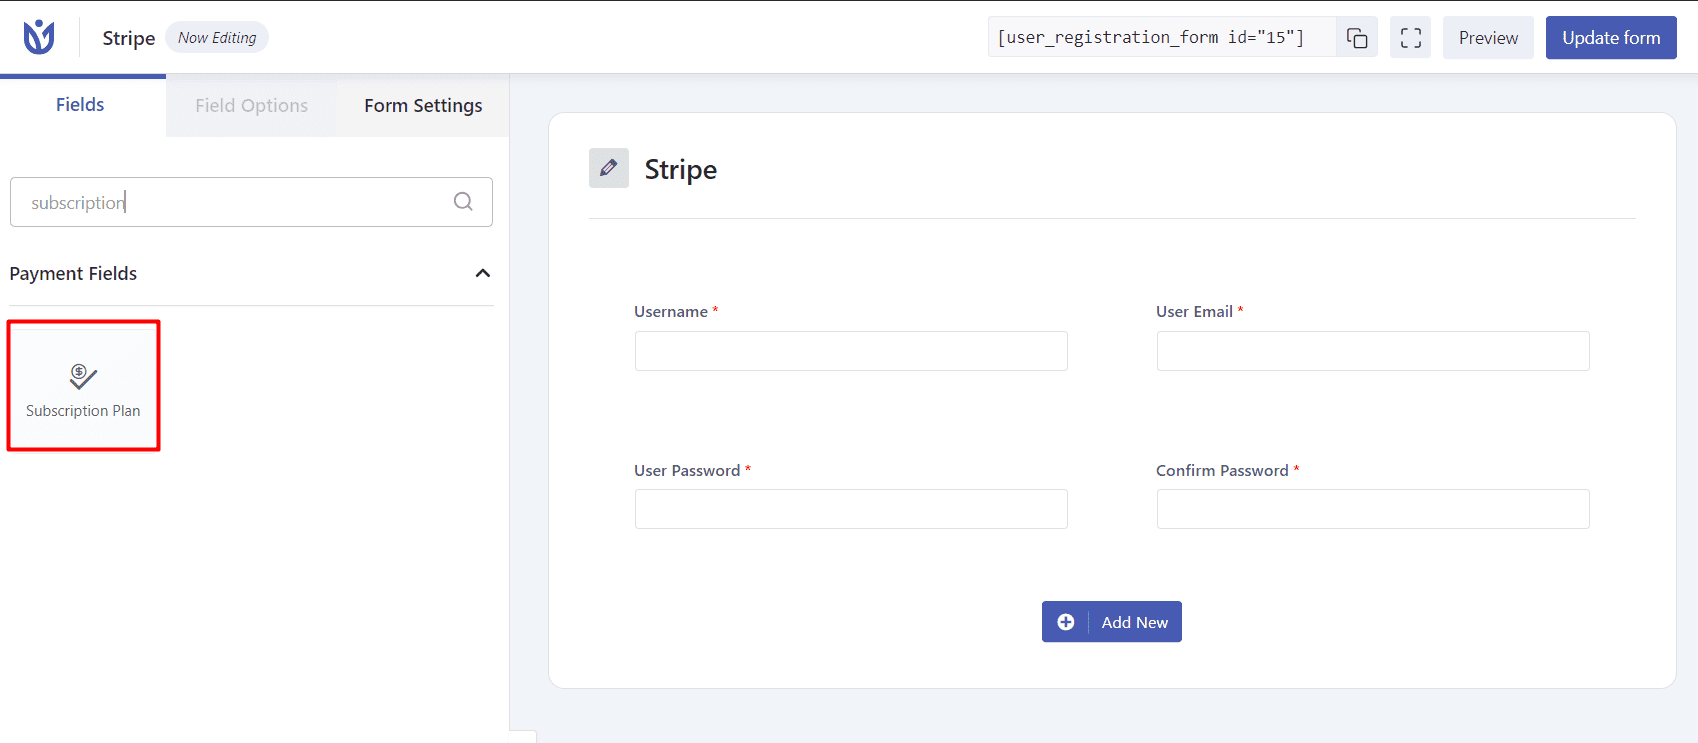
- Now, provide the names and the pricing for the plans respectively.
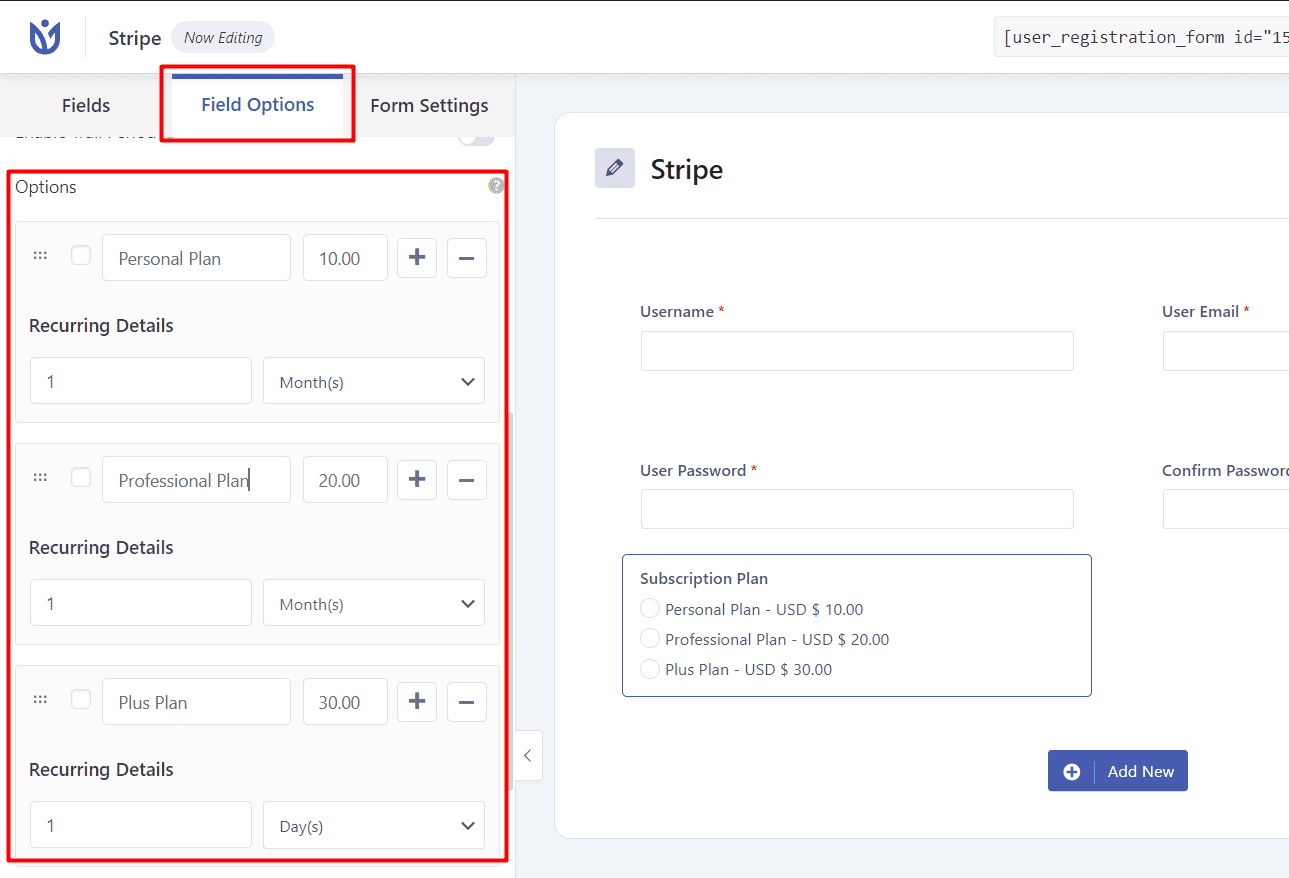
Here, you will also need to provide recurring details. For example, one day/week/month/year etc.
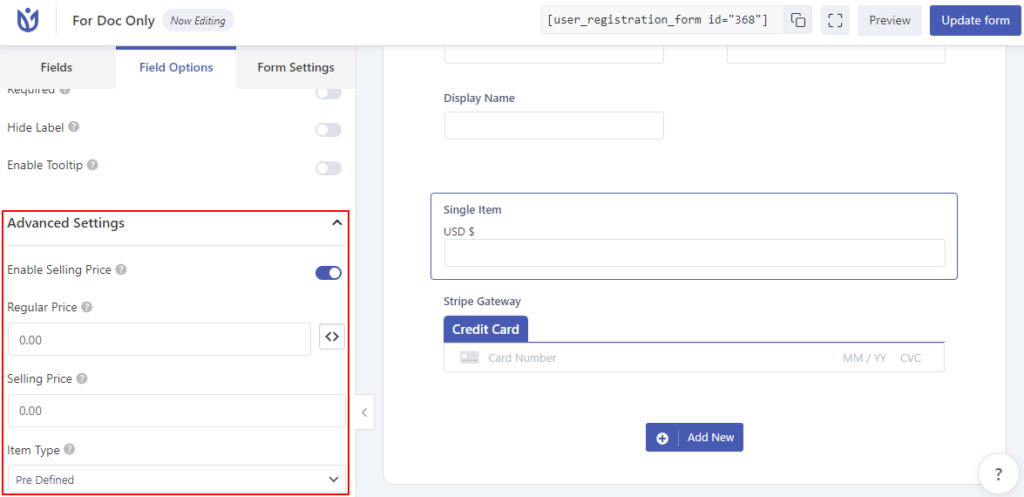
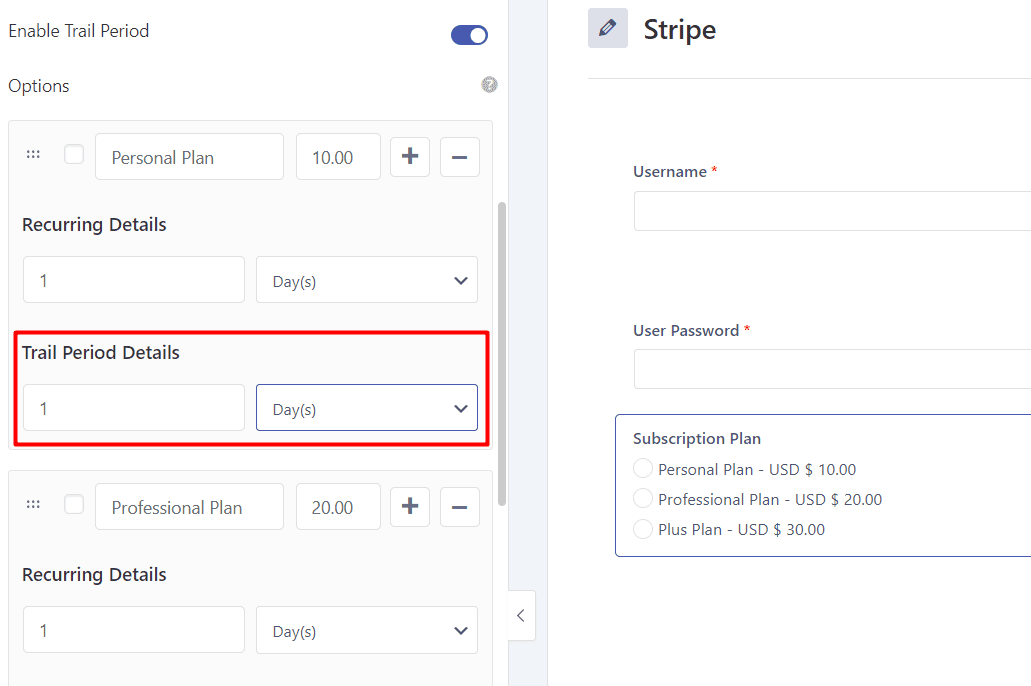
Trial Period and Selling Price #


While adding the subscription plan field, you can enable the trial period option for each individual plans. This option lets the users register without paying. You can enter trial period details just below the recurring details for each plan.
Similarly, there is an option to enable the selling price as well. By enabling this, you can set the Market Price and Selling price for each subscription plan.
The Payment Info of any user can be seen by the admin in the Users Section of WordPress by clicking on the particular username. Similarly, users can view their Payment Info after they log into the site and visit the Account Dashboard. The Payment Details Tab will contain the Payment info.
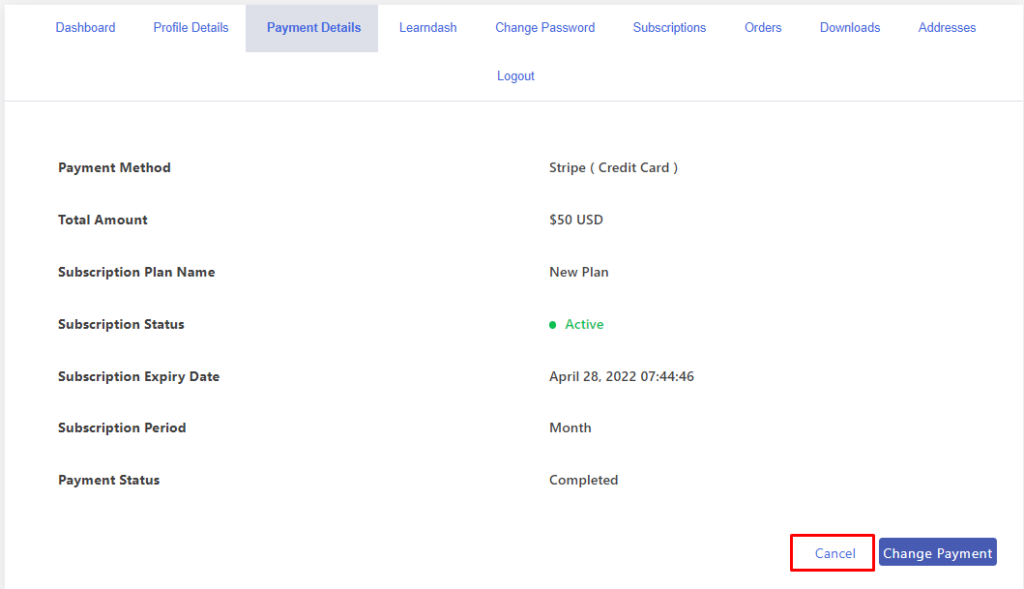
Canceling Subscription Option for Users #
In the case of recurring payments, users can cancel their subscription anytime by clicking on the cancel link present in their Payment Details Tab.
Subscription Cancellation Action #
You(admin) can choose one of the two actions for canceling the subscription. Go to Form Settings > Stripe and you will find the option to choose the Cancellation Action.

- Cancel Subscription at the end of the billing cycle: Choosing this option will cancel the user’s subscription once the whole billing cycle is completed.
- Cancel Subscription Immediately: The subscription will be canceled immediately after the user confirms the cancellation.
Subscription Reactivation #
If the cancellation action is set to be active at the end of the billing cycle, the users can reactivate their subscription if they have canceled it in between the cycle.
This option is available on the My Account Page > Payment Details. After Cancellation:

Resubscription #
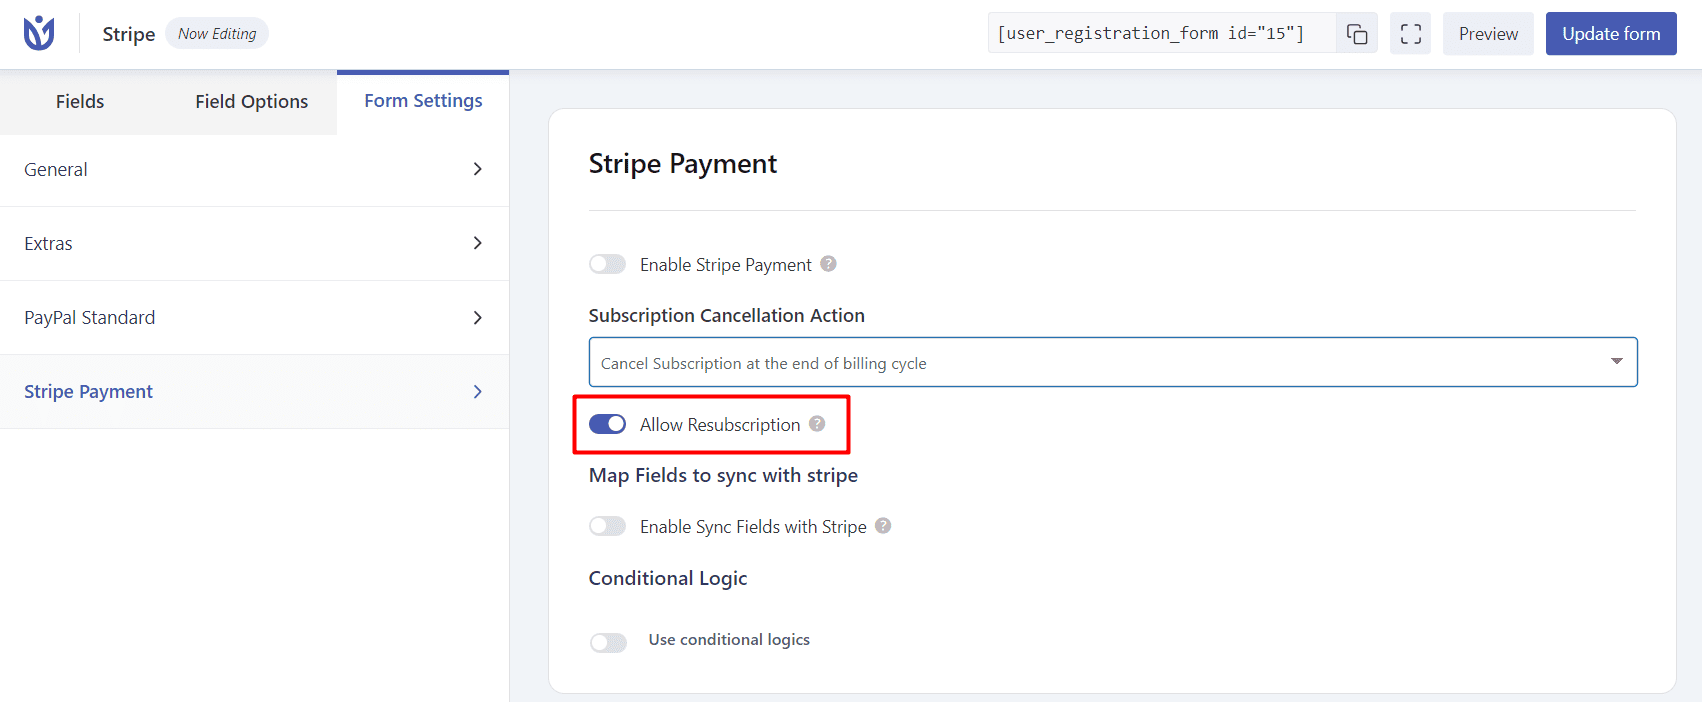
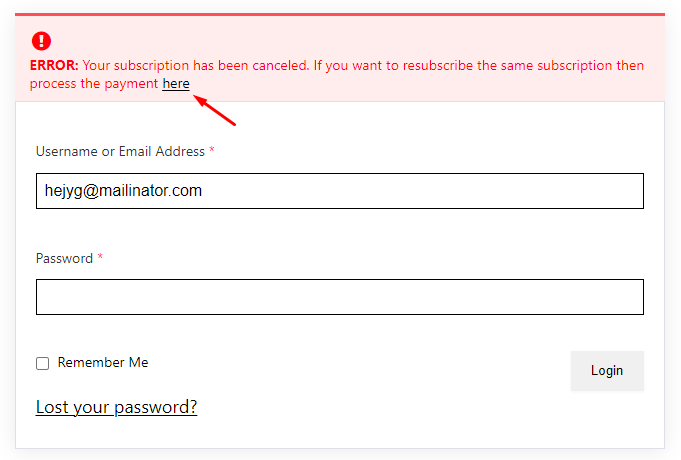
If you choose Payment Before Login as the login option for your registration form, you can allow users to resubscribe to the plan after the subscription has ended. For this, go to Form Builder > Form Settings > Stripe and enable ‘Allow Resubscription’. After this, you are ready to let the users resubscribe from the login form.
After clicking on the link, you will be asked to provide your credit card details.

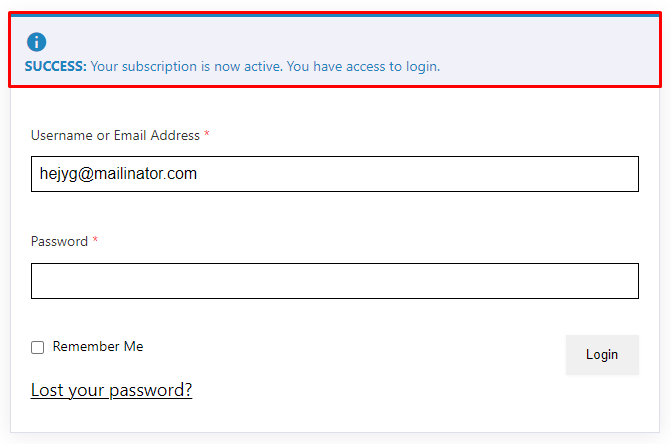
Add the details and click on Resubscribe. You have subscribed again.
Map Extra fields to sync with the Stripe Payment #
You can map the Stripe-supported fields of the User Registration when creating a subscription so that Stripe will get extra information about the users along with their email addresses. For mapping, the fields, go to the Forms Settings > Stripe Payment. Enable the recurring subscription and now you can enable the field mapping under ‘Map fields to sync with Stipe‘.
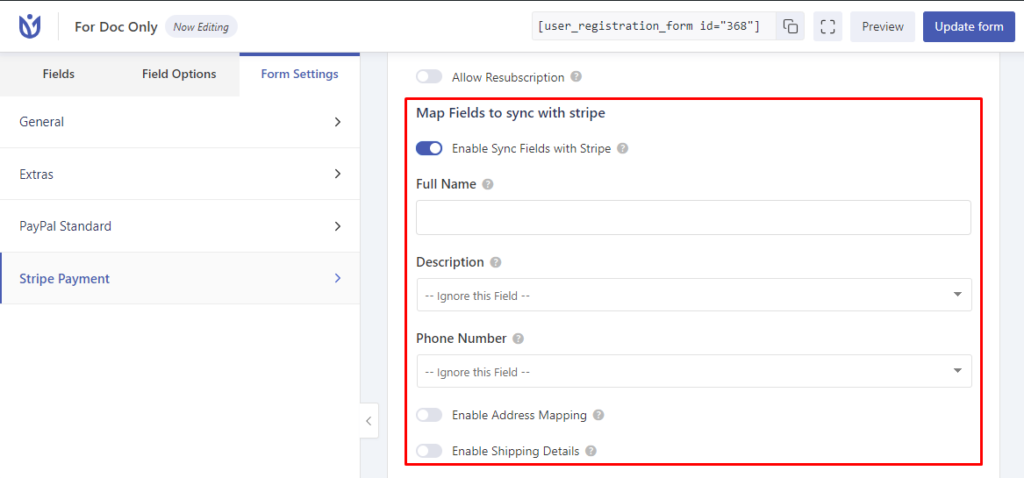
You can map the name field, description field, and phone number field. Along with these fields, you can also map the address of the user by checking the ‘Enable Address Mapping’ box. You will have to insert the Address-related fields like country etc in your form to do this.

Similarly, if you are using the WooCommerce along with the User Registration WooCommerce add-on, you can map the shipping details as well by checking on the ‘Enable Shipping Details‘ option.

Changing the Payment Details for the Users. #
If, as a user, you would like to change your credit card details at any time, you can go to the Payment Details tab from your account page(My Account page) and click on the ‘Change Payment’ button.

Now, add new credit card details and hit Update.

Download Invoice #
You can download the payment invoice from the Payment Details tab.

Compatibility with Conditional Logic: #
User Registration Pro allows you to enable conditional logic using the Conditional Logic addon. You can not only integrate conditional logic on each and every form field but also, on both payment options. This lets you set up a more responsive and situationally adaptive payment for your users.
How to allow users to choose between PayPal and Stripe payments? #
If you have both the Paypal standard and the Stripe addons, you can create options for your customers to choose between the two payment methods.
For this, insert a radio button field on your form. Then, add Paypal and Stripe as the two available options to choose from.
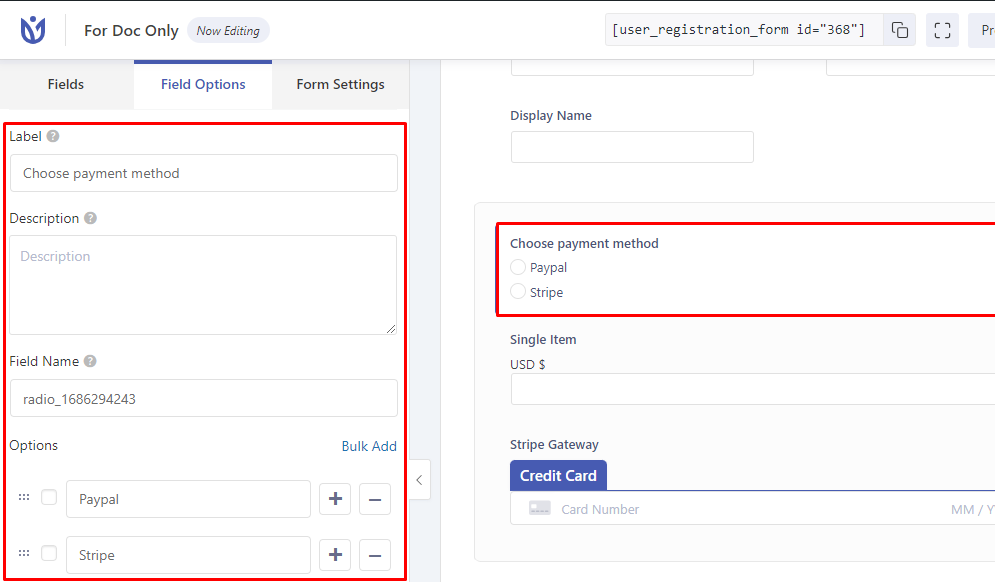
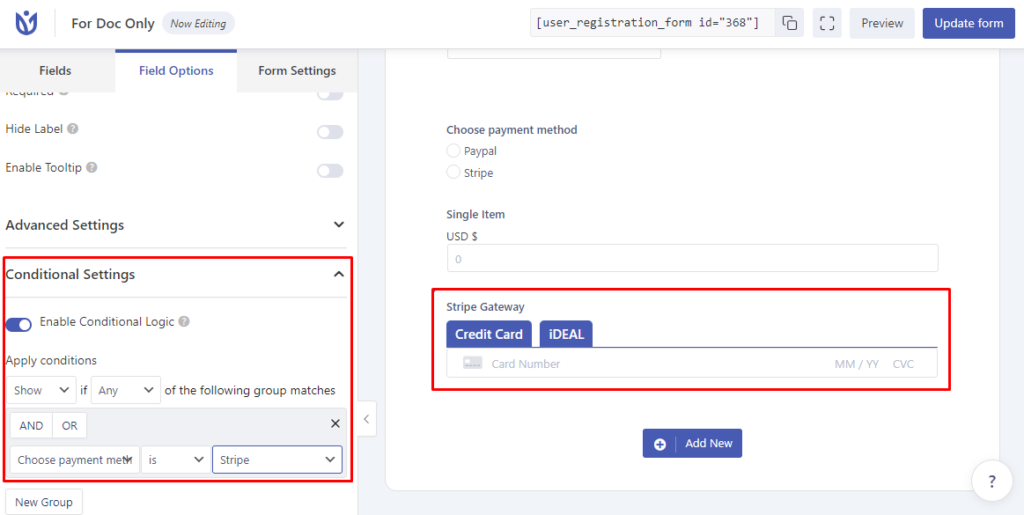
For the ‘Stripe Gateway’ field to be hidden, you will have to apply conditional logic to this field as shown in the figure below.
Now, follow the steps below.
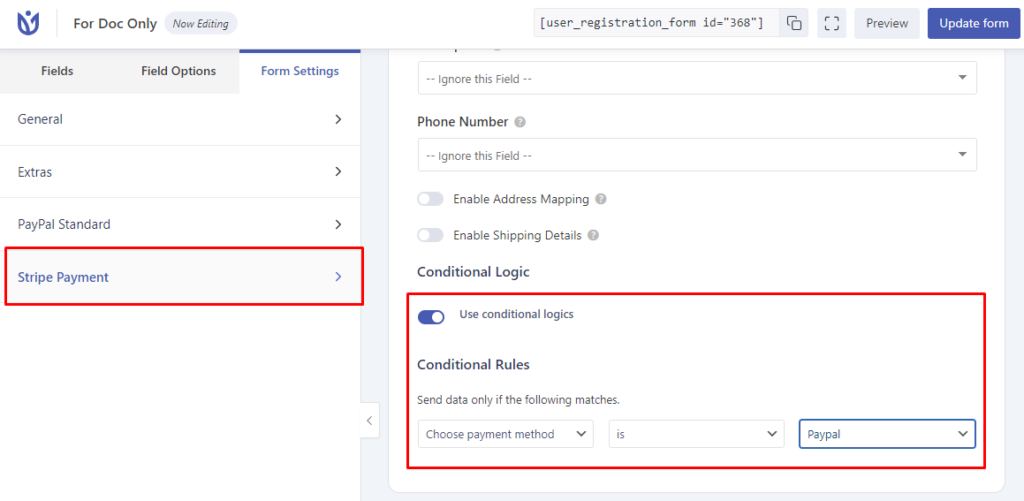
- Go to the form’s settings.
- Select PayPal Standard/Stripe Payment.
- Click on the ‘Use conditional logic’ option.
- Apply the condition as shown in the figures below
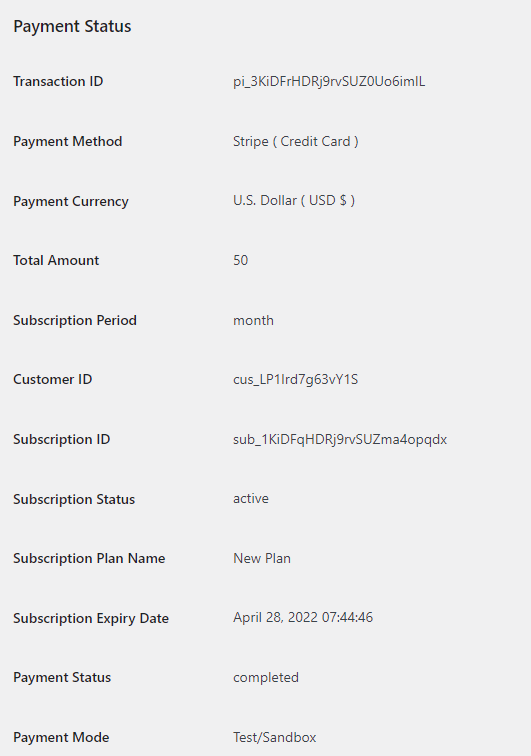
Detailed Payment Status #
As an admin, you can view the detailed payment status of the user from the following location.
User Registration > Users > View User