
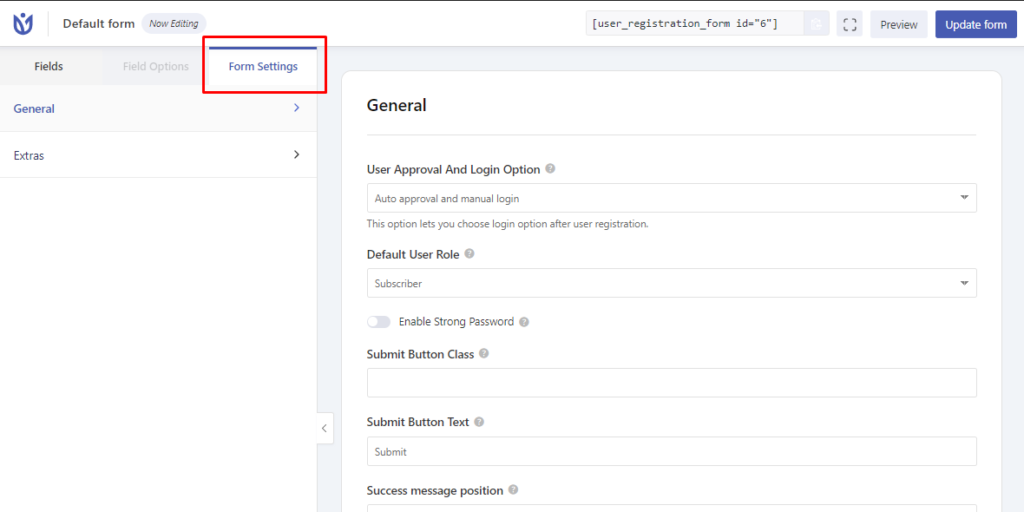
With form settings, you can apply the setting to individual forms.
Location: Form Editor > Form Setting
The Extras settings option is only for the User Registration Pro users. To learn about the Extras settings, please visit here.
- User Login Option: This option allows you to choose the login option for the user after registration. This setting is for the individual registration form.
- Default User Role: This option allows to define the role of the user.
- Enable Strong Password: This option allows you to enable a strong password.
- Minimum Password Strength: This option allows you the minimum password strength required to submit a form.
| Strength | Minimum one uppercase letter, a number, and must be 7 characters |
| Very Weak | Mininum one character |
| Weak | Minimum one uppercase and must be 4 characters |
| Medium | Minimum one uppercase letter, a number, a special character, and must be 9 characters |
| Strong | Minimum one uppercase letter, a number, a special character and must be 9 characters |
- Form Submit Button Label: This option allows you to set the label for the form submit button.
- Success Message Position: This option allows you to set the position of the success message i.e. either the top or the bottom of the form.
- Enable reCaptcha Support: This option allows you to enable reCaptcha in the registration form.
- Form Template: This option allows you to change the appearance of the registration form.
- Custom CSS Class: This option enables you to customize the CSS class.
- Enable Assign User Role Conditionally: This option allows you to assign the user roles for your site according to the conditional rules you set up. To learn how it works, you can check our documentation.
User Approval and Login Option: #
Location: Form Editor > Form Setting > General

Auto approval and manual login: When this option is selected, the user can register on the site and then has to manually log in using the User Registration My Account page or WordPress Core Login.
Auto approval and auto-login: When this option is selected, the user is automatically logged in to the site once they register.
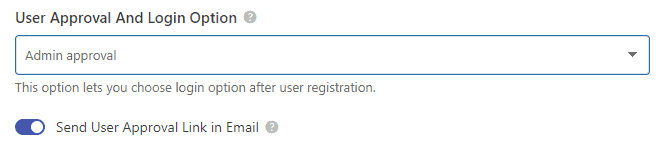
Admin Approval: Selecting this option will make the registration pending unless the site admin verifies and approves it. You can also select to send the user approval link on the admin email.
Auto approval after email confirmation: Selecting this option sends a confirmation email to the user and the user has to verify the registration by clicking on the link sent in the email.
Admin Approval after Email Confirmation[PRO]: When this option is selected, the user will have to verify the registration from the email sent to them and then the site admin will again verify and approve the registration.
Note: The 'Admin Approval after Email Confirmation' option is only available with User Registration Pro
Send User Approval Link in Email #
When you select ‘Admin approval’ as the user login option, you will be presented with an option to send a user approval link in the admin email. This sends a link from which the admin can directly approve the new user without the need to go to the user’s table from the dashboard.
The admin will receive the following email when this option is clicked.

Click on ‘Approve Now‘ to approve the newly registered user.
Customize User Approval Email content for Admin #
You can customize the content of the email sent to the admin with the user approval URL from User Registration > Settings > Emails

Here, you can find the content called ‘Admin Approval Request Email with Approval Link’. Click on the settings icon and customize the content as per your need.
Note: If you, as an admin, change the content of the admin email, you will have to add {{approval_link}} on the admin email content to send the approval URL on the email.
Also, you can use {{form_name}} and {{denail_link}}, which gives you the form name and the option to deny the users respectively.
Redirection Options After Registration #
Internal Page #

Select this option if you want the users to be redirected to pages on your site after they submit the registration form. You can select the page from the drop-down of the available pages.
External URL #

Select this option if you want to redirect the users to any external link after they submit the registration form. You can enter the URL in the ‘Redirect URL’ box.
Previous Page #
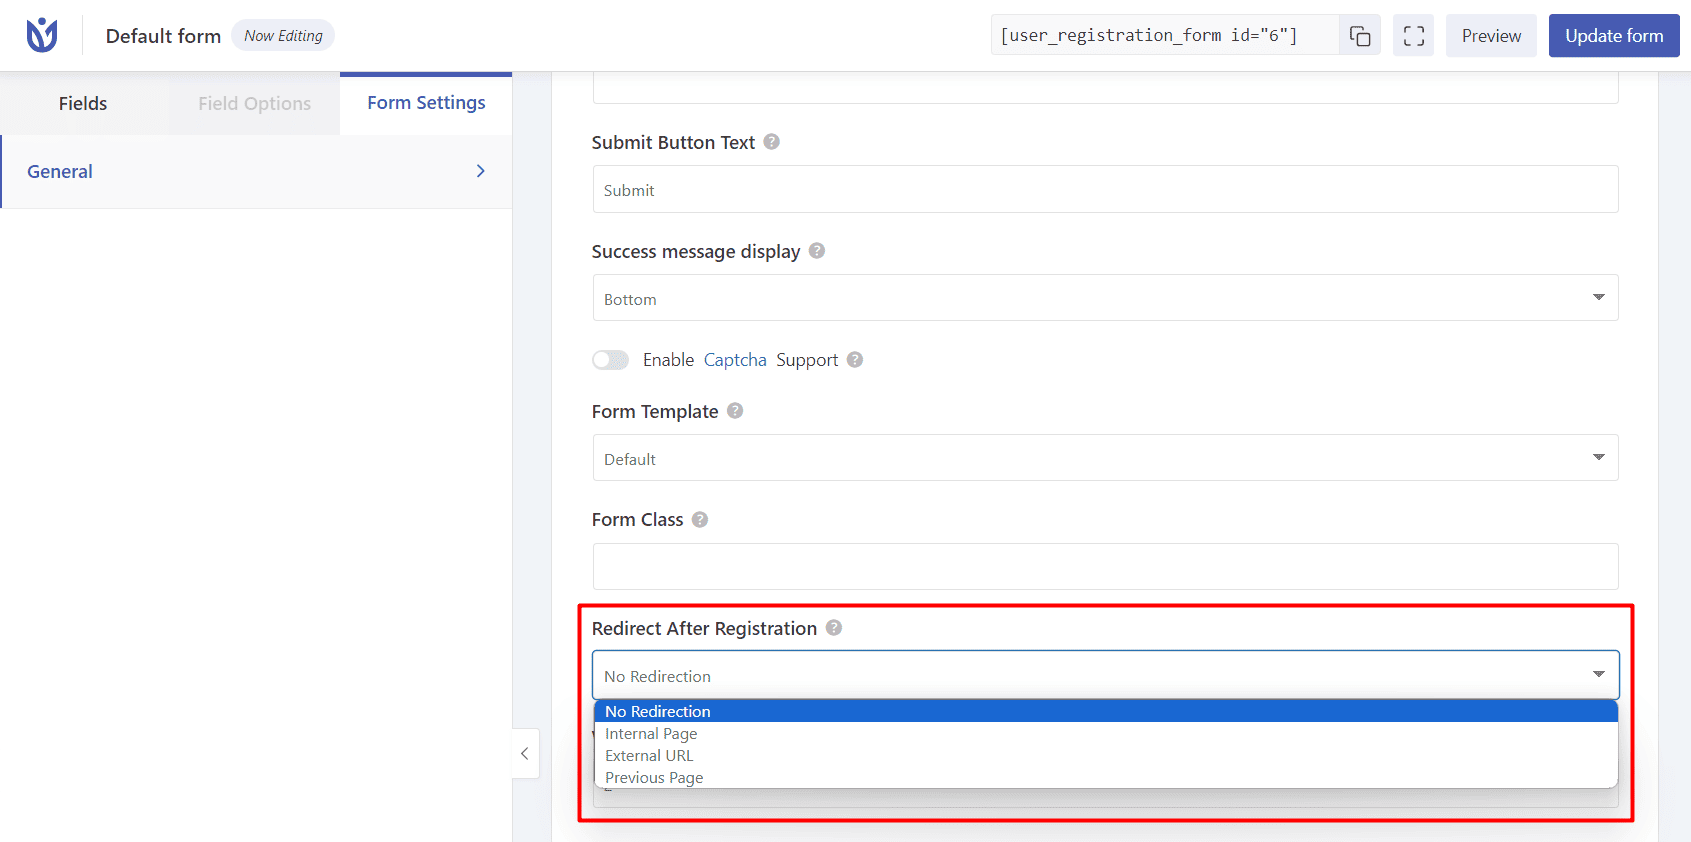
Choose this option if you want the users to be redirected back to the page from where they arrived at the registration form/page. For example, users clicked on Page A and then clicked on Page B(where the registration form is). They will now submit the form and then be redirected to Page A from where they arrived to the registration page.
Role Based Redirection[PRO] #
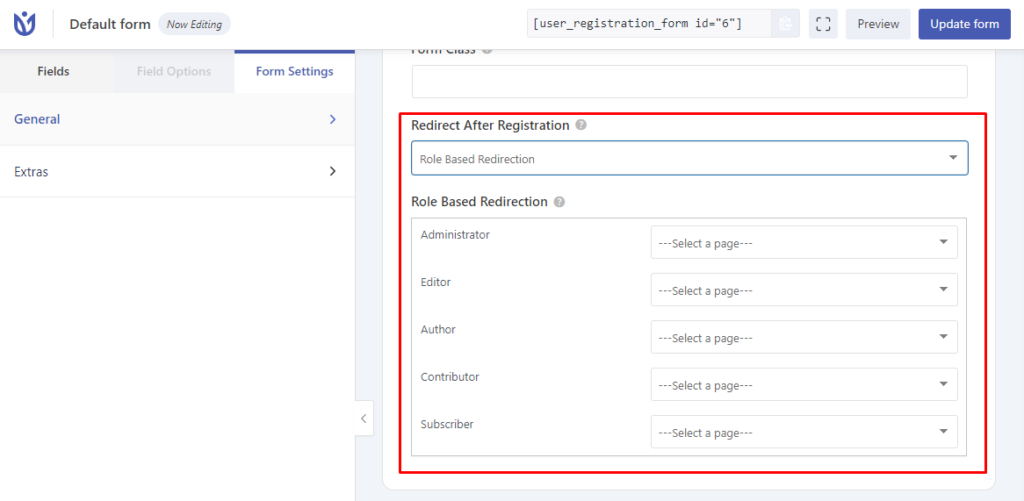
This feature allows users to be redirected to a specific page based on their roles. You can select the pages on the drop-down menu beside the roles.
Waiting Period Before Redirection #
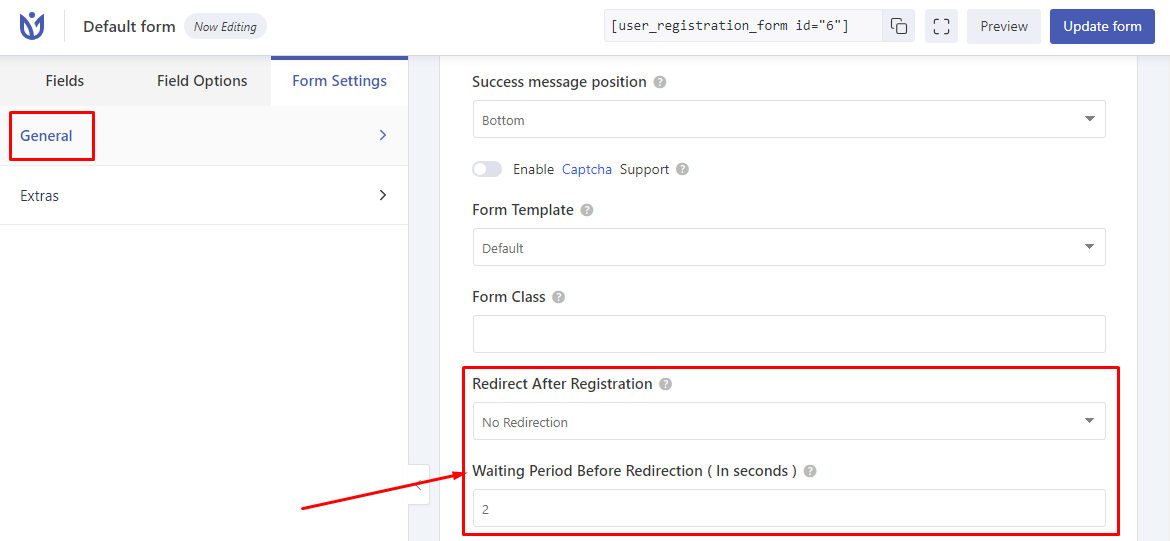
Set an amount(in seconds) and the form will wait for that time before it redirects to the allocated page.


