
Social Connect add-on to the User Registration plugin. #
Installation #
- First, purchase the User Registration – Social Connect add-on.
- After the process succeeds, you will get the add-on zip file under your WPEverest account page.
- Now, you can download the add-on zip file from there.
- After you log into your WordPress Dashboard, go to Plugins > Add New and click Upload Plugin button available there and choose the file you’ve downloaded and click Install Now button. Make sure to install the user-registration plugin too.
- This will install the add-on. Now, you’ve to activate the addon from the Install plugin list.
- Now you are ready to use this add-on for your site.
Setup and Configuration #
Social Connect API Settings #
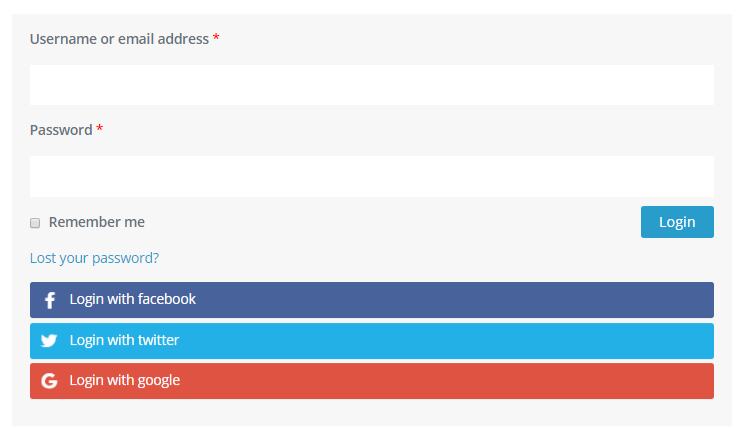
In this setting, we can use various social media credentials to login by tick marking the checkbox.
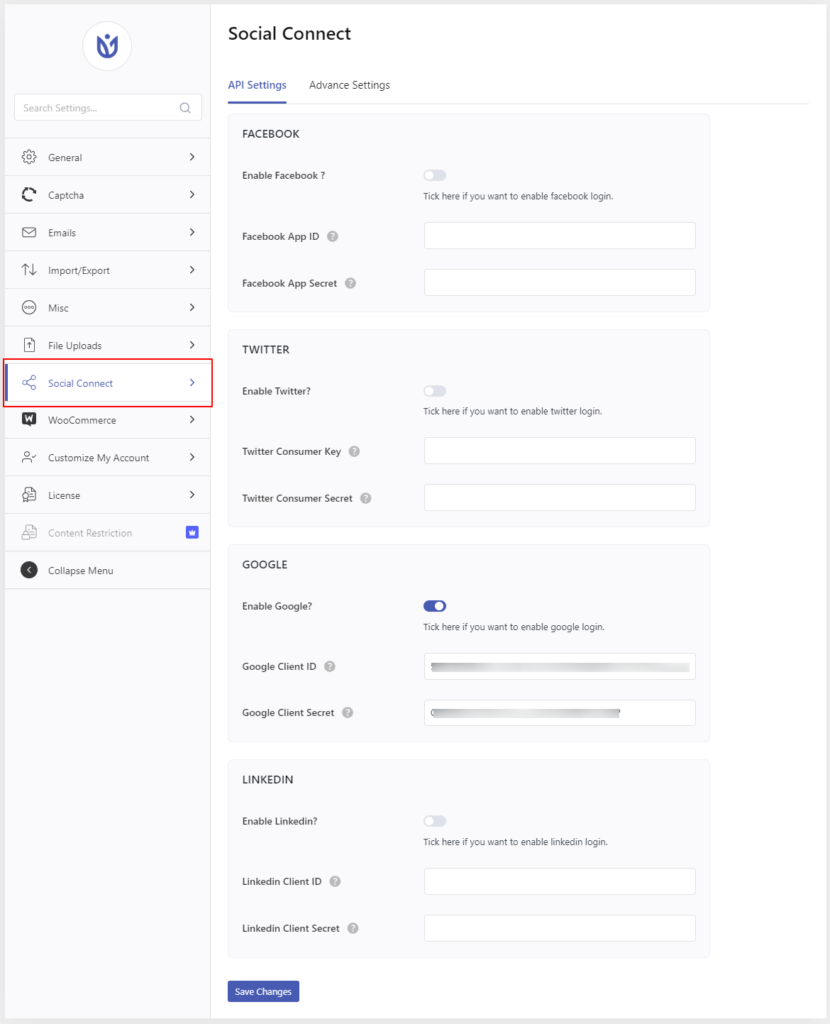
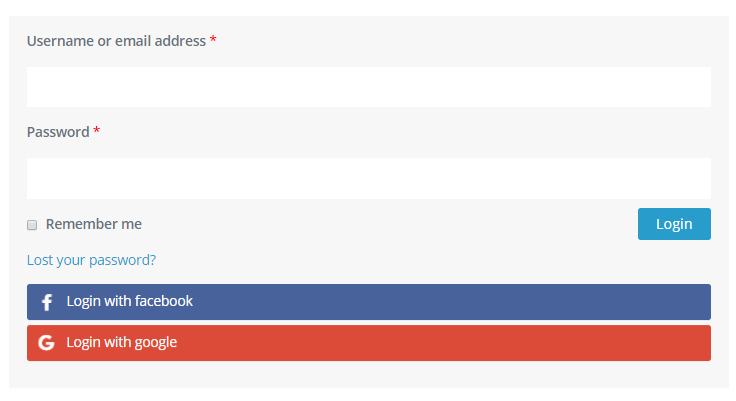
We can see the social login option using social media (whichever tick marked) in the login screen now.

Facebook: #
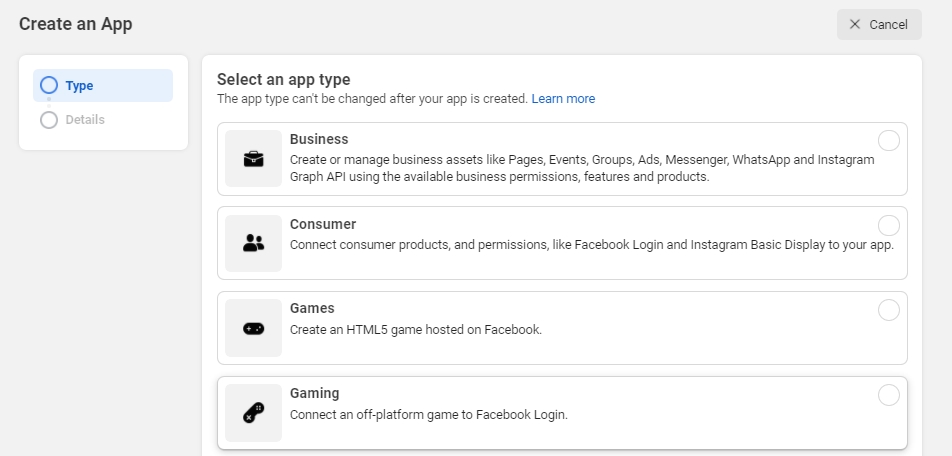
Get the Facebook App ID and Facebook App Secret from http://developers.facebook.com. Login to your Facebook account and click on Create App button:

Enter your display name and contact email and then click on the create app id button.
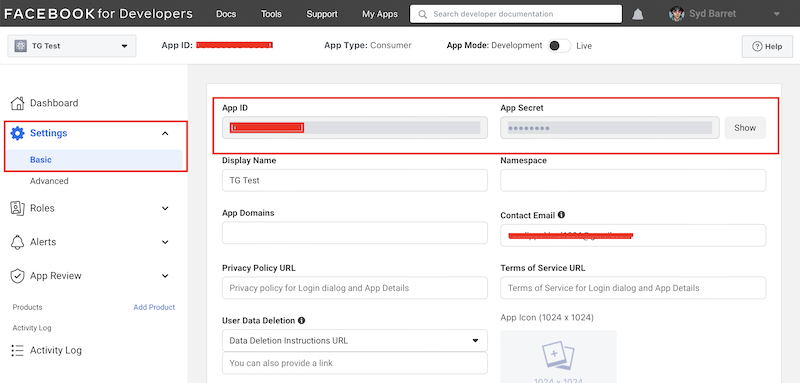
After creating an app id you are redirected to the dashboard, where you can get the app id. For viewing the app secret, go to Settings > Basic.
You also need to add the redirect URL (your callback page (at the redirect URL) when Facebook sends the user back). For this click on Add product and then, Facebook login setup.

Also, OAuth Redirect URIs should have the exact match.
More on this on the last section of this documentation or click here.

Insert the app id and app secret into our user-registration social connect settings tab.
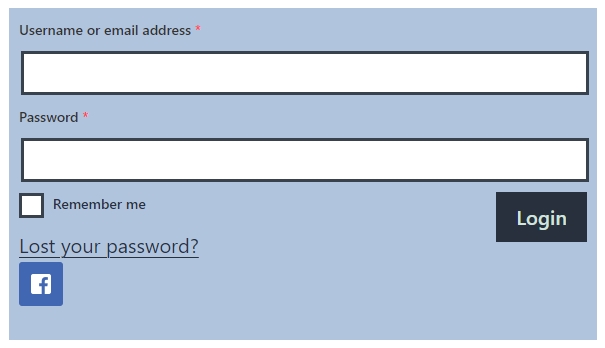
Now you should be able to login using your Facebook credentials.
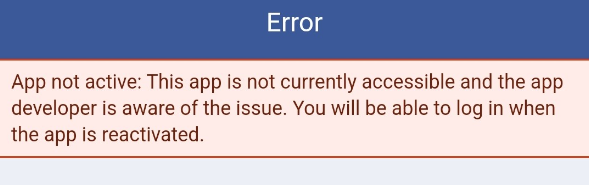
Facebook Login not working on Mobile Phones #
If you get the following error message while logging in using Facebook on your mobile devices, this suggests that the App you created on the Facebook Developer site isn’t live.
For this, follow the steps below.
- Go to Facebook for developers from here
- Choose My Apps from the top bar
- Click on your app icon ( then you will notice that your app is not live from the top bar )

- From the left side select Settings > Basic
- Put your privacy policy link in the Privacy Policy URL and in the User data deletion field, you can make a copy from this privacy policy ( select file from the top bar and select make a copy )
- Save changes
Google #
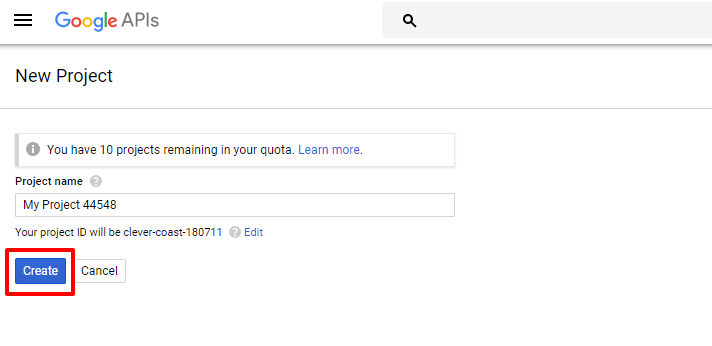
Similarly, go to console.developers.google.com to create a new project to get the app id and app secret key.
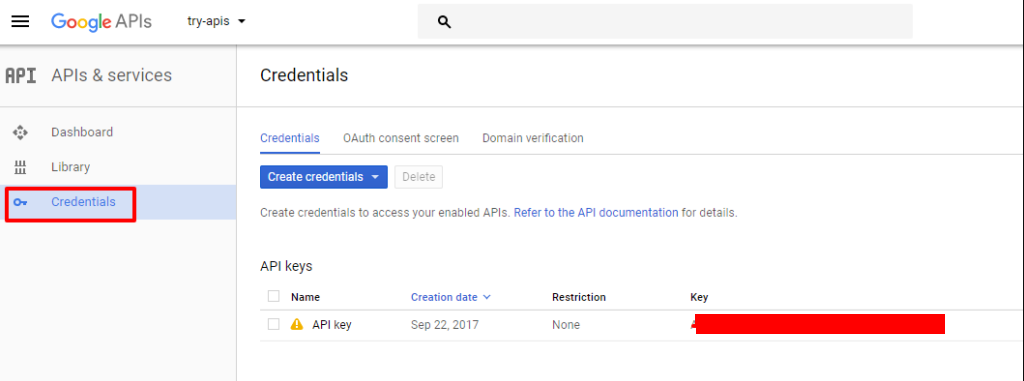
After creating a project you’ll be redirected to the dashboard, go to the credentials tab.
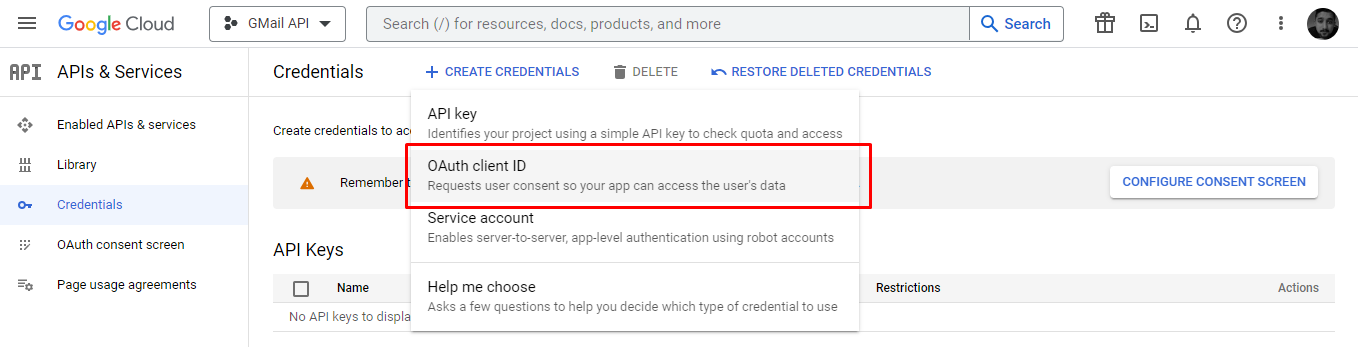
Go to create credentials dropdown shown above and then click on the OAuth client-key.
Now, select the Web application radio button, enter your redirect URL (your callback page (at the redirect URL) when Google sends the user back), and click on the create button.
Also, OAuth Redirect URIs should have the exact match.
More on this on the last section of this documentation or click here.

Now, you should get the app id and app secret:
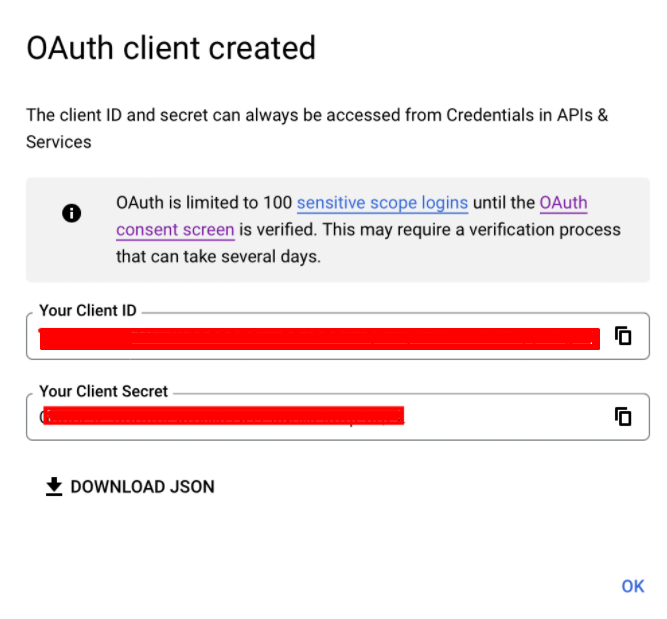
Insert the app id and app secret into our user-registration social connect settings tab.
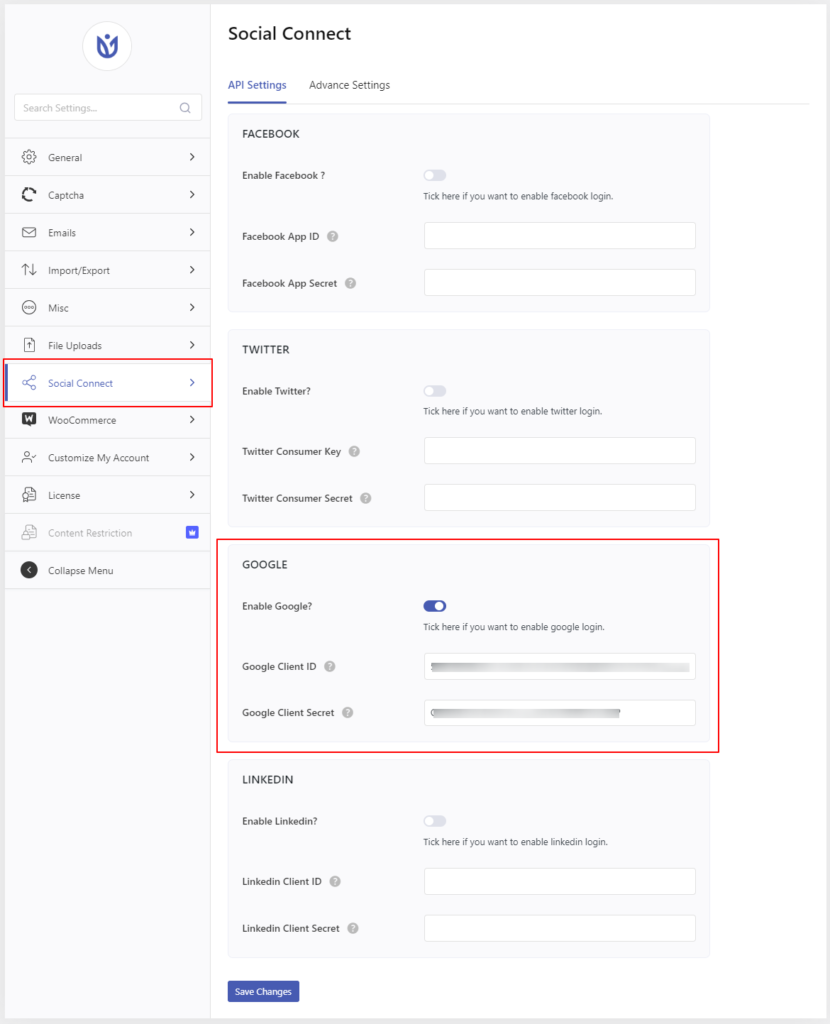
Now you should be able to login using your Google credentials.
Twitter #
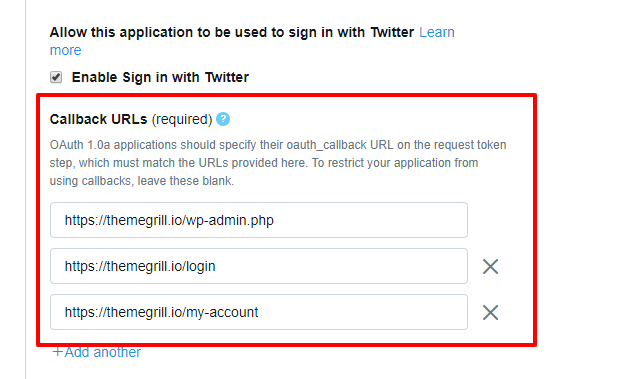
Go to https://apps.twitter.com/ to create a new app.

Then, enter your app details and submit the form, Callback URL is your callback page (at the redirect URL) when Twitter sends the user back:
Do not add query strings to your callback URLs in your Twitter app’s configuration
Twitter will allow you to pass any standard query strings along with your callback URL in your OAuth/request_token request. Therefore, twitter does not allow you to add query strings to the end of the callback URL that you list in the Twitter apps dashboard.
Example:
- You want to use https://yourdomain.com?source=twitter as your callback URL
- Add this to the Twitter app dashboard: https://yourdomain.com
For further information: https://developer.twitter.com/en/docs/basics/developer-portal/guides/callback-urls.html
After creating an app, you will be redirected to the dashboard, go to the Keys and Access Tokens tab to get the consumer key and consumer secret.
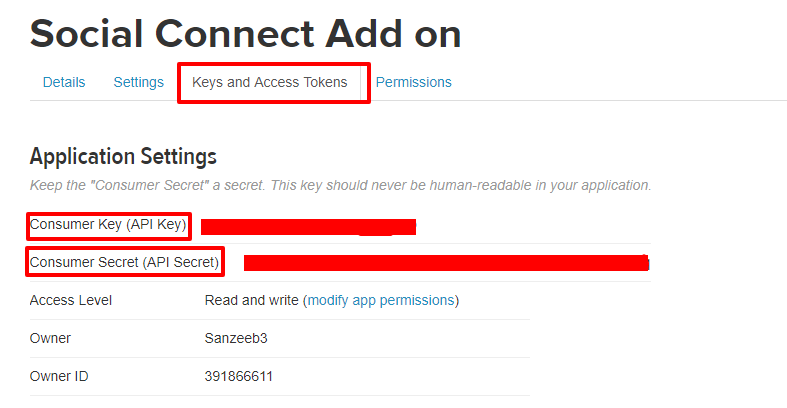
Insert the app id and app secret into our user-registration social connect settings tab.
Now you should be able to log in using your Twitter credentials.
LinkedIn #
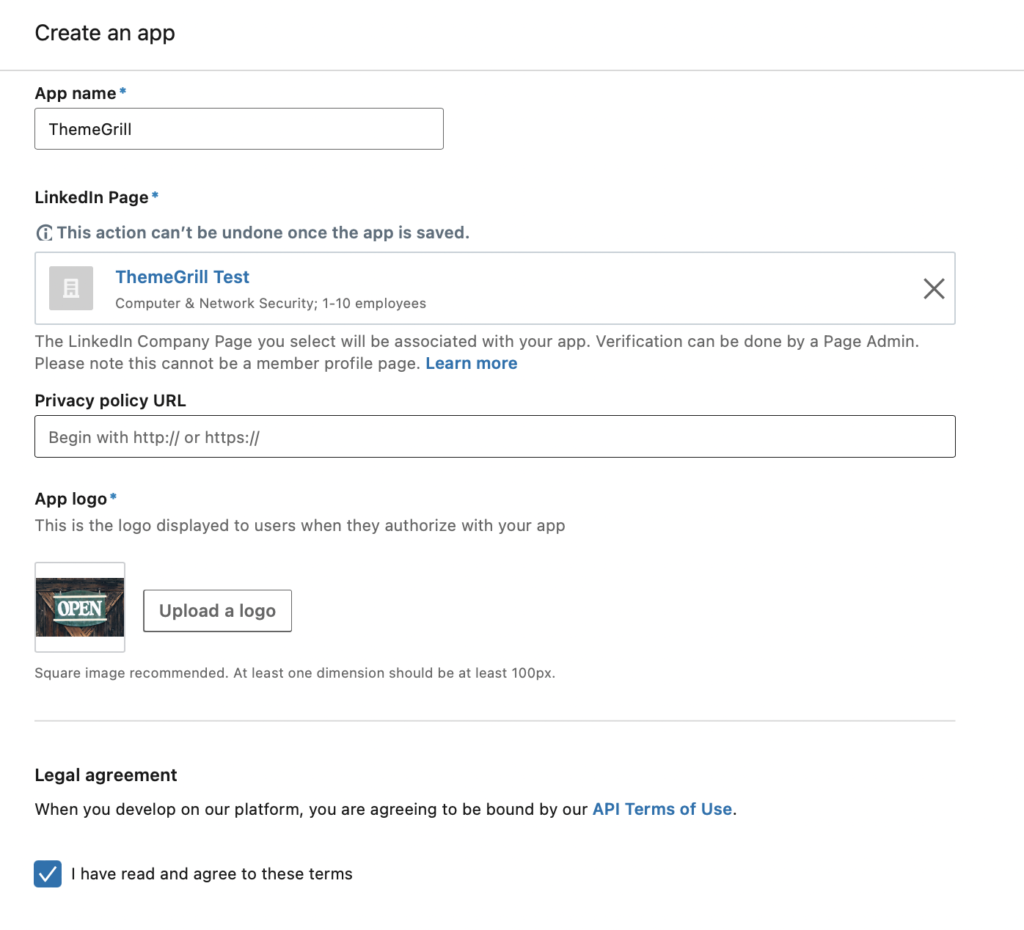
Go to the LinkedIn developers page https://www.linkedin.com/developer/apps and then to My Apps tab to create a new application.

Enter the details of your app and submit the form:
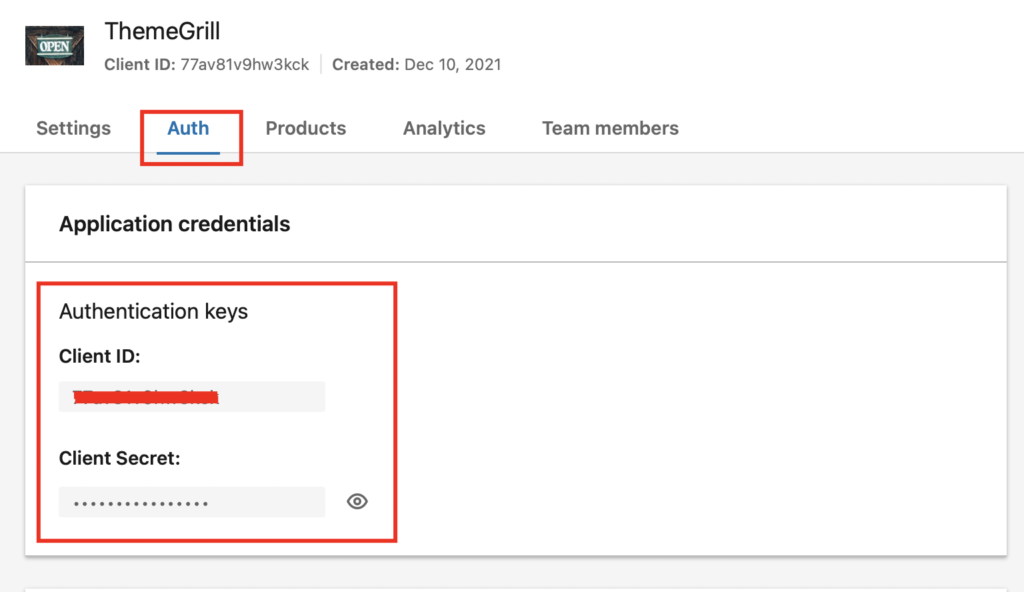
After submitting the form, you will be redirected to the settings page of your app. Now, go to the ‘Auth’ tab to find your authentication keys.
Also, enter the fully qualified URLs to define valid OAuth 2.0 callback paths in the OAuth 2.0 settings in the Auth tab.
OAuth Redirect URIs should have the exact match.
More on this on the last section of this documentation or click here.
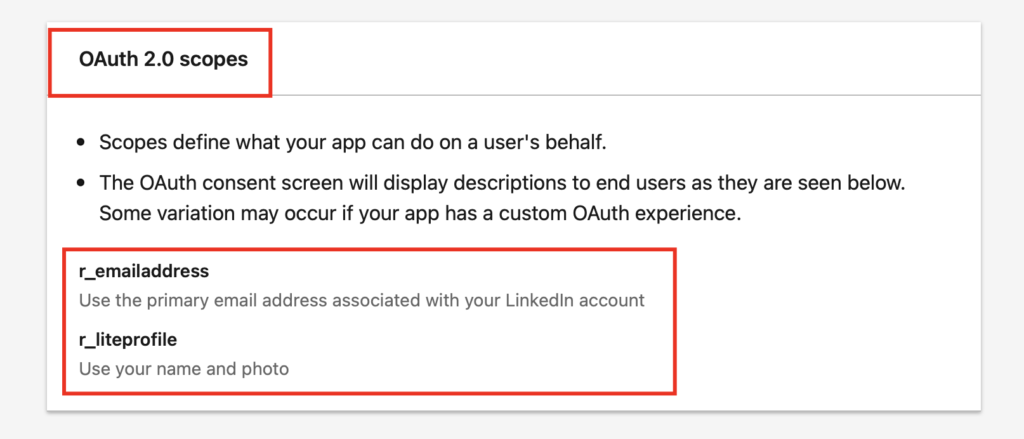
Now, you will have to add permissions in order to use the LinkedIn login on your website. For this, go to the Products tab and add ‘Sign With LinkedIn’.

When you add the ‘Sign In with LinkedIn’, you will be able to see the permissions in the OAuth Scope section in the Auth Tab.
Insert the app id and app secret into our user-registration social connect settings tab.
Now you should be able to log in using LinkedIn credentials.
that’s all for social connect API settings.
Social Connect Advanced Settings #
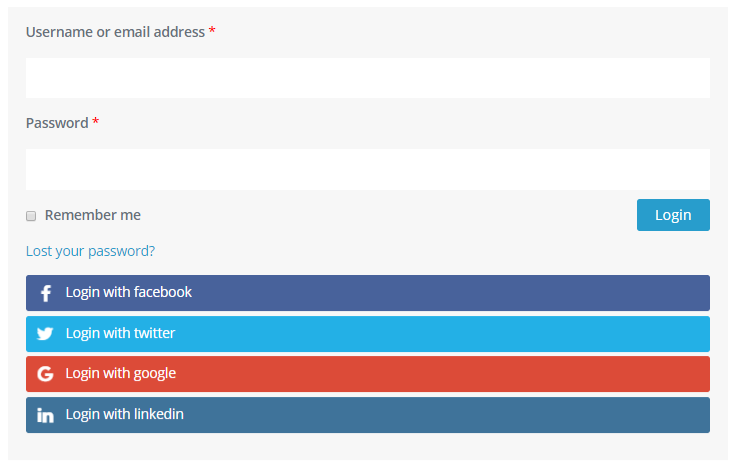
After activating the add-on, you’ll see an extra Social Connect tab inside the User Registration’s setting section. To get started using social connect, you need to go to Advance Setting and check the box which says “Enable social registration ?” and also you can check the option “Display social buttons in registration ?” to display the social buttons on your registration form.
Enable Social Registration: Tick the checkmark if you want to enable social registration.
Display social buttons in registration: Tick here if you want to display social buttons in the registration.
Default User Role: This option lets you choose the user role for social registration.
Connect socially connected users with form: Choose the registration form from the dropdown to connect with the socially connected users. It will provide the additional form field from your registration form to socially connected users.
In order to allow users to edit their profile details and add more information, you will have to connect these users to the registration form created with the User Registration plugin.
Social Login Templates: Select a template for social login.
Social text: Text that appears on the social icon login page.
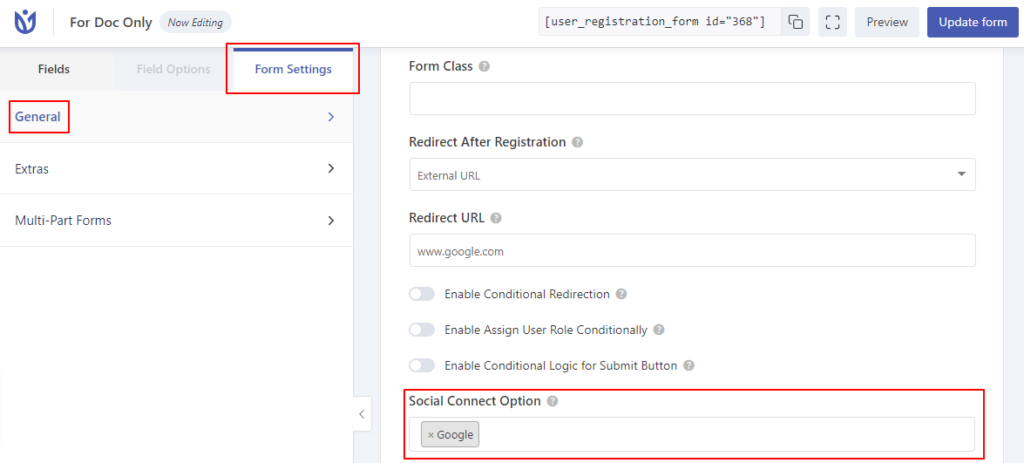
Social Login Button on Individual Form #
Now, the User Registration’s Social Connect addon provides you the flexibility to add a custom social connect button on individual forms.
To do so, please go to the individual form setting. Scroll down and there you will find the setting called”Social Connect option” to select the social button on the specific form.
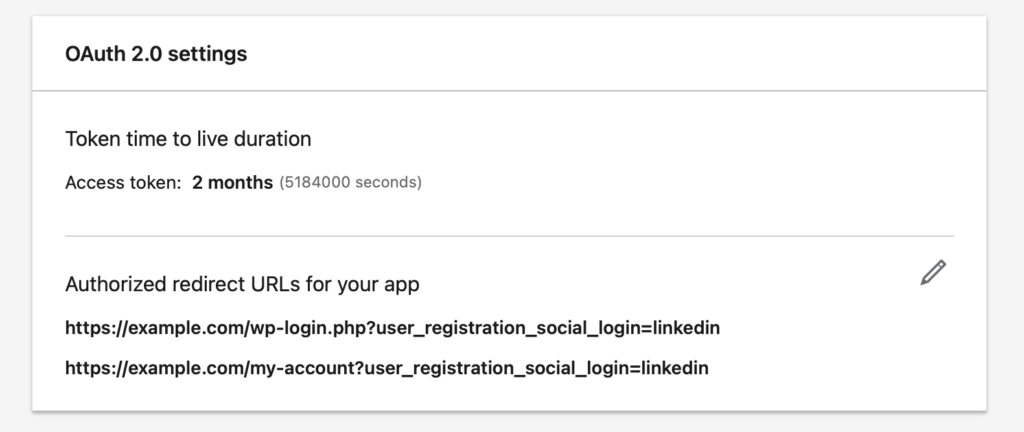
Redirect URLs: #
Make sure you have the https://example.com/wp-login.php/?user_registration_social_login=facebook like, redirect URLs.
Or, if you are using Social Connect with the default registration login page or my-account page, make sure to add https://example.com/login/?user_registration_social_login=facebook or https://example.com/my-account/?user_registration_social_login=facebook where login and my-account are page slugs created with user registration shortcode [user_registration_login] and [user_registration_my_account] respectively.
Note: the above URLs are for Facebook. You can replace the word 'Facebook' in the above URLs with Google, or LinkedIn for the respective social networks.


