- WooCommerce Add-on
- Installation
- Setup and Configuration
- My Accounts Page Conflict
- How to Integrate User Registration Fields in Account Details of WooCommerce My Account Page?
- How to Replace the WooCommerce Login and Registration form?
- How to Integrate User Registration Form in WooCommerce Checkout Page?
- How to integrate User Registration form fields on WooCommerce Single Product Page?
WooCommerce Add-on #
The WooCommerce add-on allows you to integrate WooCommerce fields to your registration forms and lets users view their WooCommerce data in the Account profile. Also, it allows you to integrate the User Registration plugin’s form fields to your WooCommerce Checkout and My Account page.
To implement the add-on on your WordPress site, follow the following steps:
- Installation of WooCommerce Add-on
- Set up and Configuration in User Registration plugin’s Account Page
- Show User Registration Fields in WooCommerce Account Details
- Replace WooCommerce Login and Registration form
- Integrate User Registration Form in WooCommerce Checkout Page
Installation #
- First, purchase the User Registration – WooCommerce add-on.
- After the process succeeds, you will get the add-on zip file under your WPEverest account page.
- Now, you can download the add-on zip file from there.
- After you log into your WordPress Dashboard, go to Plugins > Add New and click Upload Plugin button available there and choose the file you’ve downloaded and click Install Now button. Make sure to install the User-Registration and WooCommerce plugins too.
- This will install the add-on. Now, you’ve to activate the addon from the installed plugin list.
- Now you are ready to use this add-on for your site.
Setup and Configuration #
After activating the add-on, you’ll see extra WooCommerce tabs inside my account setting section such as Orders, Downloads and addresses.
If you don’t know how to display the Accounts Page yet then, please read our documentation.
My account tabs description #
- Dashboard: From your account dashboard you can manage your profile details and edit your password and account details.
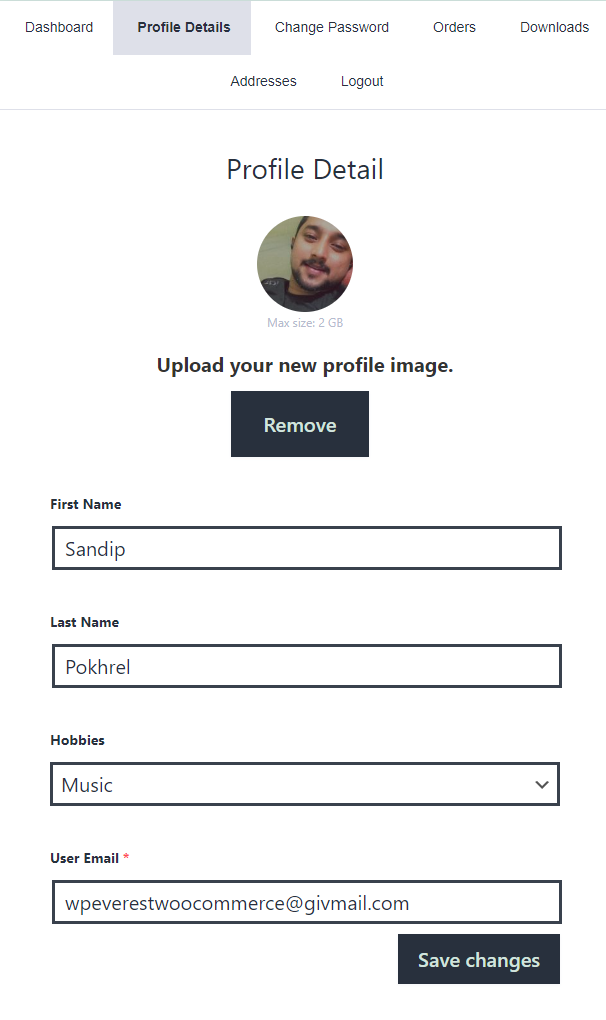
- Profile Details: This tab shows basic user information and additional details. You can also save your profile information.
- Change Password: This tab allows you to change the password.
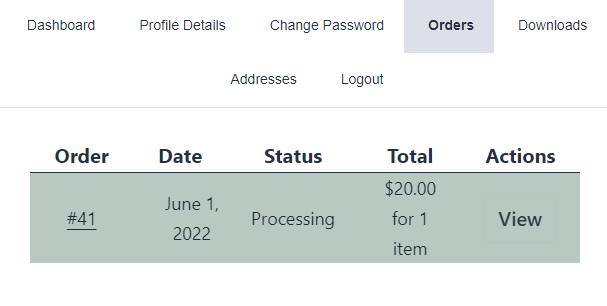
- Orders: This tab shows the WooCommerce product orders ordered by logged in user.
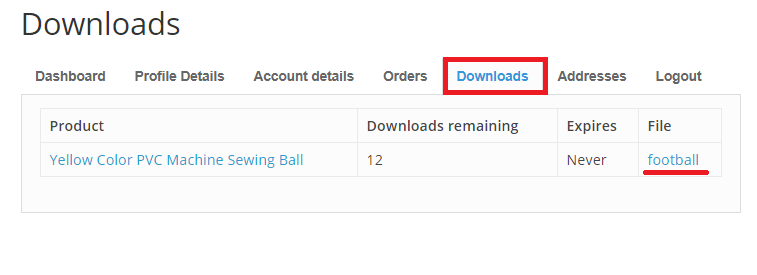
- Downloads: You can download the downloadable products under this section. Clicking in the file downloads the file.
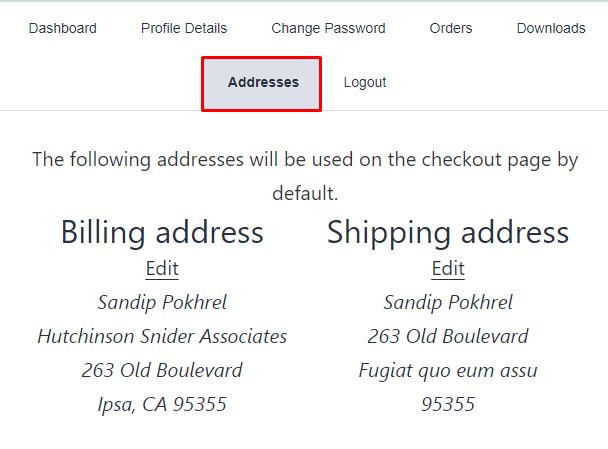
- Address: This tab shows the billing address (Valid address to receive the bill) and shipping address (Valid address you would like the products to deliver to). The shipping and billing addresses can be edited by clicking on the edit button.
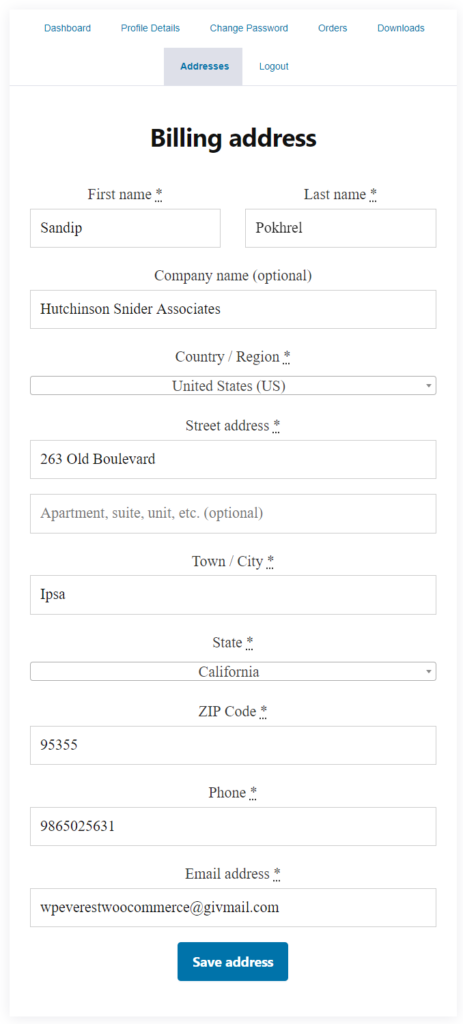
After clicking on the Edit link, you will be shown an edit form. And click on the Save Address button to update your address.
Editing billing address:
Editing Shipping Address:

- Logout: With this tab, you can log out of your account.
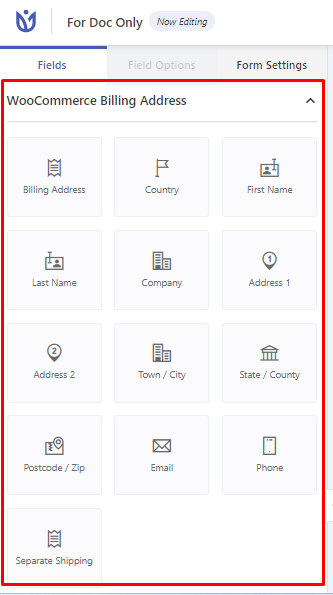
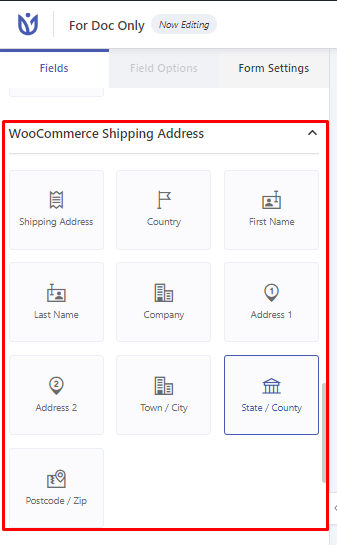
With this add-on, you can now add WooCommerce Billing and Shipping addresses to your registration form.
If you want a detailed guide on this, check our How to create an extended WooCommerce Registration Form tutorial.
If you want a detailed guide on this, check our How to create an extended WooCommerce Registration Form tutorial.
My Accounts Page Conflict #
If you choose the User Registration My Account Page as the main account page for your WooCommerce site, there can be a conflict. The Orders tab shows an error like this.

This conflict occurs because there are two account pages: WooCommerce My Account Page and User Registration My Account Page.
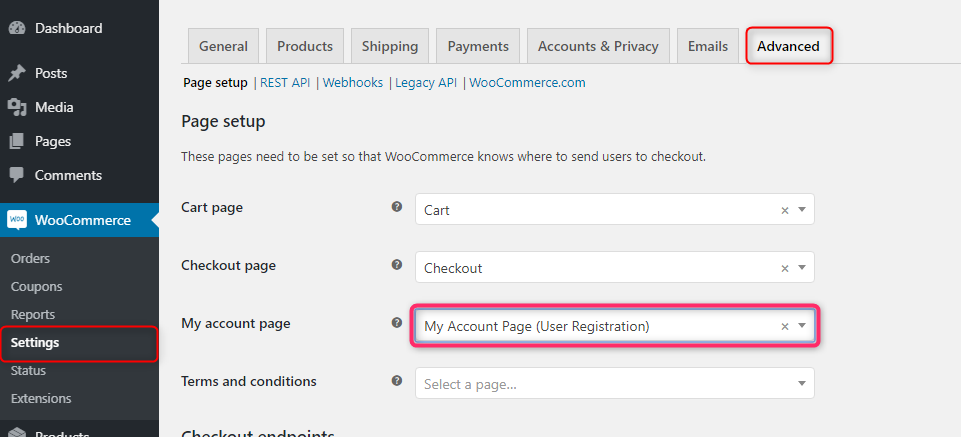
And to prevent this conflict, you need to make changes in WooCommerce settings. For this, go to WooCommerce ->Settings and click on the Advanced tab.
Here, you need to choose the User Registration Account Page on the My account page settings. After that, don’t forget to Save Changes.
Now, the conflict is resolved and the User Registration Account Page tabs work well.

How to Integrate User Registration Fields in Account Details of WooCommerce My Account Page? #
Moreover, you can integrate the User Registration Form into the WooCommerce Account Page. Doing this will add User Registration form fields that are not available in the WooCommerce registration form to the Account details tab.
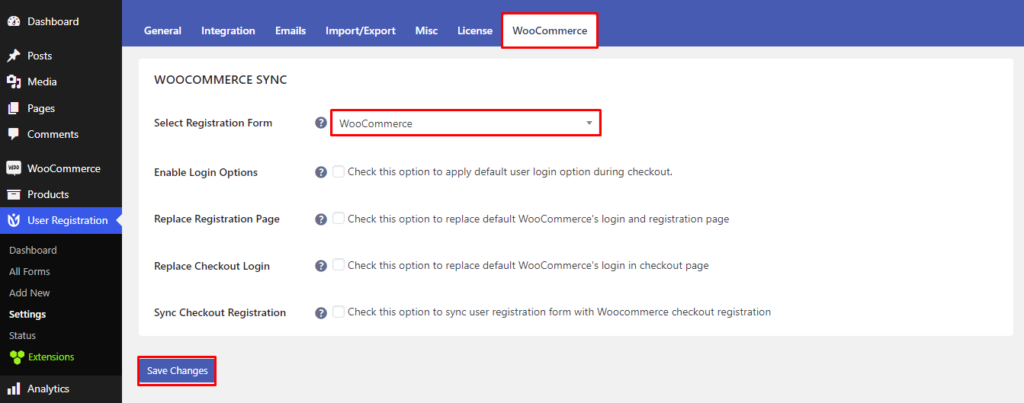
For this, go to User Registration→Settings and click on the WooCommerce tab. Then, Select the Registration Form that you require and Save Changes.
Now, you’ll be able to see the User Registration field on the Account Details tab of the WooCommerce My Account Page.

How to Replace the WooCommerce Login and Registration form? #
Also, you can replace your WooCommerce Registration Form with the User Registration Form. And, you can allow users to register on the Accounts Page. Just follow the instructions below:
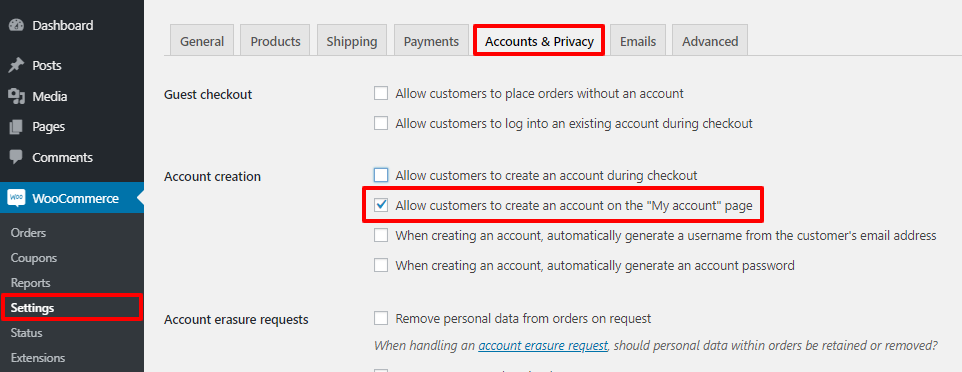
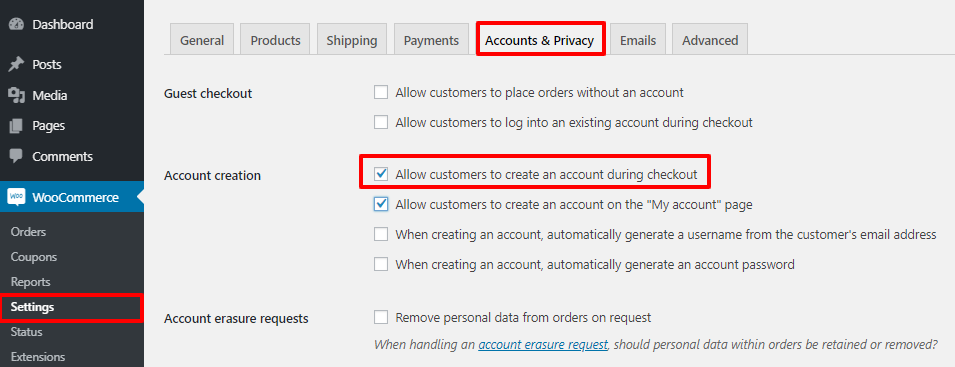
First, you need to fix the settings in WooCommerce. So, Go to WooCommerce → Settings and click on the Accounts and Privacy tab.
Then, Go to the Account Creation section and check the Allow customers to create an account on the “My Account” page option.
After that, go to User Registration → Settings and click on the WooCommerce tab.
Now, select the registration form that you want to integrate. And, Check the option to replace default WooCommerce’s login and registration page option. Don’t forget to Save Changes.

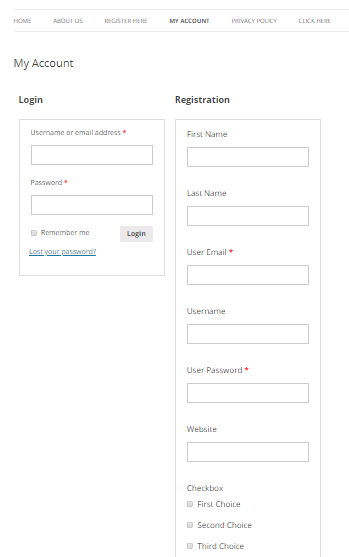
Now, the User Registration Login Form and Registration Form are shown.
How to Integrate User Registration Form in WooCommerce Checkout Page? #
Similarly, you can also include your registration form in your WooCommerce Checkout Page.
So, go to WooCommerce → Settings and click on the Accounts and Privacy tab. Then, on the Account Creation section, check the Allow customers to create an account during the checkout option.
Next, go to User Registration → Settings and click on the WooCommerce tab. Then, check the option to sync the user registration form with the Woocommerce checkout registration option.
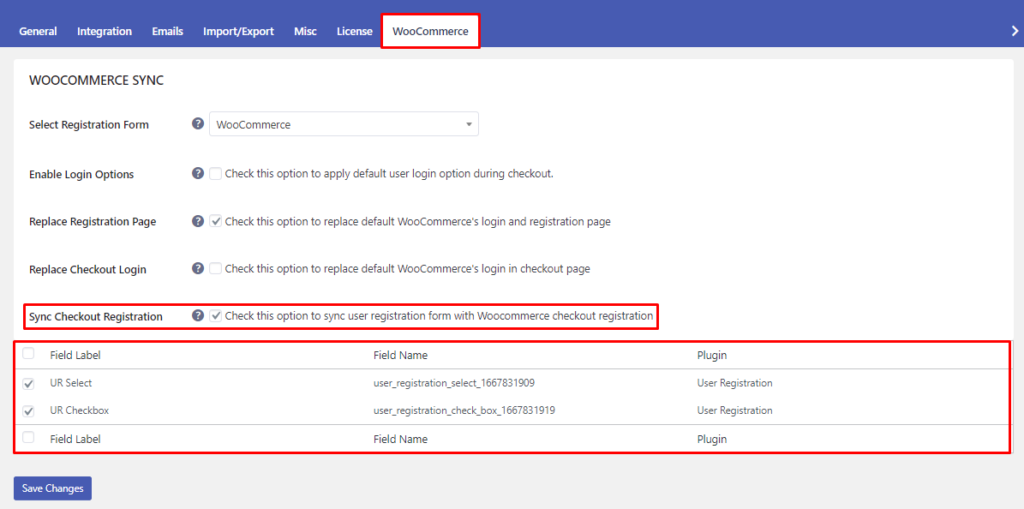
This option shows the extra fields from your user registration form that do not exist in the WooCommerce registration form.
Here, you can choose which extra fields you want to show in the WooCommerce checkout field.

Enable Login Options #

Enable this option to use the login option set in the form(that is selected in the first option) to be used in the checkout registration form.
Wanna know more about the available login option?
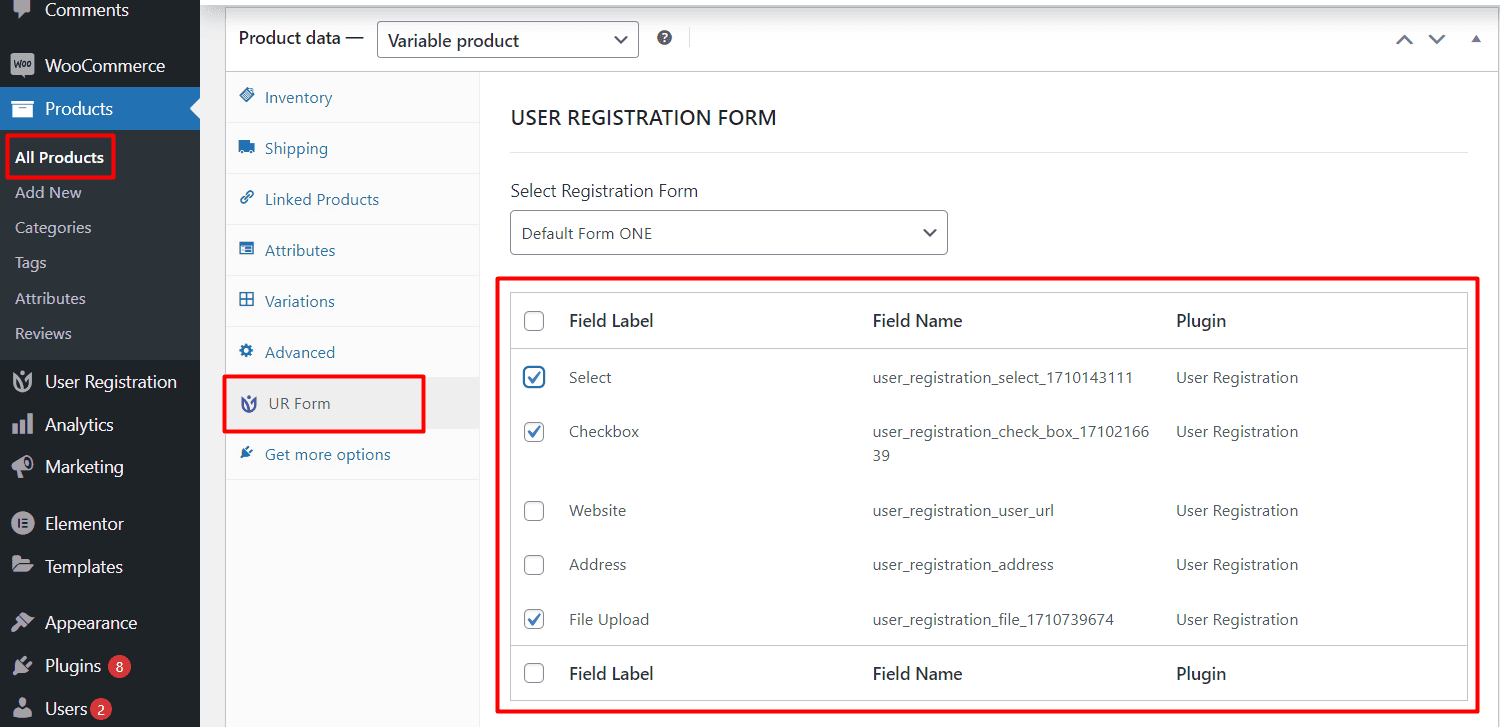
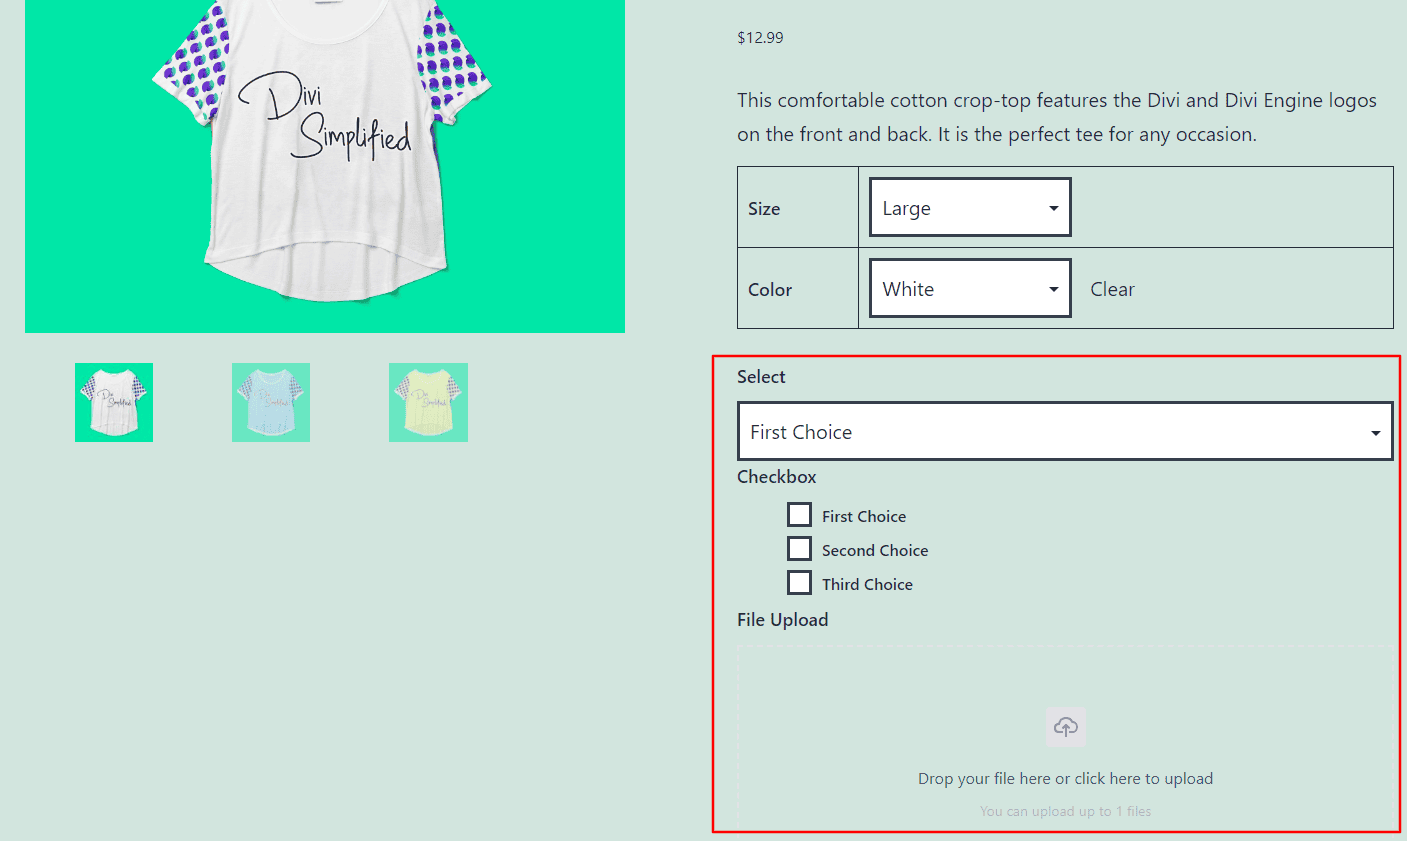
How to integrate User Registration form fields on WooCommerce Single Product Page? #
If you want to show custom fields the User Registration plugin provides on the product page, you can go to Products > Select a Product to Edit. Go to the Product Data meta box. Here, you will find a tab called ‘UR Form‘. You can map a form from this tab and select the desired fields.